---
title: React Native file upload with Supabase Storage
description: Learn how to implement authentication and file upload in a React Native app.
author: simon_grimm
date: '2023-08-01'
tags:
- react-native
- storage
categories:
- developers
---
If you want to upload files from your React Native app, you need a backend to store the files, [Supabase Storage](https://supabase.com/docs/guides/storage) is a great choice for this as it provides a simple API to upload files, and we can easily combine this with authentication to build a powerful app.
This means you can quickly build your own image-sharing app, a file-sharing app, or any other app that needs to upload files to a backend!
In this tutorial, you will learn to:
- Set up a React Native app with [Expo SDK49](https://expo.dev/)
- Use [Supabase Authentication](https://supabase.com/docs/guides/auth)
- Work with Expo Router v2 and protected routes
- Upload files to [Supabase Storage](https://supabase.com/docs/guides/storage)
You can also directly check out the [full source code on GitHub](https://github.com/saimon24/react-native-resumable-upload-supabase) so you can get started with Supabase fast!
Before we get into the app, let's quickly [start a new Supabase project](https://supabase.com/dashboard).
## Creating the Supabase Project
To use authentication and storage we need a new Supabase project. If you don't have a Supabase account yet, you can [get started for free](https://supabase.com/dashboard)!
In your dashboard, click "New Project" and leave it to the default settings, but make sure you keep a copy of your Database password!

After a minute your project should be ready, and we can configure the authentication and storage.
## Setting up Authentication
Authentication will be enabled by default, but we want to turn off email confirmation for this tutorial.
Select **Authentication** from the menu, go to the **Providers** section, and expand Email.

Here you can disable the confirmation email, and apply other changes later if you want to!
## Setting up Storage
Now we want to create a **bucket** under storage where we will upload our files, and also add some security rules to protect the files of a user.
First, select **Storage** from the menu, then click **New bucket** and call it `files`.

Make sure that this is not a public bucket, otherwise, even unauthenticated users can upload or read the files!
To protect that bucket and allow users only access to their own folder, we need to add some [Storage policies](https://supabase.com/docs/guides/storage/security/access-control).
You can either do this through the UI and pick from examples, or simply run my SQL script in the **SQL Editor** which you can select from the menu:
```sql
CREATE POLICY "Enable storage access for users based on user_id" ON "storage"."objects"
AS PERMISSIVE FOR ALL
TO public
USING (bucket_id = 'files' AND (SELECT auth.uid()::text )= (storage.foldername(name))[1])
WITH CHECK (bucket_id = 'files' AND (SELECT auth.uid()::text) = (storage.foldername(name))[1])
```
This will allow users to only access their own folder, and not any other files in the bucket.
## Setting up the React Native app
Now that we have our Supabase project ready, we can start building the React Native app!
Get started by setting up a new Expo app with the tabs template and install some dependencies:
```sh
# Create a new Expo app
npx create-expo-app@latest cloudApp --template tabs@49
# Install dependencies
npm i @supabase/supabase-js
npm i react-native-url-polyfill base64-arraybuffer react-native-loading-spinner-overlay @react-native-async-storage/async-storage
# Install Expo packages
npx expo install expo-image-picker
npx expo install expo-file-system
```
We will use the [Expo AsyncStorage](https://docs.expo.dev/versions/latest/sdk/async-storage/) to store the Supabase session, and the [Expo Image Picker](https://docs.expo.dev/versions/latest/sdk/imagepicker/) to select images from the device. We also need the [Expo File System](https://docs.expo.dev/versions/latest/sdk/filesystem/) to read the image from the device and upload its data.
You can now already run your project with `npx expo` and then select a platform to run on.
However, the tabs template contains a lot of code that we don't need, so to simplify things we can remove the **app**, **constants** and **components** folder.
This gives us a much cleaner project structure.
## Connecting to Supabase from React Native
To use Supabase we need to initialize the client with our project URL and the public key, which you can find in the **Settings** of your project under **API**.
You can put both of them in a `.env` file at the root of your project:
```env
EXPO_PUBLIC_SUPABASE_URL=
EXPO_PUBLIC_SUPABASE_ANON_KEY=
```
We can now simply read those values from the environment variables and initialize the Supabase client, so create a file at `config/initSupabase.ts` and add the following code:
```ts
import AsyncStorage from '@react-native-async-storage/async-storage'
import 'react-native-url-polyfill/auto'
import { createClient } from '@supabase/supabase-js'
const url = process.env.EXPO_PUBLIC_SUPABASE_URL
const key = process.env.EXPO_PUBLIC_SUPABASE_ANON_KEY
// Initialize the Supabase client
export const supabase = createClient(url, key, {
auth: {
storage: AsyncStorage,
detectSessionInUrl: false,
},
})
```
We are using the AsyncStorage from Expo to handle the session of our Supabase client and add in the `createClient` function.
Later we can import the `supabase` client from this file and use it in our app whenever we need to access Supabase.
## Building the authentication flow
Currently, the app won't work as we have no entry point. Because we are using the Expon Router and file-based routing, we can create a new file at `app/index.tsx` which will be the first page that comes up in our app.
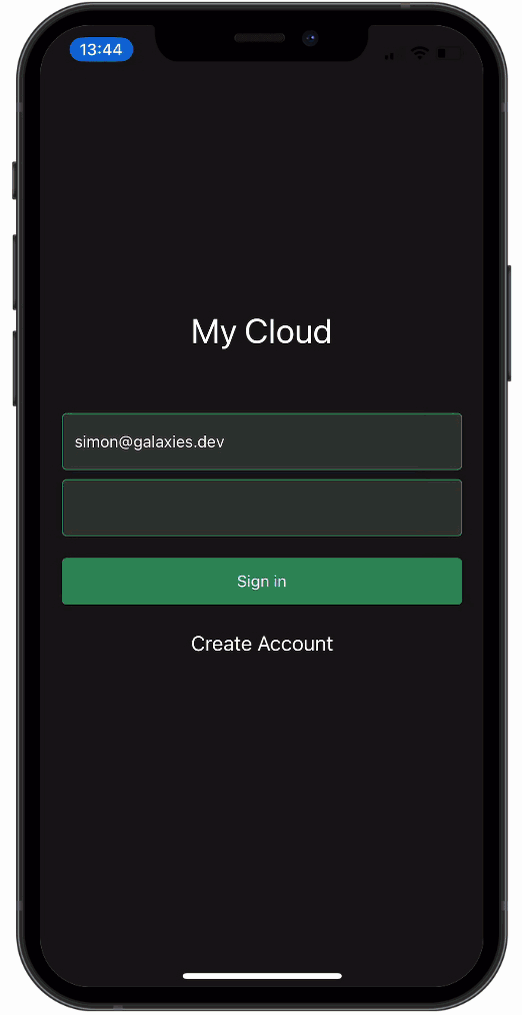
On this page we will handle both login and registration, so let's start by creating a simple form with a few inputs and buttons inside the `app/index.tsx` file:
```tsx
import { Alert, View, Button, TextInput, StyleSheet, Text, TouchableOpacity } from 'react-native'
import { useState } from 'react'
import React from 'react'
import Spinner from 'react-native-loading-spinner-overlay'
import { supabase } from '../config/initSupabase'
const Login = () => {
const [email, setEmail] = useState('')
const [password, setPassword] = useState('')
const [loading, setLoading] = useState(false)
// Sign in with email and password
const onSignInPress = async () => {
setLoading(true)
const { error } = await supabase.auth.signInWithPassword({
email,
password,
})
if (error) Alert.alert(error.message)
setLoading(false)
}
// Create a new user
const onSignUpPress = async () => {
setLoading(true)
const { error } = await supabase.auth.signUp({
email: email,
password: password,
})
if (error) Alert.alert(error.message)
setLoading(false)
}
return (
My Cloud
Sign in
)
}
const styles = StyleSheet.create({
container: {
flex: 1,
paddingTop: 200,
padding: 20,
backgroundColor: '#151515',
},
header: {
fontSize: 30,
textAlign: 'center',
margin: 50,
color: '#fff',
},
inputField: {
marginVertical: 4,
height: 50,
borderWidth: 1,
borderColor: '#2b825b',
borderRadius: 4,
padding: 10,
color: '#fff',
backgroundColor: '#363636',
},
button: {
marginVertical: 15,
alignItems: 'center',
backgroundColor: '#2b825b',
padding: 12,
borderRadius: 4,
},
})
export default Login
```
There's nothing fancy going on here, but this is all we need to use Supabase Authentication in our app!

You can try it out right now and create a new user account or sign in with an existing one and log the values to the console to see what's going on.
However, we are not handling the authentication state yet so let's create a **Context** to listen to changes.
We will wrap a Provider around our app, which will use the `onAuthStateChange` function from Supabase to listen to changes in the authentication state and accordingly set our state.
For this, create a new file at `provider/AuthProvider.tsx` and add the following code:
```tsx
import React, { useState, useEffect, createContext, PropsWithChildren } from 'react'
import { Session, User } from '@supabase/supabase-js'
import { supabase } from '../config/initSupabase'
type AuthProps = {
user: User | null
session: Session | null
initialized?: boolean
signOut?: () => void
}
export const AuthContext = createContext>({})
// Custom hook to read the context values
export function useAuth() {
return React.useContext(AuthContext)
}
export const AuthProvider = ({ children }: PropsWithChildren) => {
const [user, setUser] = useState()
const [session, setSession] = useState(null)
const [initialized, setInitialized] = useState(false)
useEffect(() => {
// Listen for changes to authentication state
const { data } = supabase.auth.onAuthStateChange(async (event, session) => {
setSession(session)
setUser(session ? session.user : null)
setInitialized(true)
})
return () => {
data.subscription.unsubscribe()
}
}, [])
// Log out the user
const signOut = async () => {
await supabase.auth.signOut()
}
const value = {
user,
session,
initialized,
signOut,
}
return {children}
}
```
To use the context we can now wrap it around our app, and while we do this we can also take care of the navigation:
In the topmost layout file we can check whether a user has an active session or not, and either directly sign the user into the inside area (that we will create soon) or automatically bring her back to the login screen.
To make this work with the Expo Router we can create a file at `app/_layout.tsx` and add the following code:
```tsx
import { Slot, useRouter, useSegments } from 'expo-router'
import { useEffect } from 'react'
import { AuthProvider, useAuth } from '../provider/AuthProvider'
// Makes sure the user is authenticated before accessing protected pages
const InitialLayout = () => {
const { session, initialized } = useAuth()
const segments = useSegments()
const router = useRouter()
useEffect(() => {
if (!initialized) return
// Check if the path/url is in the (auth) group
const inAuthGroup = segments[0] === '(auth)'
if (session && !inAuthGroup) {
// Redirect authenticated users to the list page
router.replace('/list')
} else if (!session) {
// Redirect unauthenticated users to the login page
router.replace('/')
}
}, [session, initialized])
return
}
// Wrap the app with the AuthProvider
const RootLayout = () => {
return (
)
}
export default RootLayout
```
Whenever the `initialized` or `session` state changes, we check if the user is authenticated and redirect her to the correct page.
This also means we don't have to worry about the authentication state in our pages anymore, we can just assume that the user is authenticated and use the `useAuth` hook to access the user and session data later on.
Your app might show an error right now because the `/list` route doesn't exist yet, but we will create it in the next step.
## File Upload to Supabase Storage
Now that we have the authentication set up, we can start working on the file upload.
First, let's define another layout for this inside area so create a file at `/app/(auth)/_layout.tsx` and add the following code:
```tsx
import { Stack } from 'expo-router'
import { useAuth } from '../../provider/AuthProvider'
import React from 'react'
import { TouchableOpacity } from 'react-native'
import { Ionicons } from '@expo/vector-icons'
// Simple stack layout within the authenticated area
const StackLayout = () => {
const { signOut } = useAuth()
return (
(
),
}}
>
)
}
export default StackLayout
```
This defines a simple stack navigation and adds a button to trigger the logout, so we can now also fully test the authentication flow.
Next, we create the page for uploading and displaying all files of a user from Supabase Storage.
You won't have any files to show yet, but loading the files of a user is as easy as calling `list()` on the storage bucket and passing the user id as the folder name.
Additionally, we add a little FAB (floating action button) to trigger the file picker, so create a file at `/app/(auth)/list.tsx` and add the following code:
```tsx
import { View, StyleSheet, TouchableOpacity, ScrollView } from 'react-native'
import React, { useEffect, useState } from 'react'
import { Ionicons } from '@expo/vector-icons'
import * as ImagePicker from 'expo-image-picker'
import { useAuth } from '../../provider/AuthProvider'
import * as FileSystem from 'expo-file-system'
import { decode } from 'base64-arraybuffer'
import { supabase } from '../../config/initSupabase'
import { FileObject } from '@supabase/storage-js'
const list = () => {
const { user } = useAuth()
const [files, setFiles] = useState([])
useEffect(() => {
if (!user) return
// Load user images
loadImages()
}, [user])
const loadImages = async () => {
const { data } = await supabase.storage.from('files').list(user!.id)
if (data) {
setFiles(data)
}
}
const onSelectImage = async () => {
// TODO
}
return (
{/* FAB to add images */}
)
}
const styles = StyleSheet.create({
container: {
flex: 1,
padding: 20,
backgroundColor: '#151515',
},
fab: {
borderWidth: 1,
alignItems: 'center',
justifyContent: 'center',
width: 70,
position: 'absolute',
bottom: 40,
right: 30,
height: 70,
backgroundColor: '#2b825b',
borderRadius: 100,
},
})
export default list
```
This should give us a nice and clean UI.

Now we can implement the image picker and upload the selected image to Supabase Storage.
Using the image picker from Expo gives us a **URI**, which we can use to read the file from the file system and convert it to a base64 string.
We can then use the `upload()` method from the storage client to upload the file to the storage bucket. Life can be easy.
At this point, you should be able to upload files to Supabase Storage, and you can already see them in your UI (or log them to the console).
To finally display them we will add a `ScrollView` component, which will render one item for every file of a user.
Let's start by creating those component rows in another file, so create a `components/ImageItem.tsx` file and add the following code:
```tsx
import { FileObject } from '@supabase/storage-js'
import { Image, View, Text, TouchableOpacity } from 'react-native'
import { supabase } from '../config/initSupabase'
import { useState } from 'react'
import { Ionicons } from '@expo/vector-icons'
// Image item component that displays the image from Supabase Storage and a delte button
const ImageItem = ({
item,
userId,
onRemoveImage,
}: {
item: FileObject
userId: string
onRemoveImage: () => void
}) => {
const [image, setImage] = useState('')
supabase.storage
.from('files')
.download(`${userId}/${item.name}`)
.then(({ data }) => {
const fr = new FileReader()
fr.readAsDataURL(data!)
fr.onload = () => {
setImage(fr.result as string)
}
})
return (
{image ? (
) : (
)}
{item.name}
{/* Delete image button */}
)
}
export default ImageItem
```
This component will display the image from Supabase Storage, the name of the file and a delete button.
To display the image we use the `download()` method from the storage client, which returns a `FileObject` with the file data. We can then use the `FileReader` to convert the file data to a base64 string, which we can use as the image source.
Now let's use this component in our `list.tsx` file to render the list of images by updating the `return` statement:
```tsx
return (
{files.map((item, index) => (
onRemoveImage(item, index)}
/>
))}
{/* FAB to add images */}
)
```
Don't forget to also include the import to the `ImageItem` component!

Finally, we can also include the delete functionality by adding the following code to the `list.tsx`:
```tsx
const onRemoveImage = async (item: FileObject, listIndex: number) => {
supabase.storage.from('files').remove([`${user!.id}/${item.name}`])
const newFiles = [...files]
newFiles.splice(listIndex, 1)
setFiles(newFiles)
}
```
We are handling the deletion here so we can accordingly update the state of the files list after removing an item.
And with that in place, you have a fully functional image gallery app with React Native and Supabase Storage!
## What about resumable uploads?
Initially, I wanted to include [resumable uploads](https://supabase.com/blog/storage-v3-resumable-uploads) in this tutorial, but apparently, the [Uppy](https://uppy.io/) client didn't work 100% for React Native yet.
You can still see an [initial implementation of resumable downloads with Supabase and React Native](https://github.com/saimon24/react-native-resumable-upload-supabase/commit/bb45455dc2d4d3fdd42089a8a26a521cc5b5e60f#diff-2d97fcb7ad2b1ac426a8d5391cfd0ab970e525ede1f11e14885f65e6dcd116a1) in the repository of this tutorial.
However, ultimately the uploaded file was always 0 bytes, so I decided to leave it out for now.
The Supabase team is investigating this issue, so I'm very sure that we will have resumable uploads working with React Native soon.
## Conclusion
It's almost too easy to use Supabase Storage, and it's a great way to store files for your apps.
You now have a fully functional image gallery app with React Native and Supabase Storage including user authentication without writing a line of backend code!
You can [find the full code of this tutorial on GitHub](https://github.com/saimon24/react-native-resumable-upload-supabase) where you just need to insert your own Supabase URL and API key.
If you enjoyed the tutorial, you can [learn React Native on Galaxies.dev](https://galaxies.dev) where I help developers build awesome React Native apps.
Until next time and happy coding with Supabase!
## More React Native/Expo resources
- [Getting started with React Native authentication](https://supabase.com/blog/react-native-authentication)
- [Offline-first React Native Apps with Expo, WatermelonDB](https://supabase.com/blog/react-native-offline-first-watermelon-db)
- [React Native Quickstart](https://supabase.com/docs/guides/auth/quickstarts/react-native)
- [Watch our React Native video tutorials](https://youtube.com/playlist?list=PL5S4mPUpp4OsrbRTx21k34aACOgpqQGlx\&si=Ez-0S4QhBxtayYsq)