Managing Environments
Manage multiple environments using Database Migrations and GitHub Actions.
This guide shows you how to set up your local Supabase development environment that integrates with GitHub Actions to automatically test and release schema changes to staging and production Supabase projects.

Set up a local environment#
The first step is to set up your local repository with the Supabase CLI:
1supabase initYou should see a new supabase directory. Then you need to link your local repository with your Supabase project:
1supabase login2supabase link --project-ref $PROJECT_IDYou can get your $PROJECT_ID from your project's dashboard URL:
1https://supabase.com/dashboard/project/<project-id>If you're using an existing Supabase project, you might have made schema changes through the Dashboard. Run the following command to pull these changes before making local schema changes from the CLI:
1supabase db pullThis command creates a new migration in supabase/migrations/<timestamp>_remote_schema.sql which reflects the schema changes you have made previously.
Now commit your local changes to Git and run the local development setup:
1git add .2git commit -m "init supabase"3supabase startYou are now ready to develop schema changes locally and create your first migration.
Create a new migration#
There are two ways to make schema changes:
- Manual migration: Write DDL statements manually into a migration file
- Auto schema diff: Make changes through Studio UI and auto generate a schema diff
Manual migration#
Create a new migration script by running:
1supabase migration new new_employeeYou should see a new file created: supabase/migrations/<timestamp>_new_employee.sql. You can then write SQL statements in this script using a text editor:
1create table public.employees (2 id integer primary key generated always as identity,3 name text4);Apply the new migration to your local database:
1supabase db resetThis command recreates your local database from scratch and applies all migration scripts under supabase/migrations directory. Now your local database is up to date.
The new migration command also supports stdin as input. This allows you to pipe in an existing script from another file or stdout:
supabase migration new new_employee < create_employees_table.sql
Auto schema diff#
Unlike manual migrations, auto schema diff creates a new migration script from changes already applied to your local database.
Create an employees table under the public schema using Studio UI, accessible at localhost:54323 by default.
Next, generate a schema diff by running the following command:
1supabase db diff -f new_employeeYou should see that a new file supabase/migrations/<timestamp>_new_employee.sql is created. Open the file and verify that the generated DDL statements are the same as below.
1-- This script was generated by the Schema Diff utility in pgAdmin 42-- For the circular dependencies, the order in which Schema Diff writes the objects is not very sophisticated3-- and may require manual changes to the script to ensure changes are applied in the correct order.4-- Please report an issue for any failure with the reproduction steps.56CREATE TABLE IF NOT EXISTS public.employees7(8 id integer NOT NULL GENERATED ALWAYS AS IDENTITY ( INCREMENT 1 START 1 MINVALUE 1 MAXVALUE 2147483647 CACHE 1 ),9 name text COLLATE pg_catalog."default",10 CONSTRAINT employees_pkey PRIMARY KEY (id)11)1213TABLESPACE pg_default;1415ALTER TABLE IF EXISTS public.employees16 OWNER to postgres;1718GRANT ALL ON TABLE public.employees TO anon;1920GRANT ALL ON TABLE public.employees TO authenticated;2122GRANT ALL ON TABLE public.employees TO postgres;2324GRANT ALL ON TABLE public.employees TO service_role;You may notice that the auto-generated migration script is more verbose than the manually written one. This is because the default schema diff tool does not account for default privileges added by the initial schema.
Commit the new migration script to git and you are ready to deploy.
Alternatively, you may pass in the --use-migra experimental flag to generate a more concise migration using migra.
Without the -f file flag, the output is written to stdout by default.
supabase db diff --use-migra
Deploy a migration#
In a production environment, we recommend using a CI/CD pipeline to deploy new migrations with GitHub Actions rather than deploying from your local machine.
This example uses two Supabase projects, one for production and one for staging.
Prepare your environments by:
- Creating separate Supabase projects for staging and production
- Pushing your git repository to GitHub and enabling GitHub Actions
You need a new project for staging. A project which has already been modified to reflect the production project's schema can't be used because the CLI would reapply these changes.
Configure GitHub Actions#
The Supabase CLI requires a few environment variables to run in non-interactive mode.
SUPABASE_ACCESS_TOKENis your personal access tokenSUPABASE_DB_PASSWORDis your project specific database passwordSUPABASE_PROJECT_IDis your project specific reference string
We recommend adding these as encrypted secrets to your GitHub Actions runners.
Create the following files inside the .github/workflows directory:
1name: CI23on:4 pull_request:5 workflow_dispatch:67jobs:8 test:9 runs-on: ubuntu-latest1011 steps:12 - uses: actions/checkout@v41314 - uses: supabase/setup-cli@v115 with:16 version: latest1718 - name: Start Supabase local development setup19 run: supabase db start2021 - name: Verify generated types are checked in22 run: |23 supabase gen types typescript --local > types.gen.ts24 if ! git diff --ignore-space-at-eol --exit-code --quiet types.gen.ts; then25 echo "Detected uncommitted changes after build. See status below:"26 git diff27 exit 128 fiThe full example code is available in the demo repository.
Commit these files to git and push to your main branch on GitHub. Update these environment variables to match your Supabase projects:
SUPABASE_ACCESS_TOKENPRODUCTION_PROJECT_IDPRODUCTION_DB_PASSWORDSTAGING_PROJECT_IDSTAGING_DB_PASSWORD
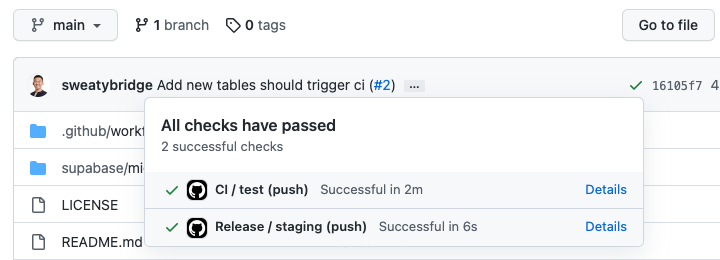
When configured correctly, your repository will have CI and Release workflows that trigger on new commits pushed to main and develop branches.
Open a PR with new migration#
Follow the migration steps to create a supabase/migrations/<timestamp>_new_employee.sql file.
Checkout a new branch feat/employee from develop , commit the migration file, and push to GitHub.
1git checkout -b feat/employee2git add supabase/migrations/<timestamp>_new_employee.sql3git commit -m "Add employee table"4git push --set-upstream origin feat/employeeOpen a PR from feat/employee to the develop branch to see that the CI workflow has been triggered.
Once the test error is resolved, merge this PR and watch the deployment in action.
Release to production#
After verifying your staging project has successfully migrated, create another PR from develop to main and merge it to deploy the migration to the production project.
The release job applies all new migration scripts merged in supabase/migrations directory to a linked Supabase project. You can control which project the job links to via PROJECT_ID environment variable.
Troubleshooting#
Sync production project to staging#
When setting up a new staging project, you might need to sync the initial schema with migrations previously applied to the production project.
One way is to leverage the Release workflow:
- Create a new branch
developand choosemainas the branch source - Push the
developbranch to GitHub
The GitHub Actions runner will deploy your existing migrations to the staging project.
Alternatively, you can also apply migrations through your local CLI to a linked remote database.
1supabase db pushOnce pushed, check that the migration version is up to date for both local and remote databases.
1supabase migration listPermission denied on db pull#
If you have been using Supabase hosted projects for a long time, you might encounter the following permission error when executing db pull.
1Error: Error running pg_dump on remote database: pg_dump: error: query failed: ERROR: permission denied for table _type23pg_dump: error: query was: LOCK TABLE "graphql"."_type" IN ACCESS SHARE MODETo resolve this error, you need to grant postgres role permissions to graphql schema. You can do that by running the following query from Supabase dashboard's SQL Editor.
1grant all on all tables in schema graphql to postgres, anon, authenticated, service_role;2grant all on all functions in schema graphql to postgres, anon, authenticated, service_role;3grant all on all sequences in schema graphql to postgres, anon, authenticated, service_role;Permission denied on db push#
If you create a table using a custom database role, the default postgres user may lack permission to modify it. This can cause 42501 privilege errors during migrations. To resolve this, grant the 'postgres` user ownership of the custom role.
1grant "custom_role" to "postgres";Rebasing new migrations#
Sometimes your teammate may merge a new migration file to git main branch, and now you need to rebase your local schema changes on top.
We can handle this scenario gracefully by renaming your old migration file with a new timestamp.
1git pull2supabase migration new dev_A3# Assume the new file is: supabase/migrations/<t+2>_dev_A.sql4mv <time>_dev_A.sql <t+2>_dev_A.sql5supabase db resetIn case reset fails, you can manually resolve conflicts by editing <t+2>_dev_A.sql file.
Once validated locally, commit your changes to Git and push to GitHub.