ILLA

Overview
ILLA is a low-code platform for developers that enables the rapid development and deployment of internal tools.
It allows for creating pages by dragging and dropping UI components, connecting to any database or API, and writing JavaScript.
Documentation
This tutorial outlines the process of creating an Admin Panel using ILLA Builder and Supabase in a few simple steps. ILLA is a low-code platform for developers that enables the rapid development and deployment of internal tools. It allows for creating pages by dragging and dropping UI components, connecting to any database or API, and writing JavaScript. To learn more about ILLA and give it a try, visit their website at https://www.illacloud.com/. Let's begin!
Step 1: Set up your Back end on Supabase
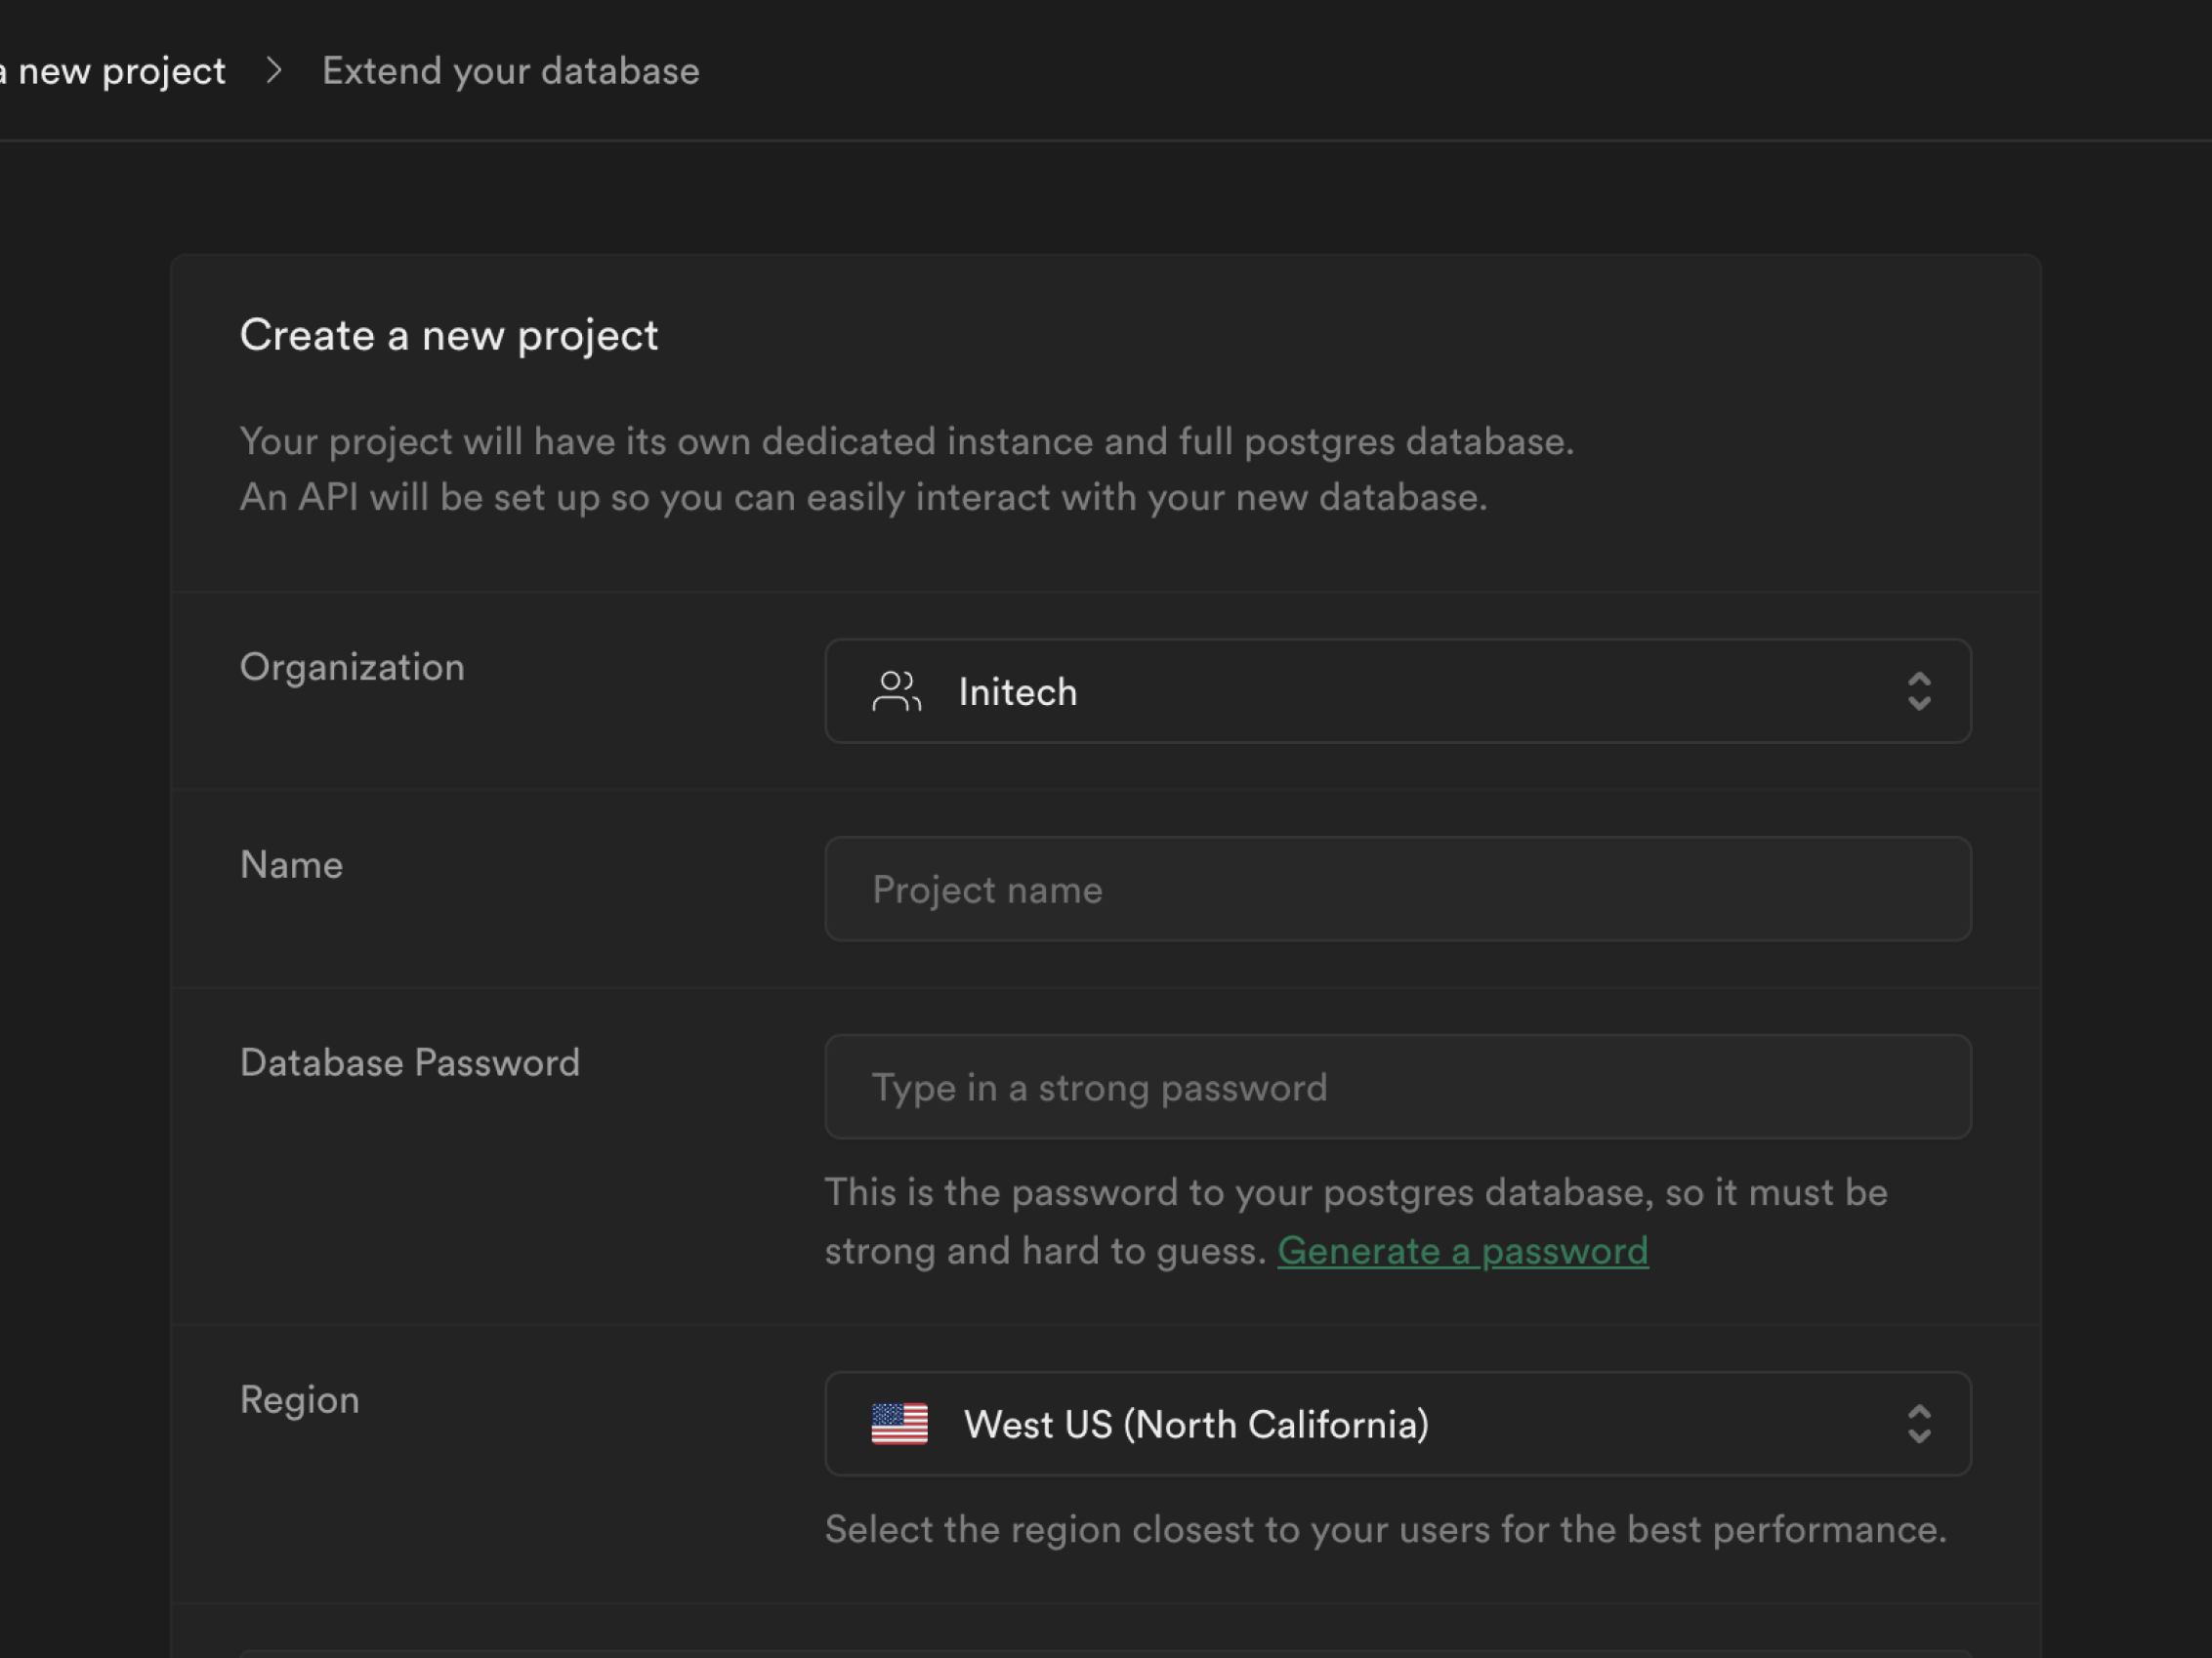
On the Supabase dashboard, click New project and set the name to adminPanel.
Create a new table by clicking on the Create a new table .
Supabase offers a variety of options for populating tables with data, including writing queries, creating schemas through a user interface, and uploading CSV files.
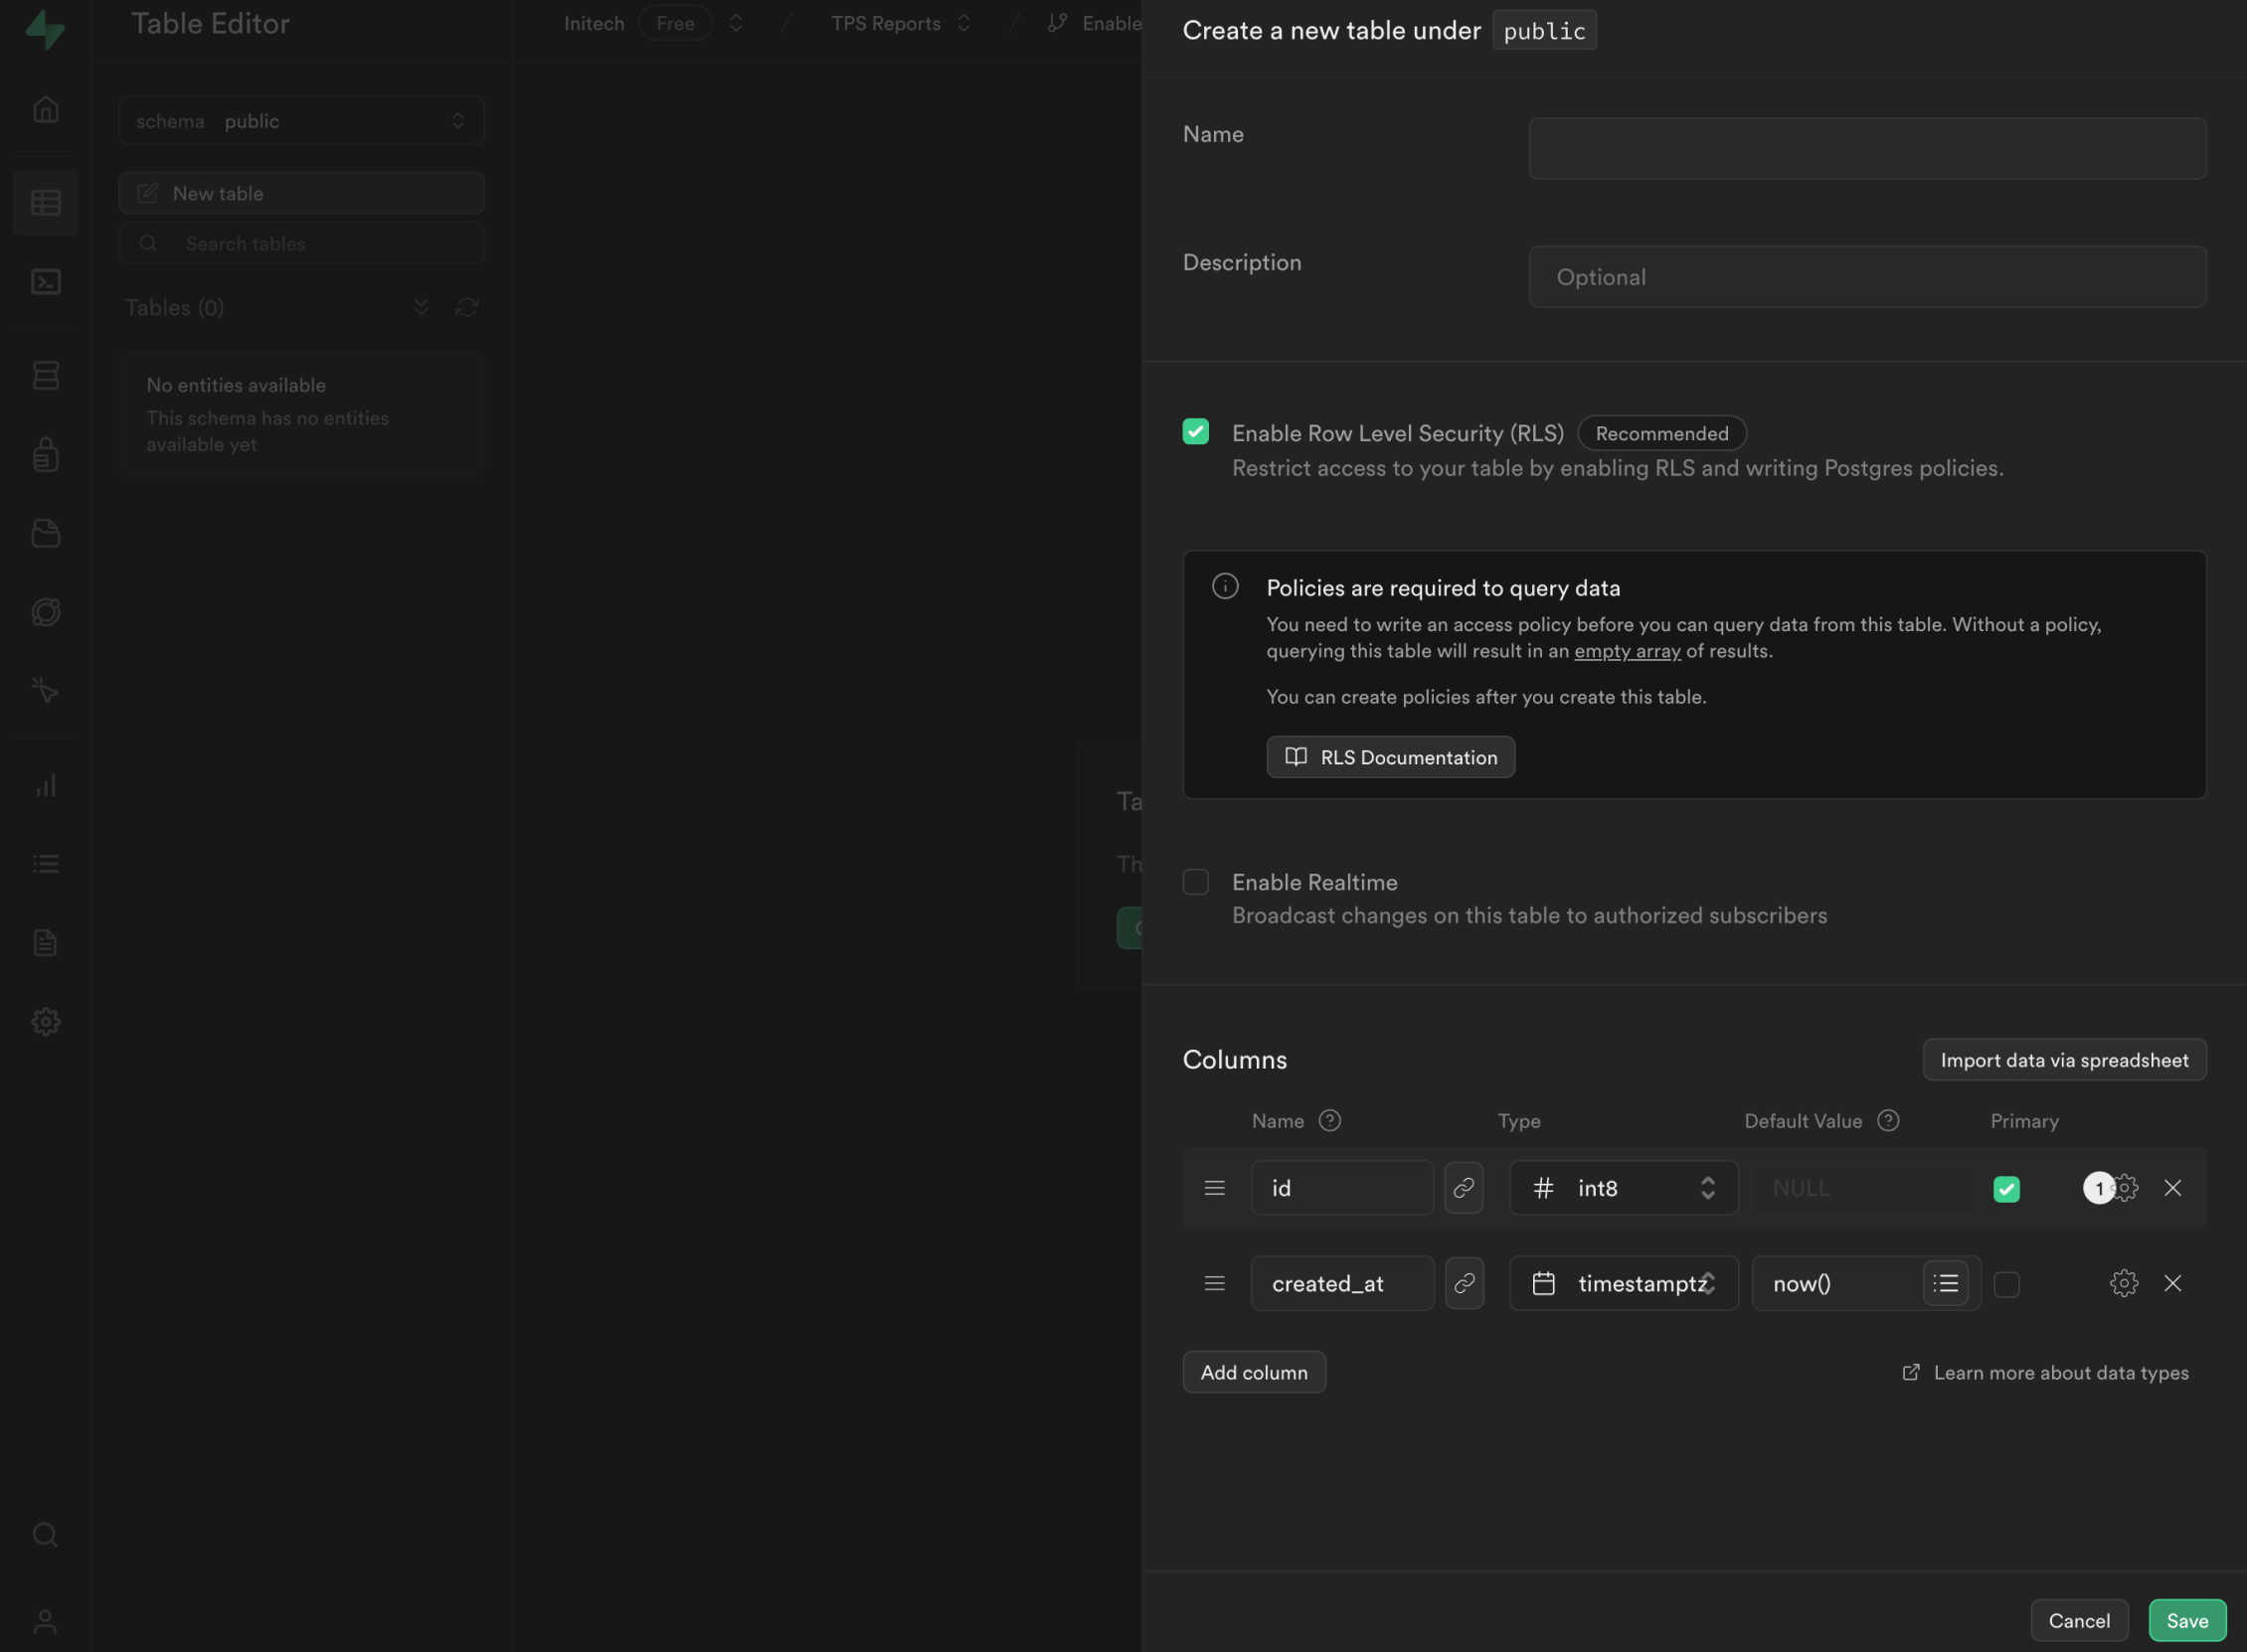
Fill out the info in the table. The database is now set up.
Step 2: Build UI on ILLA Cloud
On ILLA Cloud, click Create New to create a new application.
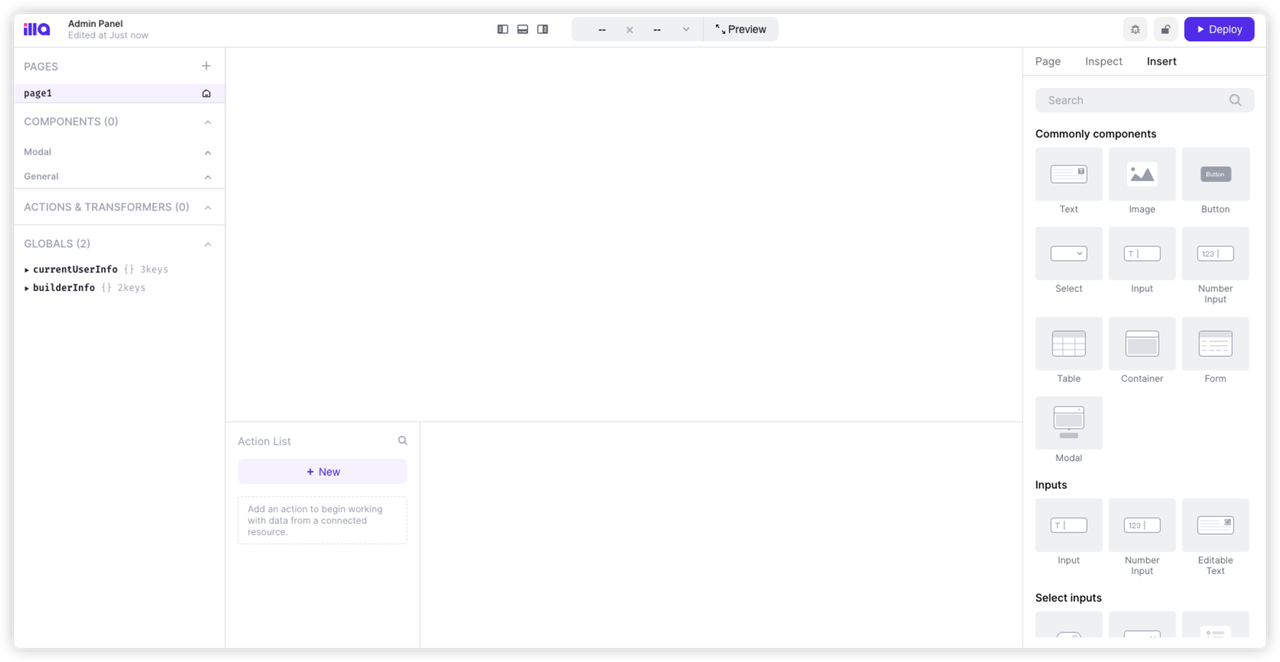
Drag components from the Insert panel to the canvas.
Select the components on the canvas and configure the property on the Inspect panel.
As seen in the below screenshot, we have built a simple admin panel.

Step 3: Connect to Supabase and config CRUD
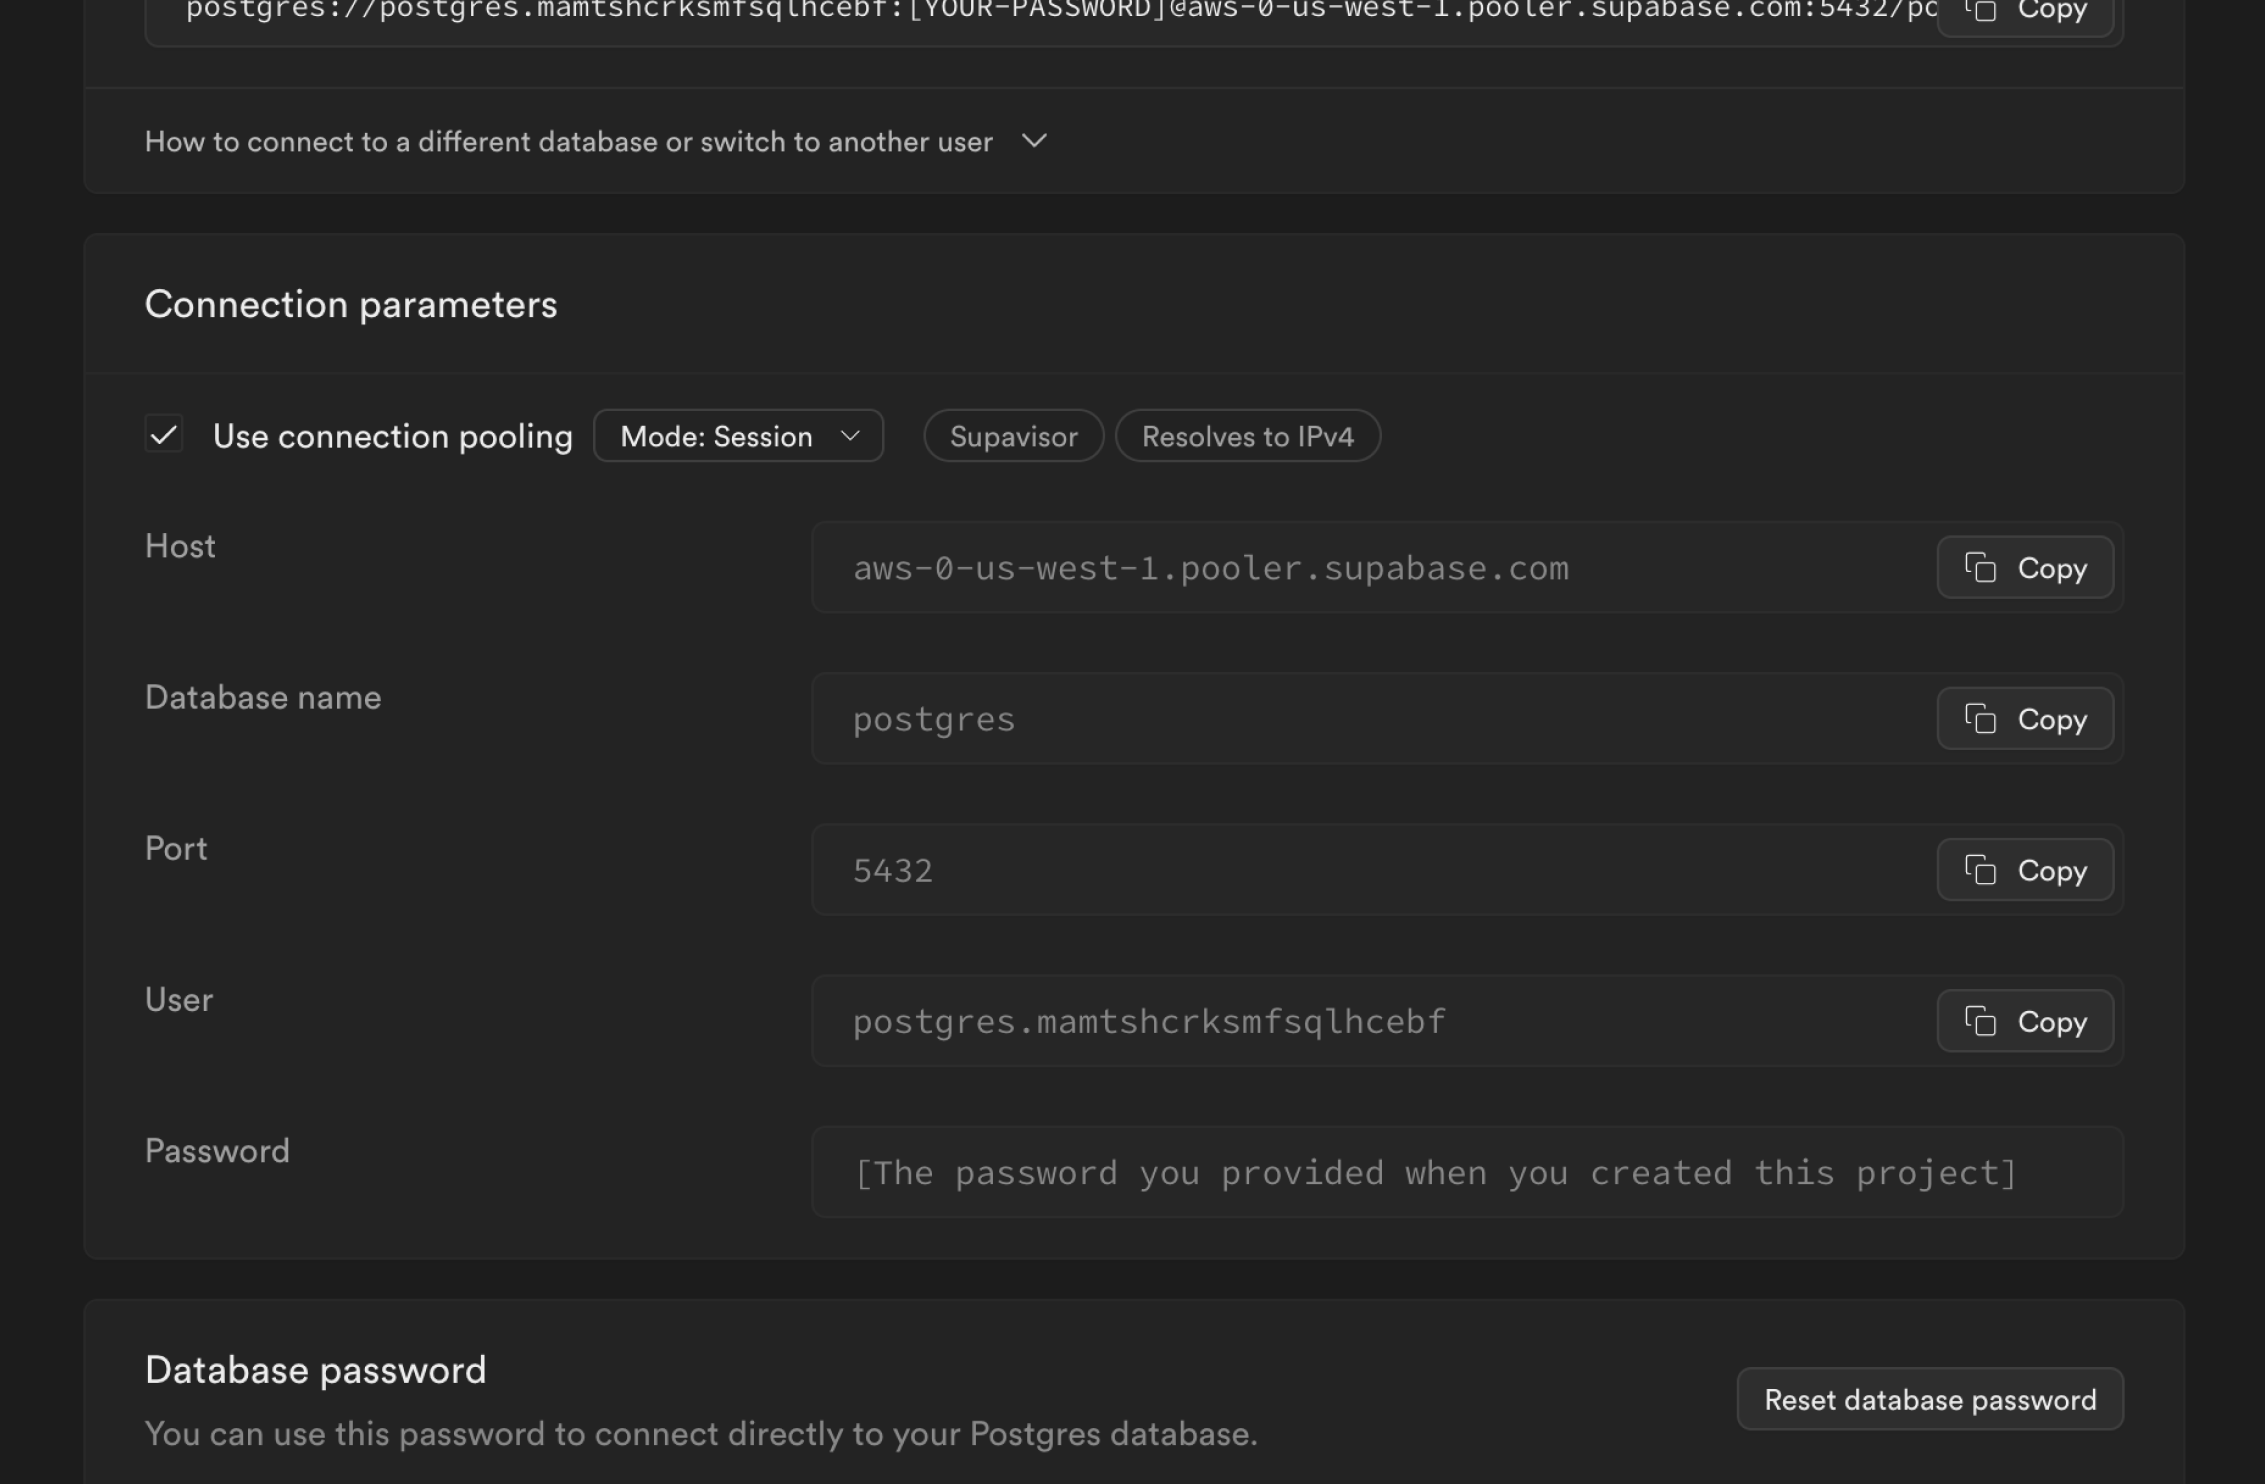
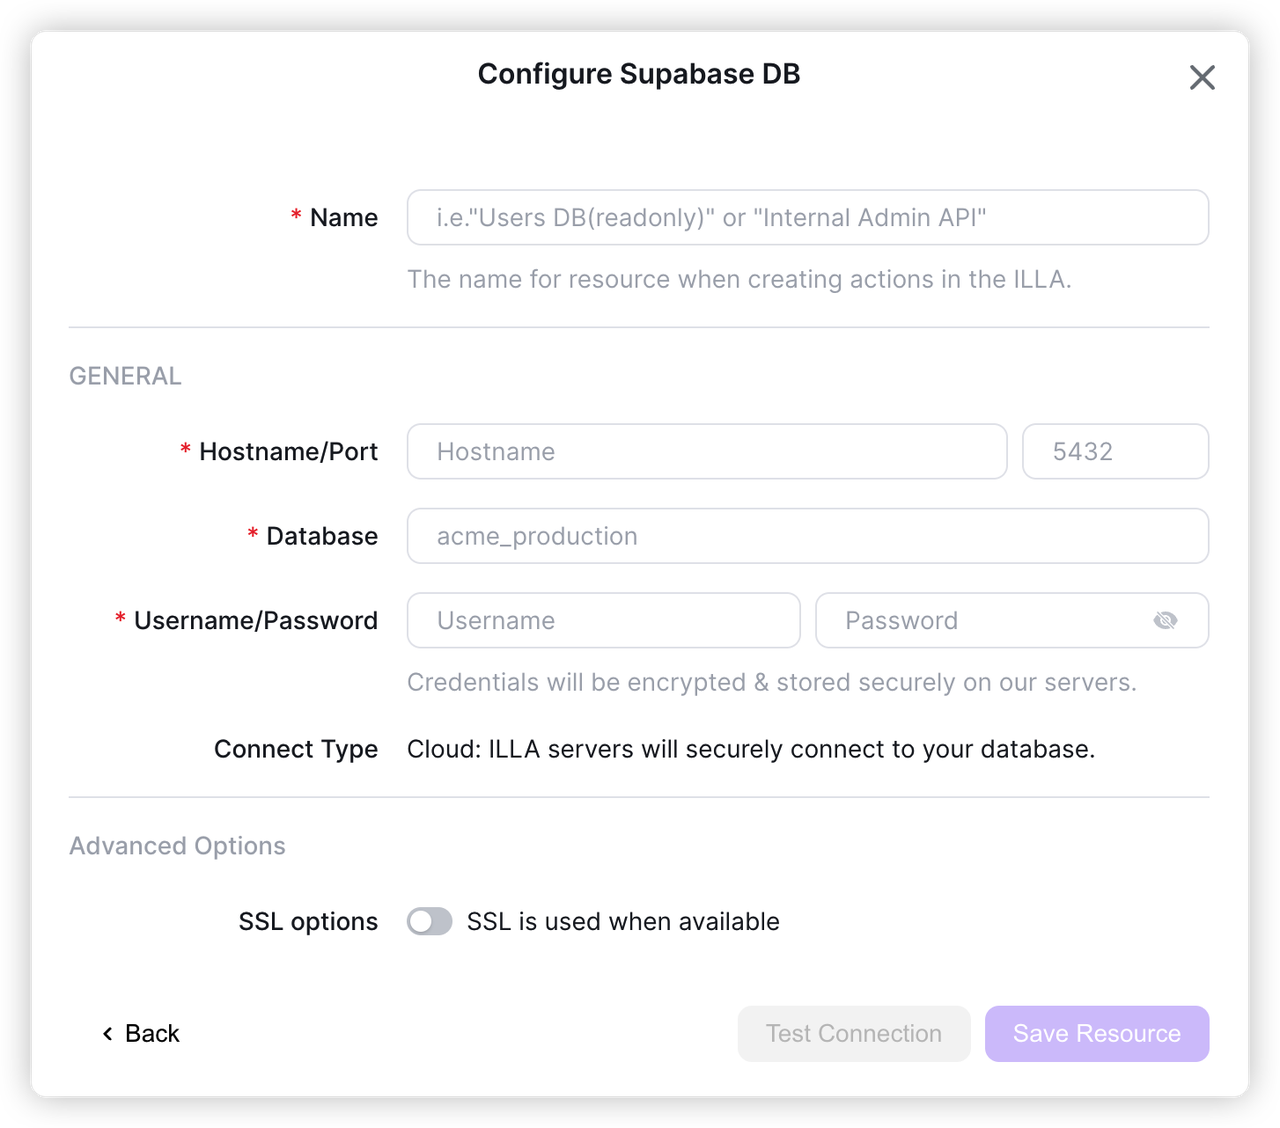
Note down the database connection parameters information under Database Settings in Supabase.
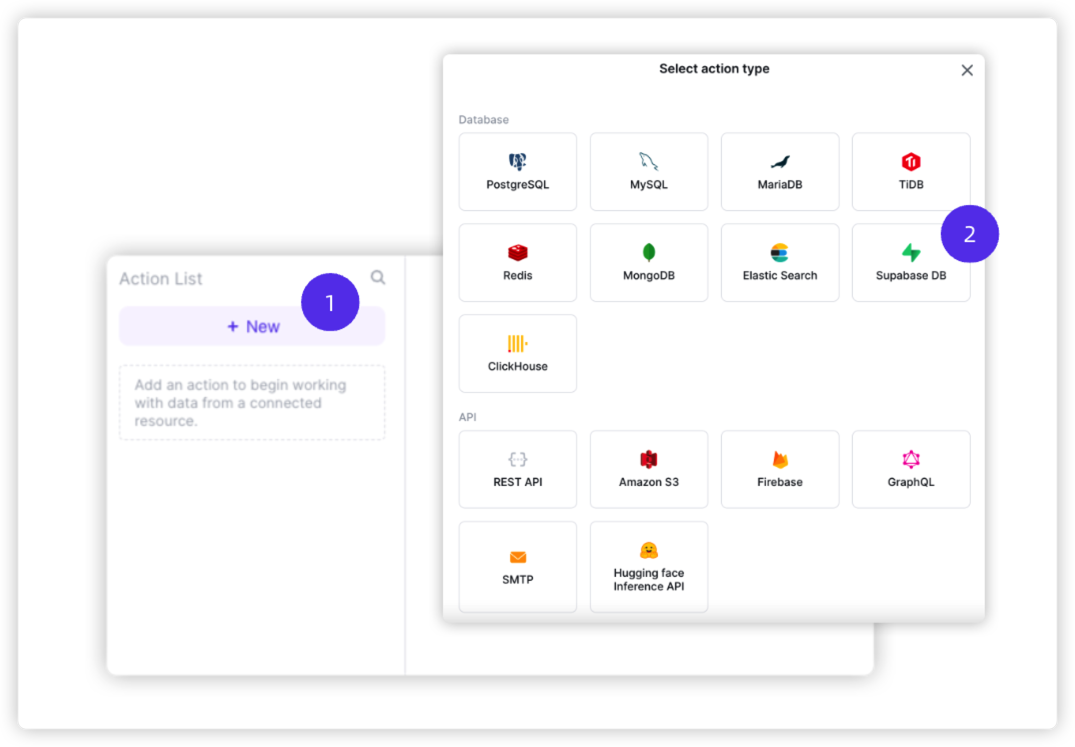
In the Action List, click + New and select Supabase DB.
Fill out the form to connect to your Supabase instance. Test connection and save resource.
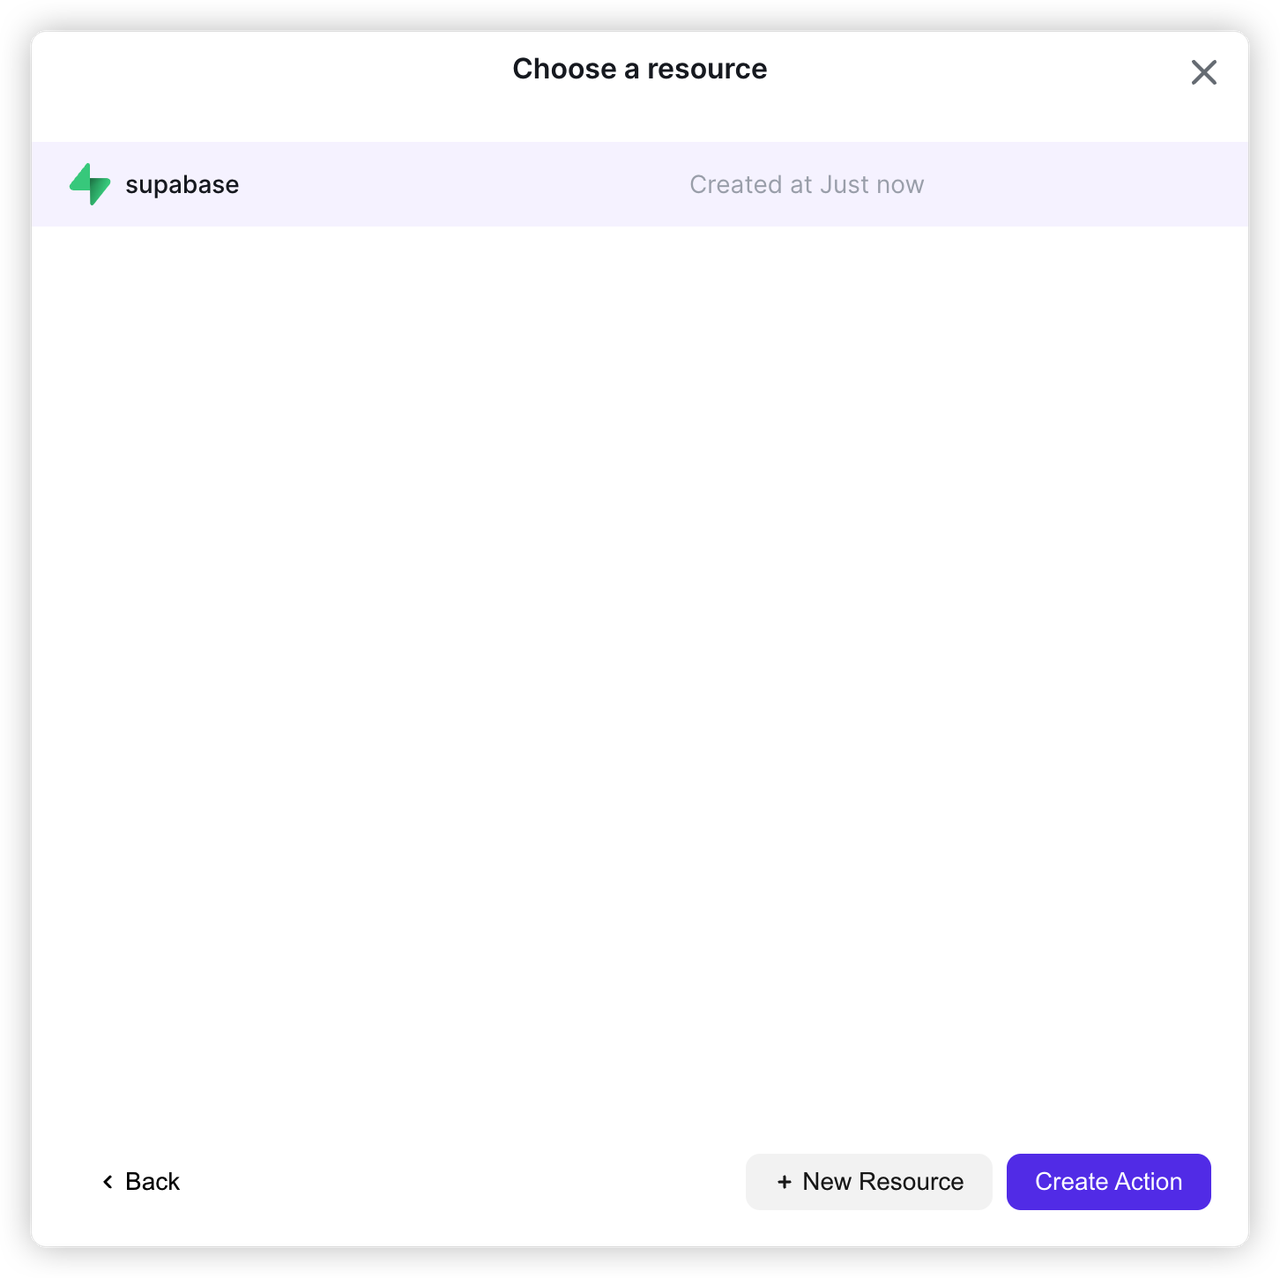
Click Create Action to create an action with the Supabase resource and config your CRUD.
Use {{ to get the front-end input data. The following is an example of the User Management page in the Admin Panel.
Search for a user by the name inputted in input1
_10SELECT *_10FROM user_10WHERE name = "{{input1.value}}"_10;
Update user data. Update user information when id matches
_10UPDATE user_10SET name = "{{input3.value}}"_10, email = "{{input4.value}}"_10WHERE id="{{input2.value}}"_10;
Insert user data
_10INSERT INTO user VALUES("{{input5.value}}","{{input6.value}}","{{input7.value}}");
Delete a user by id
_10DELETE FROM user WHERE id = "{{input2.value}}";
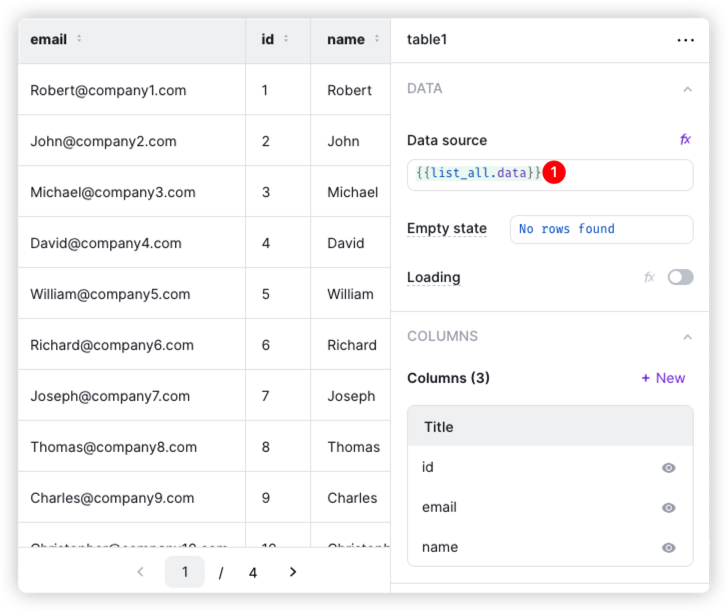
Step 4: Show data on components
Configure the properties of components with {{ . For example:
Resources
Details
Third-party integrations and docs are managed by Supabase partners.