Appsmith
Overview
Appsmith is an open-source framework for building internal tools. It lets you drag-and-drop UI components to build pages, connect to any API, database or GraphQL source and write logic with JavaScript objects.
Documentation
This guide explains how to quickly build a Support Dashboard by connecting a Supabase back-end to an Appsmith front-end.
Appsmith is an open-source framework for building internal tools. It lets you drag-and-drop UI components to build pages, connect to any API, database or GraphQL source and write logic with JavaScript objects.
If you don’t have an Appsmith account, create one here.
Let’s get started!
Step 1: Set up your Backend on Supabase
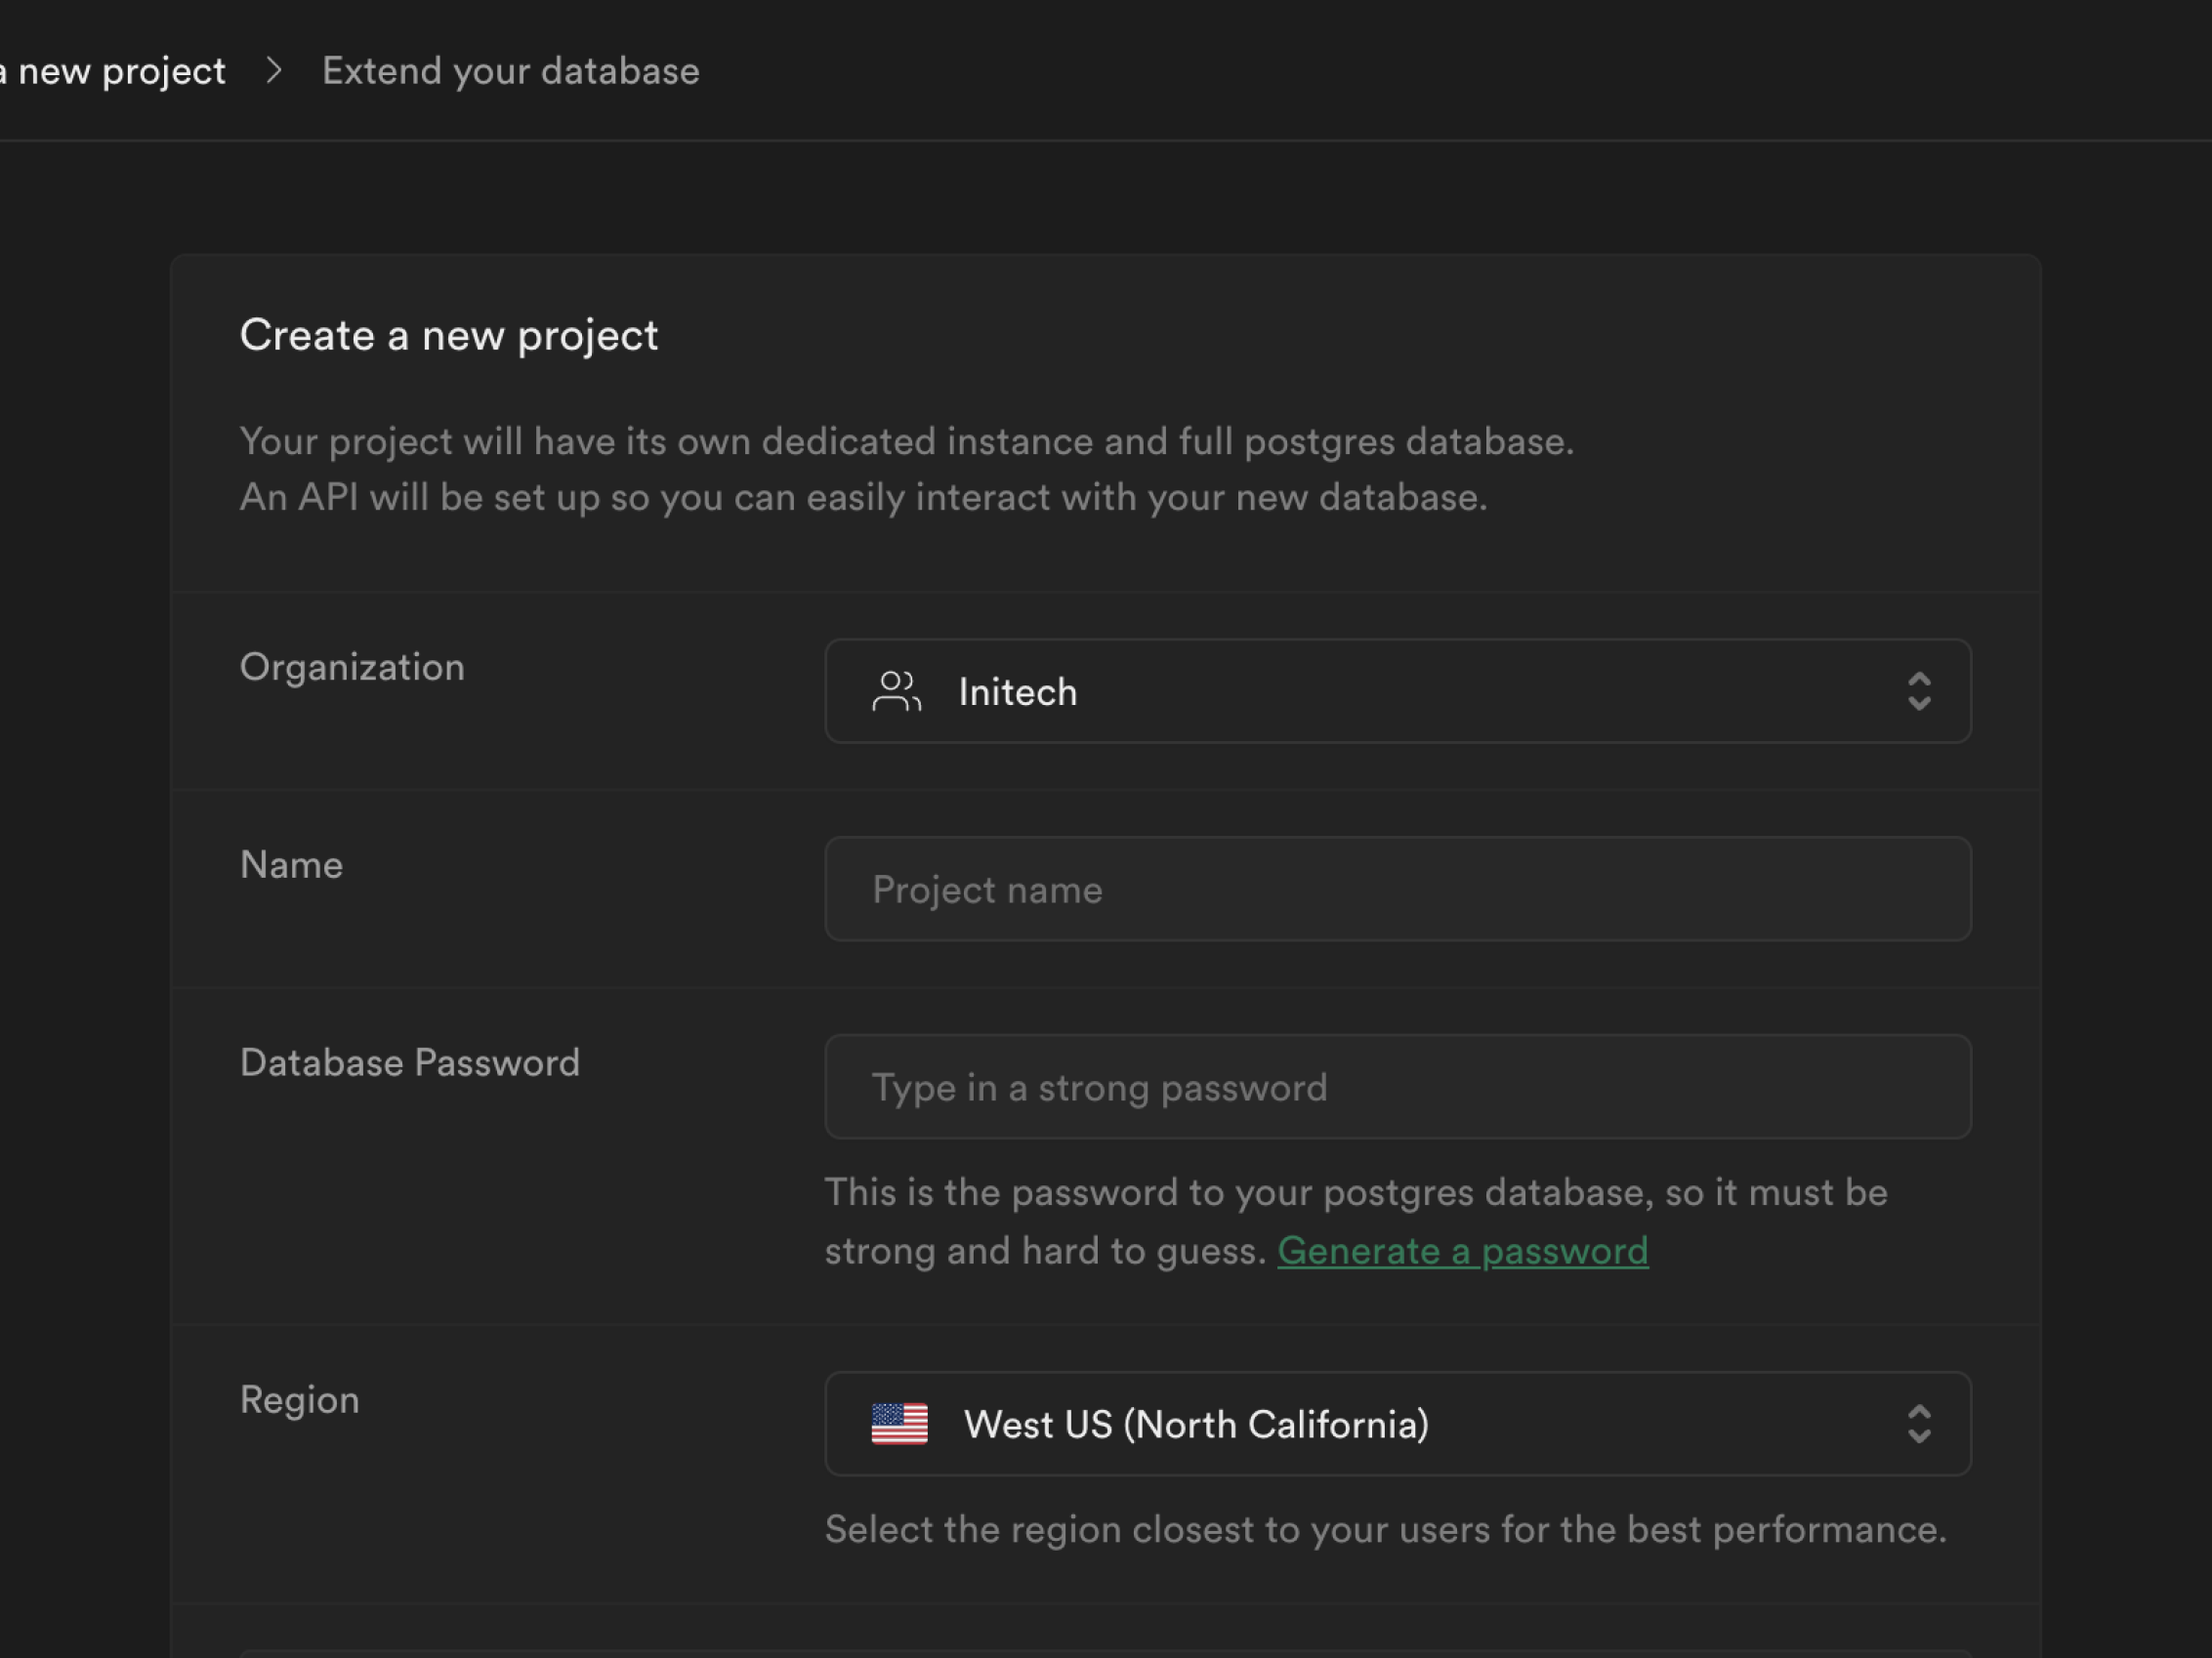
- On the Supabase dashboard, click
New projectand set the name to Support Dashboard
- Create a new table by clicking on the Create Table option on the side navigation.
- Supabase provides many ways to add data to the tables, from writing queries to creating schemas using UI to simply uploading CSV files. For our support dashboard, we will be creating the tickets table by uploading the CSV file on Supabase.
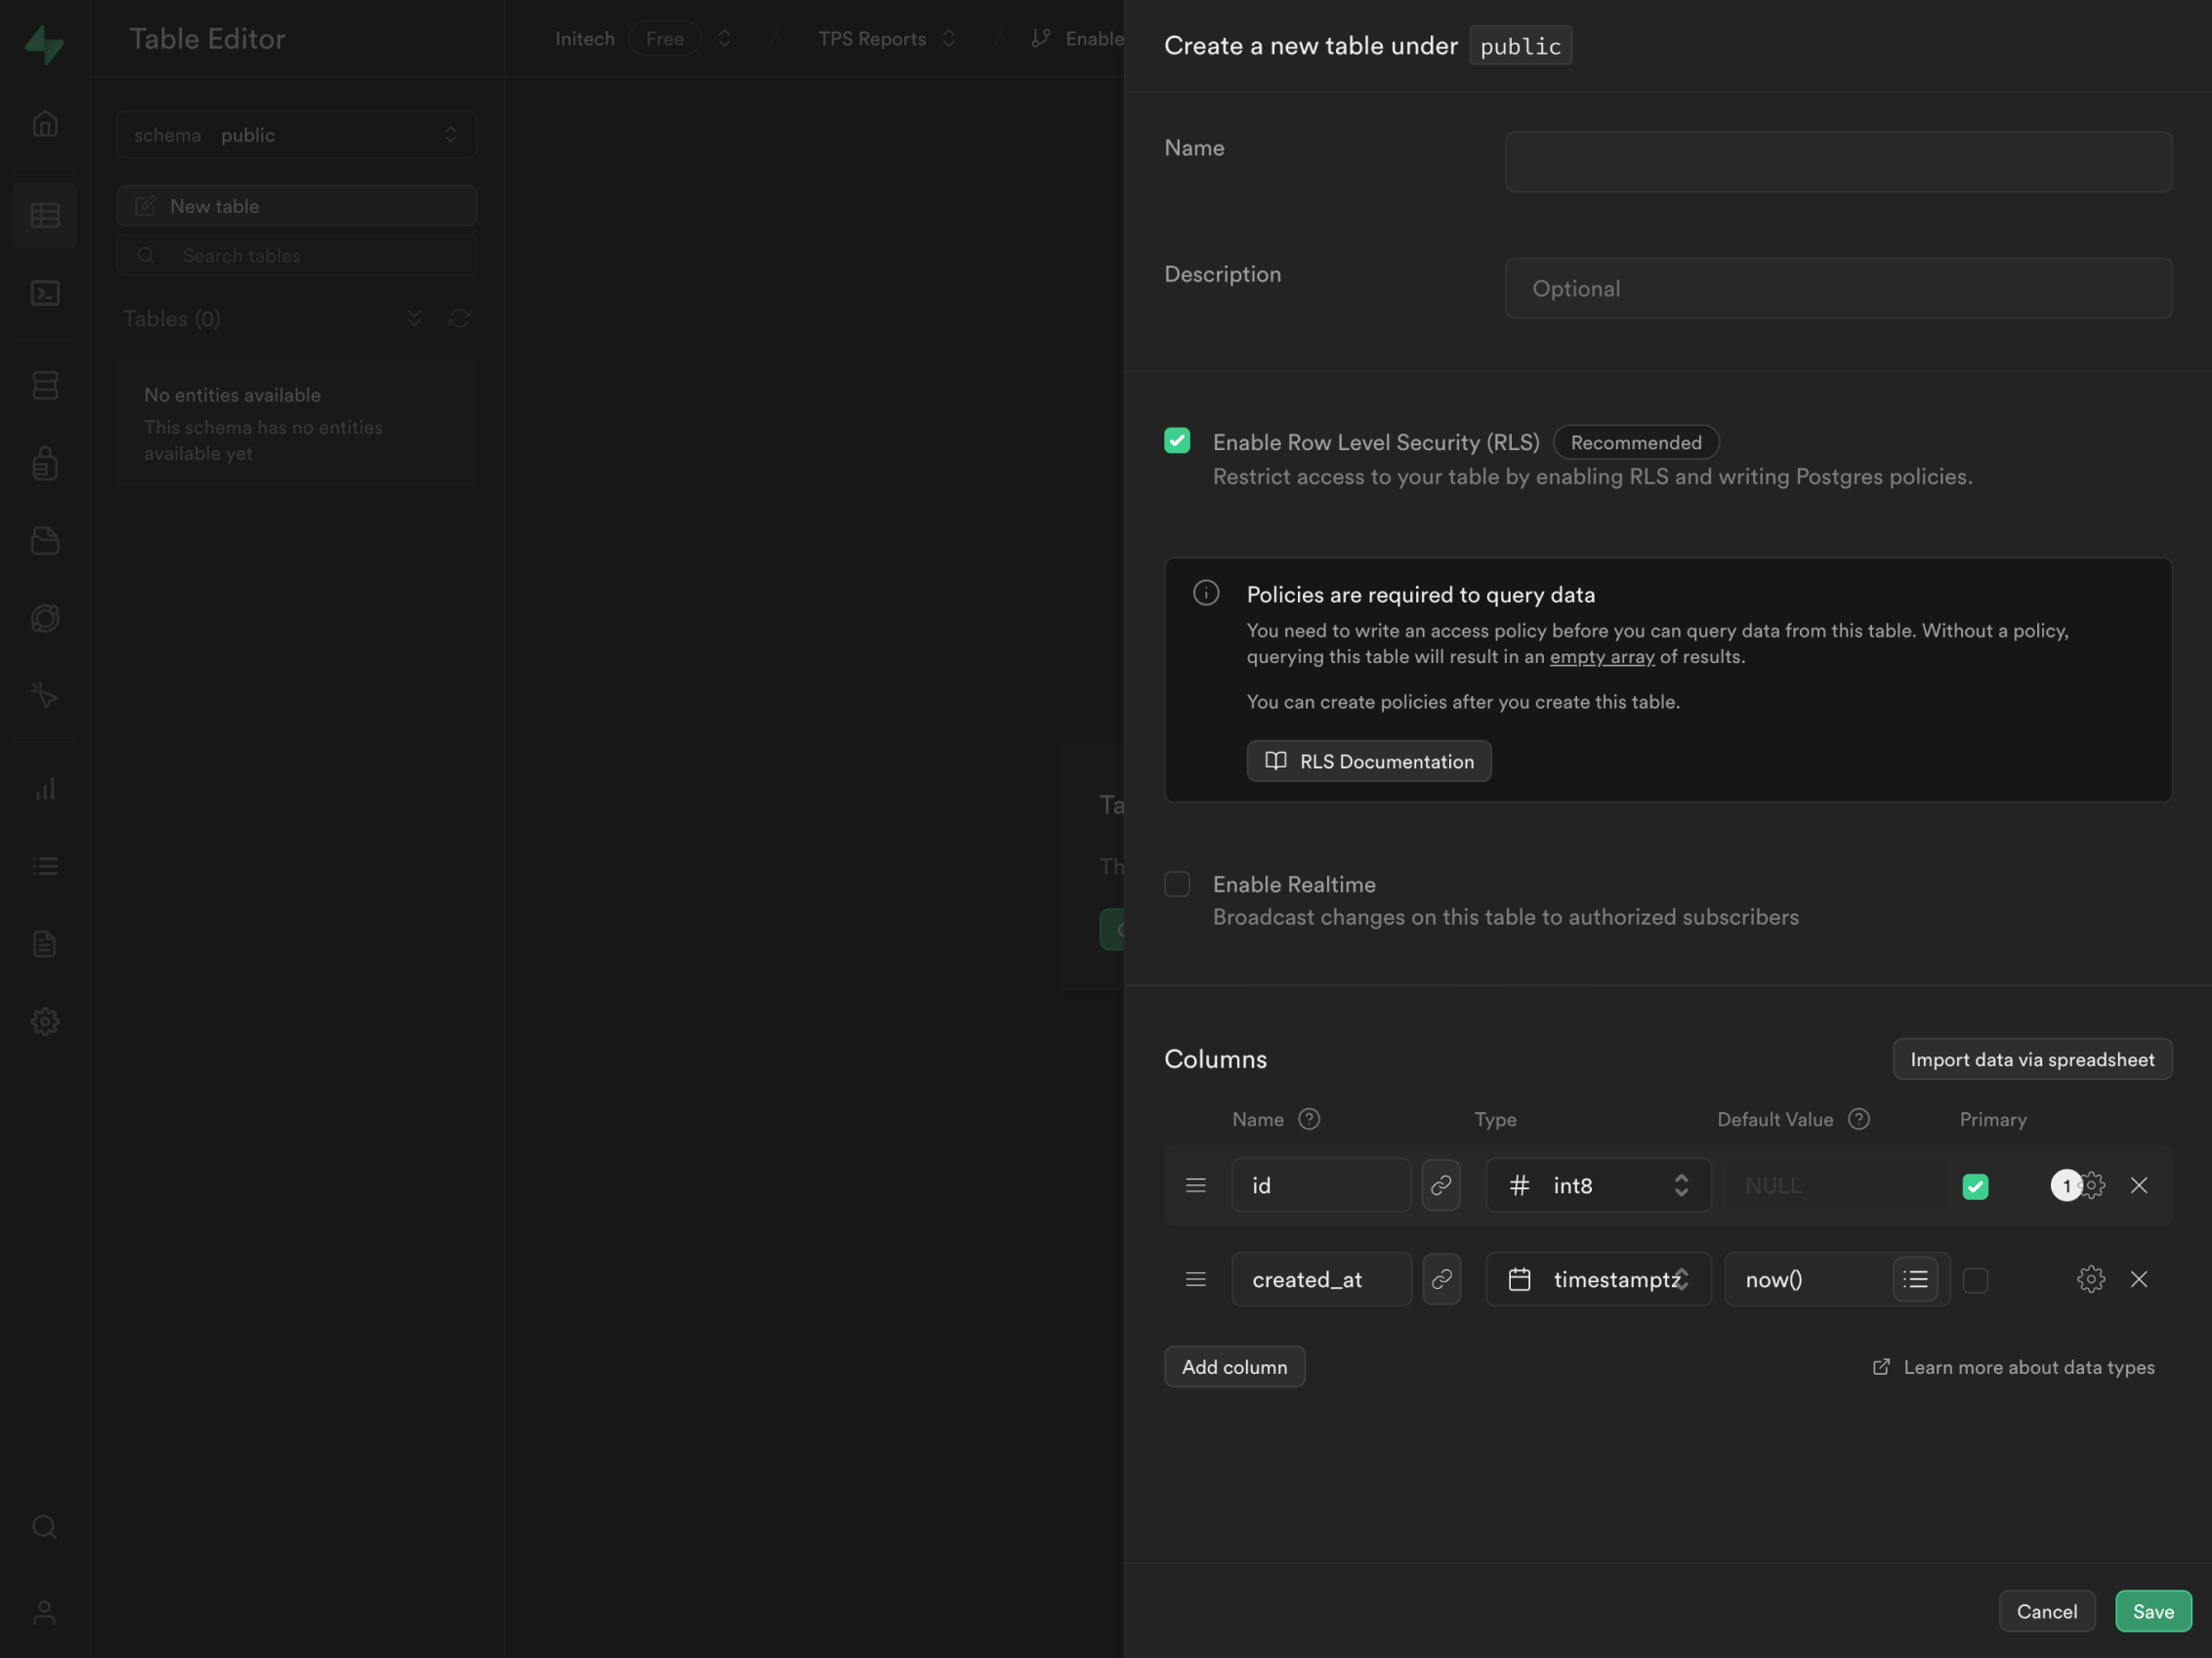
The database is now set up.
Step 2: Connect the database to Appsmith
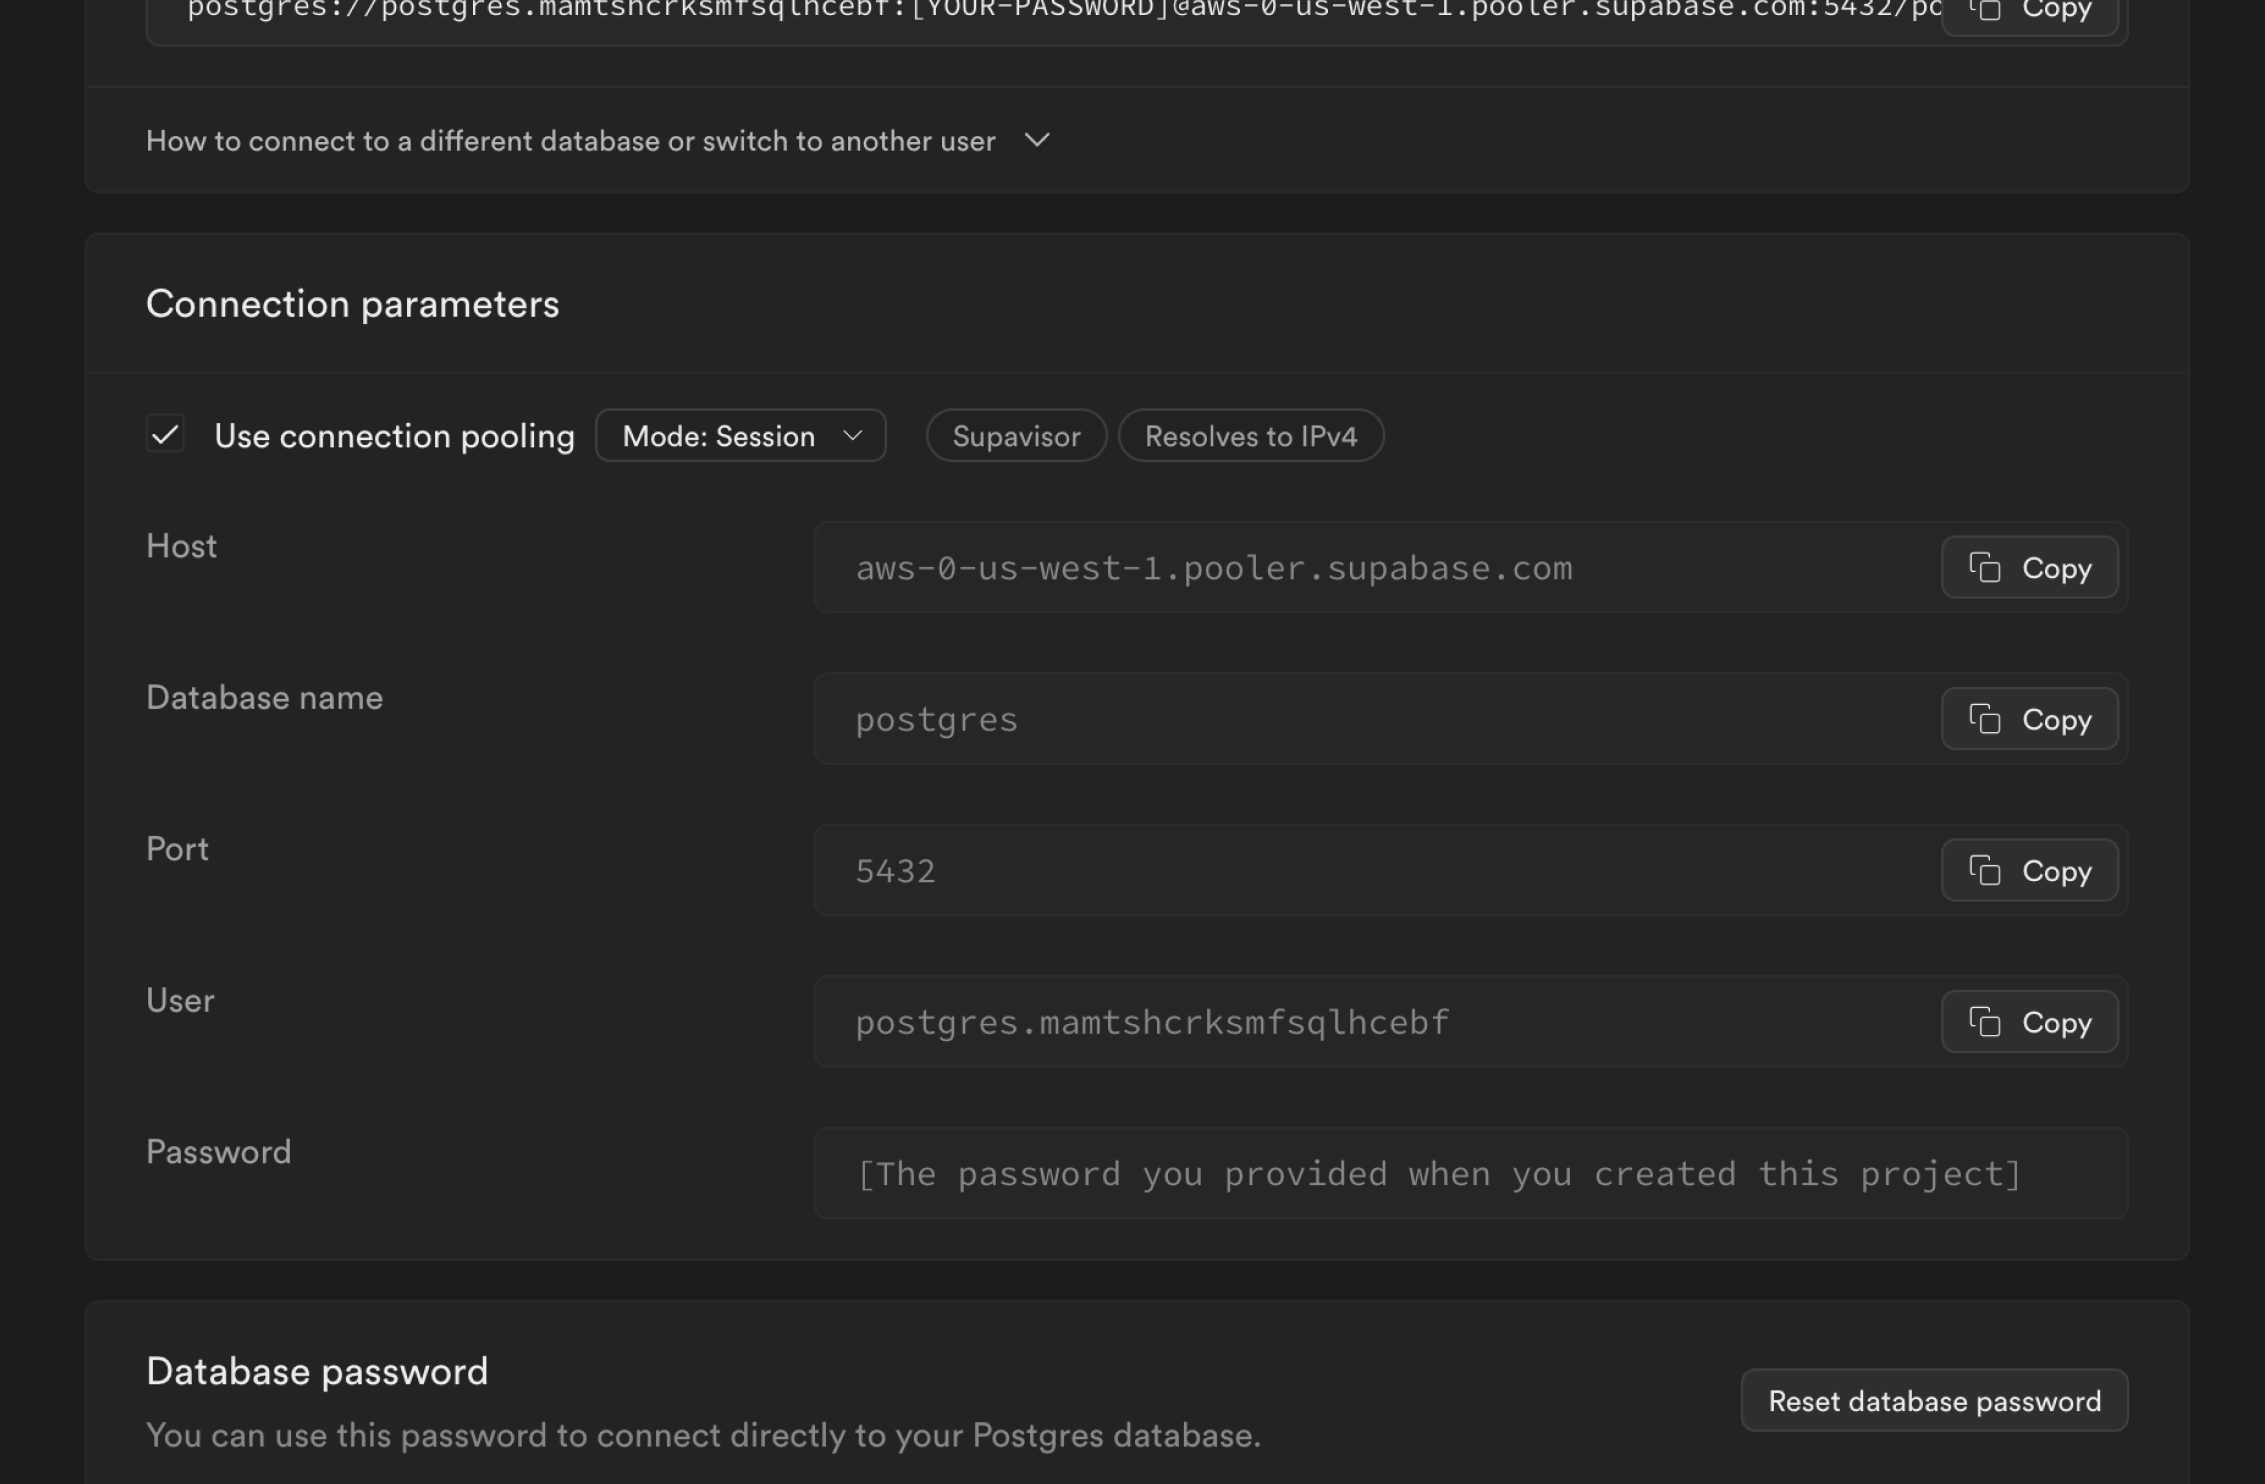
- Note down the database connection information under Project Settings in Supabase.
- On Appsmith, create a new application under the dashboard under your preferred organization.
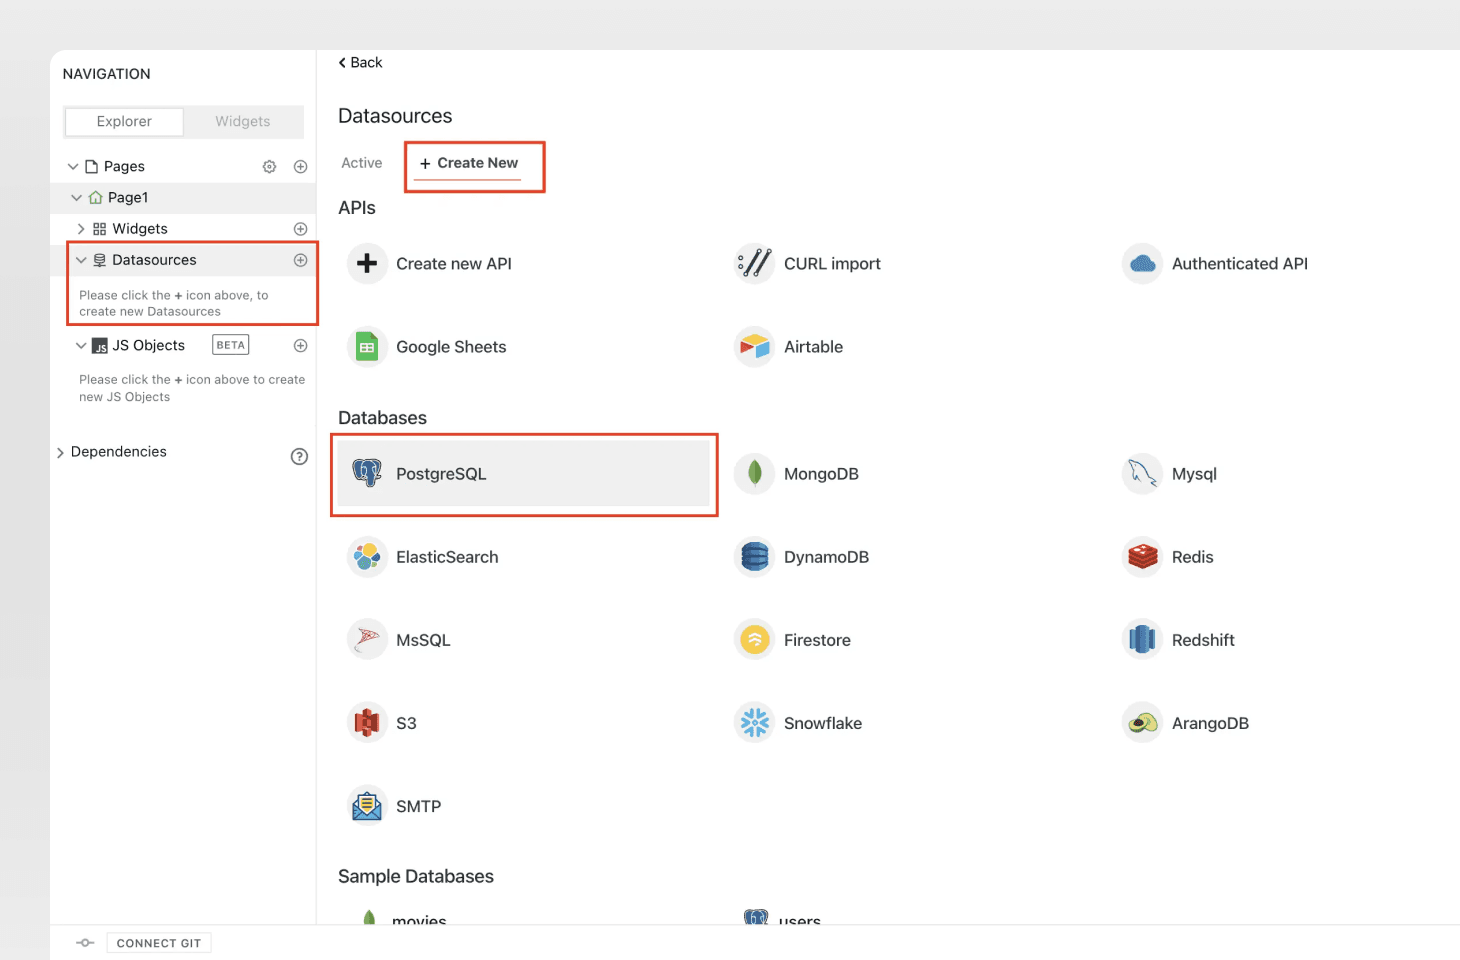
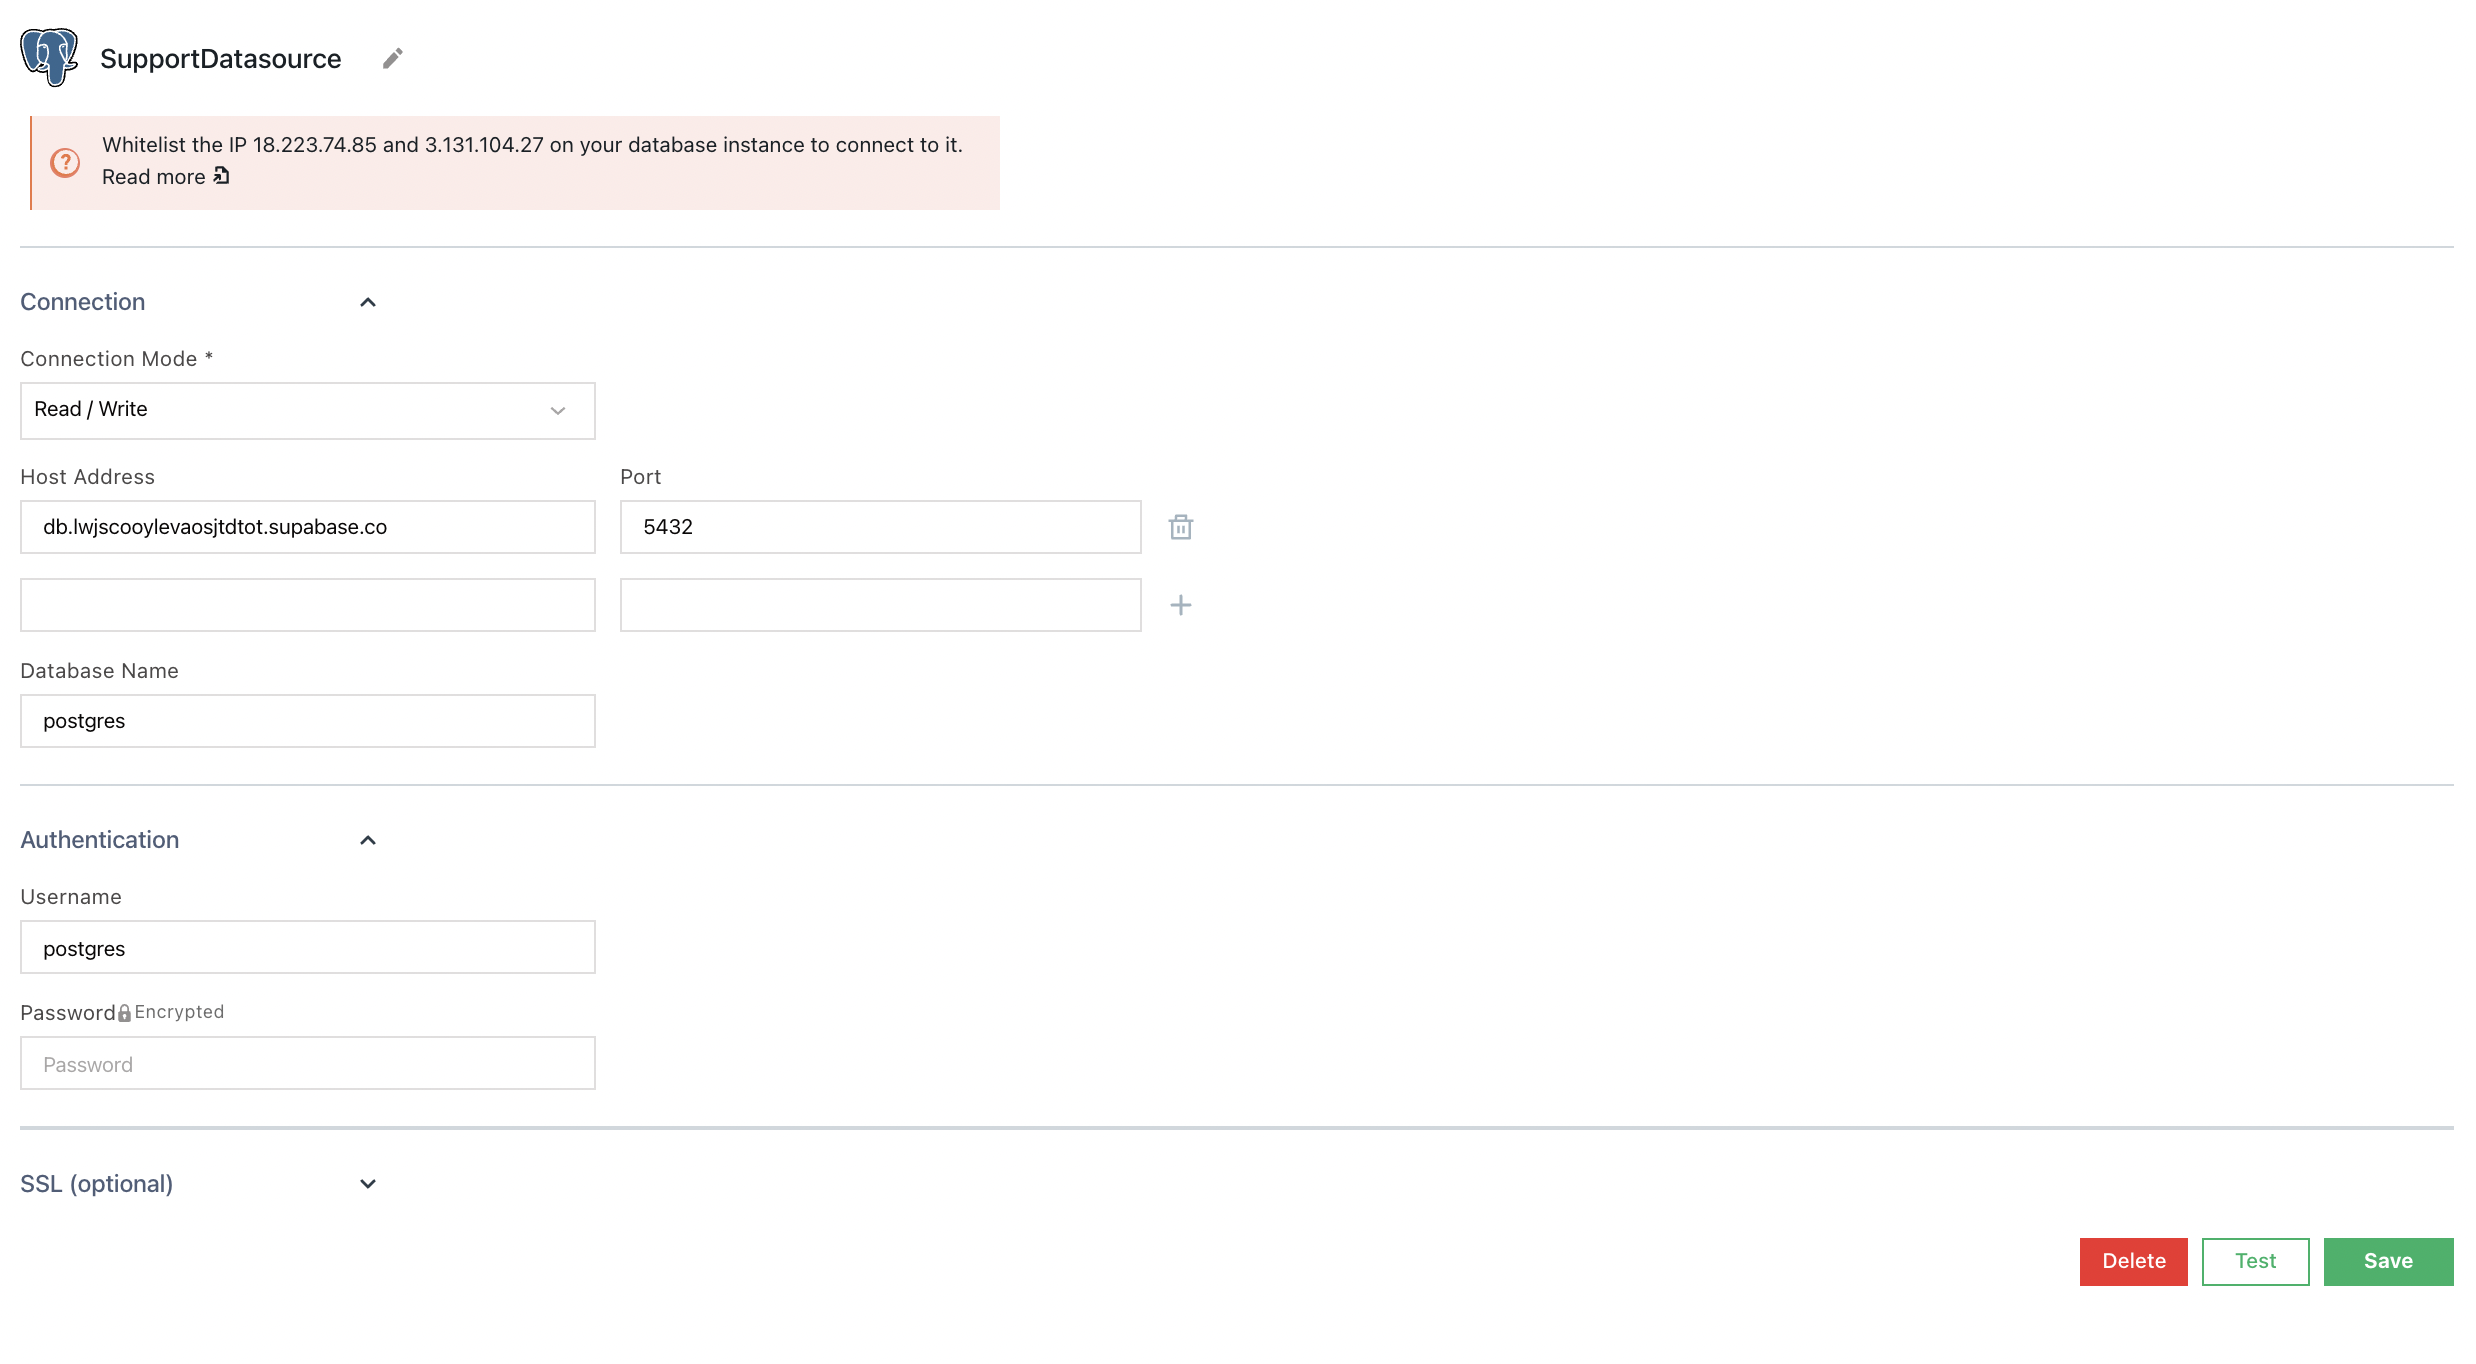
- Click on the
+icon next to Datasources on the left navigation bar under Page1 - Next, click on Create New tab and choose PostgreSQL datasource, you’ll see the following screenshot:

- Fill out the form to connect to your Supabase instance. Click Test to test connection and then Save to save the datasource
Step 3: Build UI on Appsmith
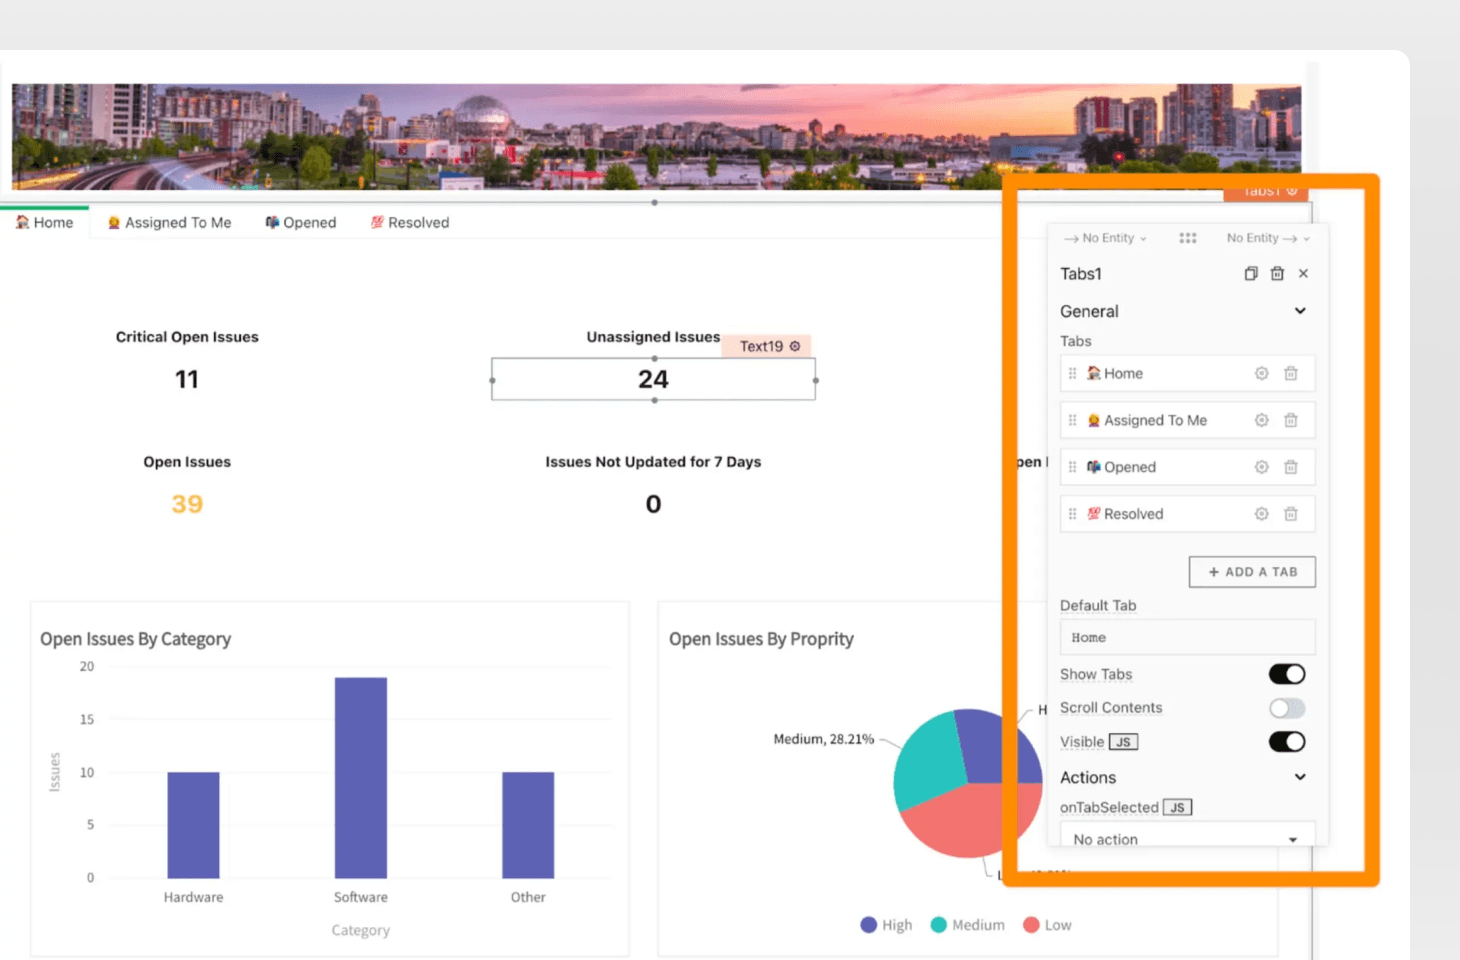
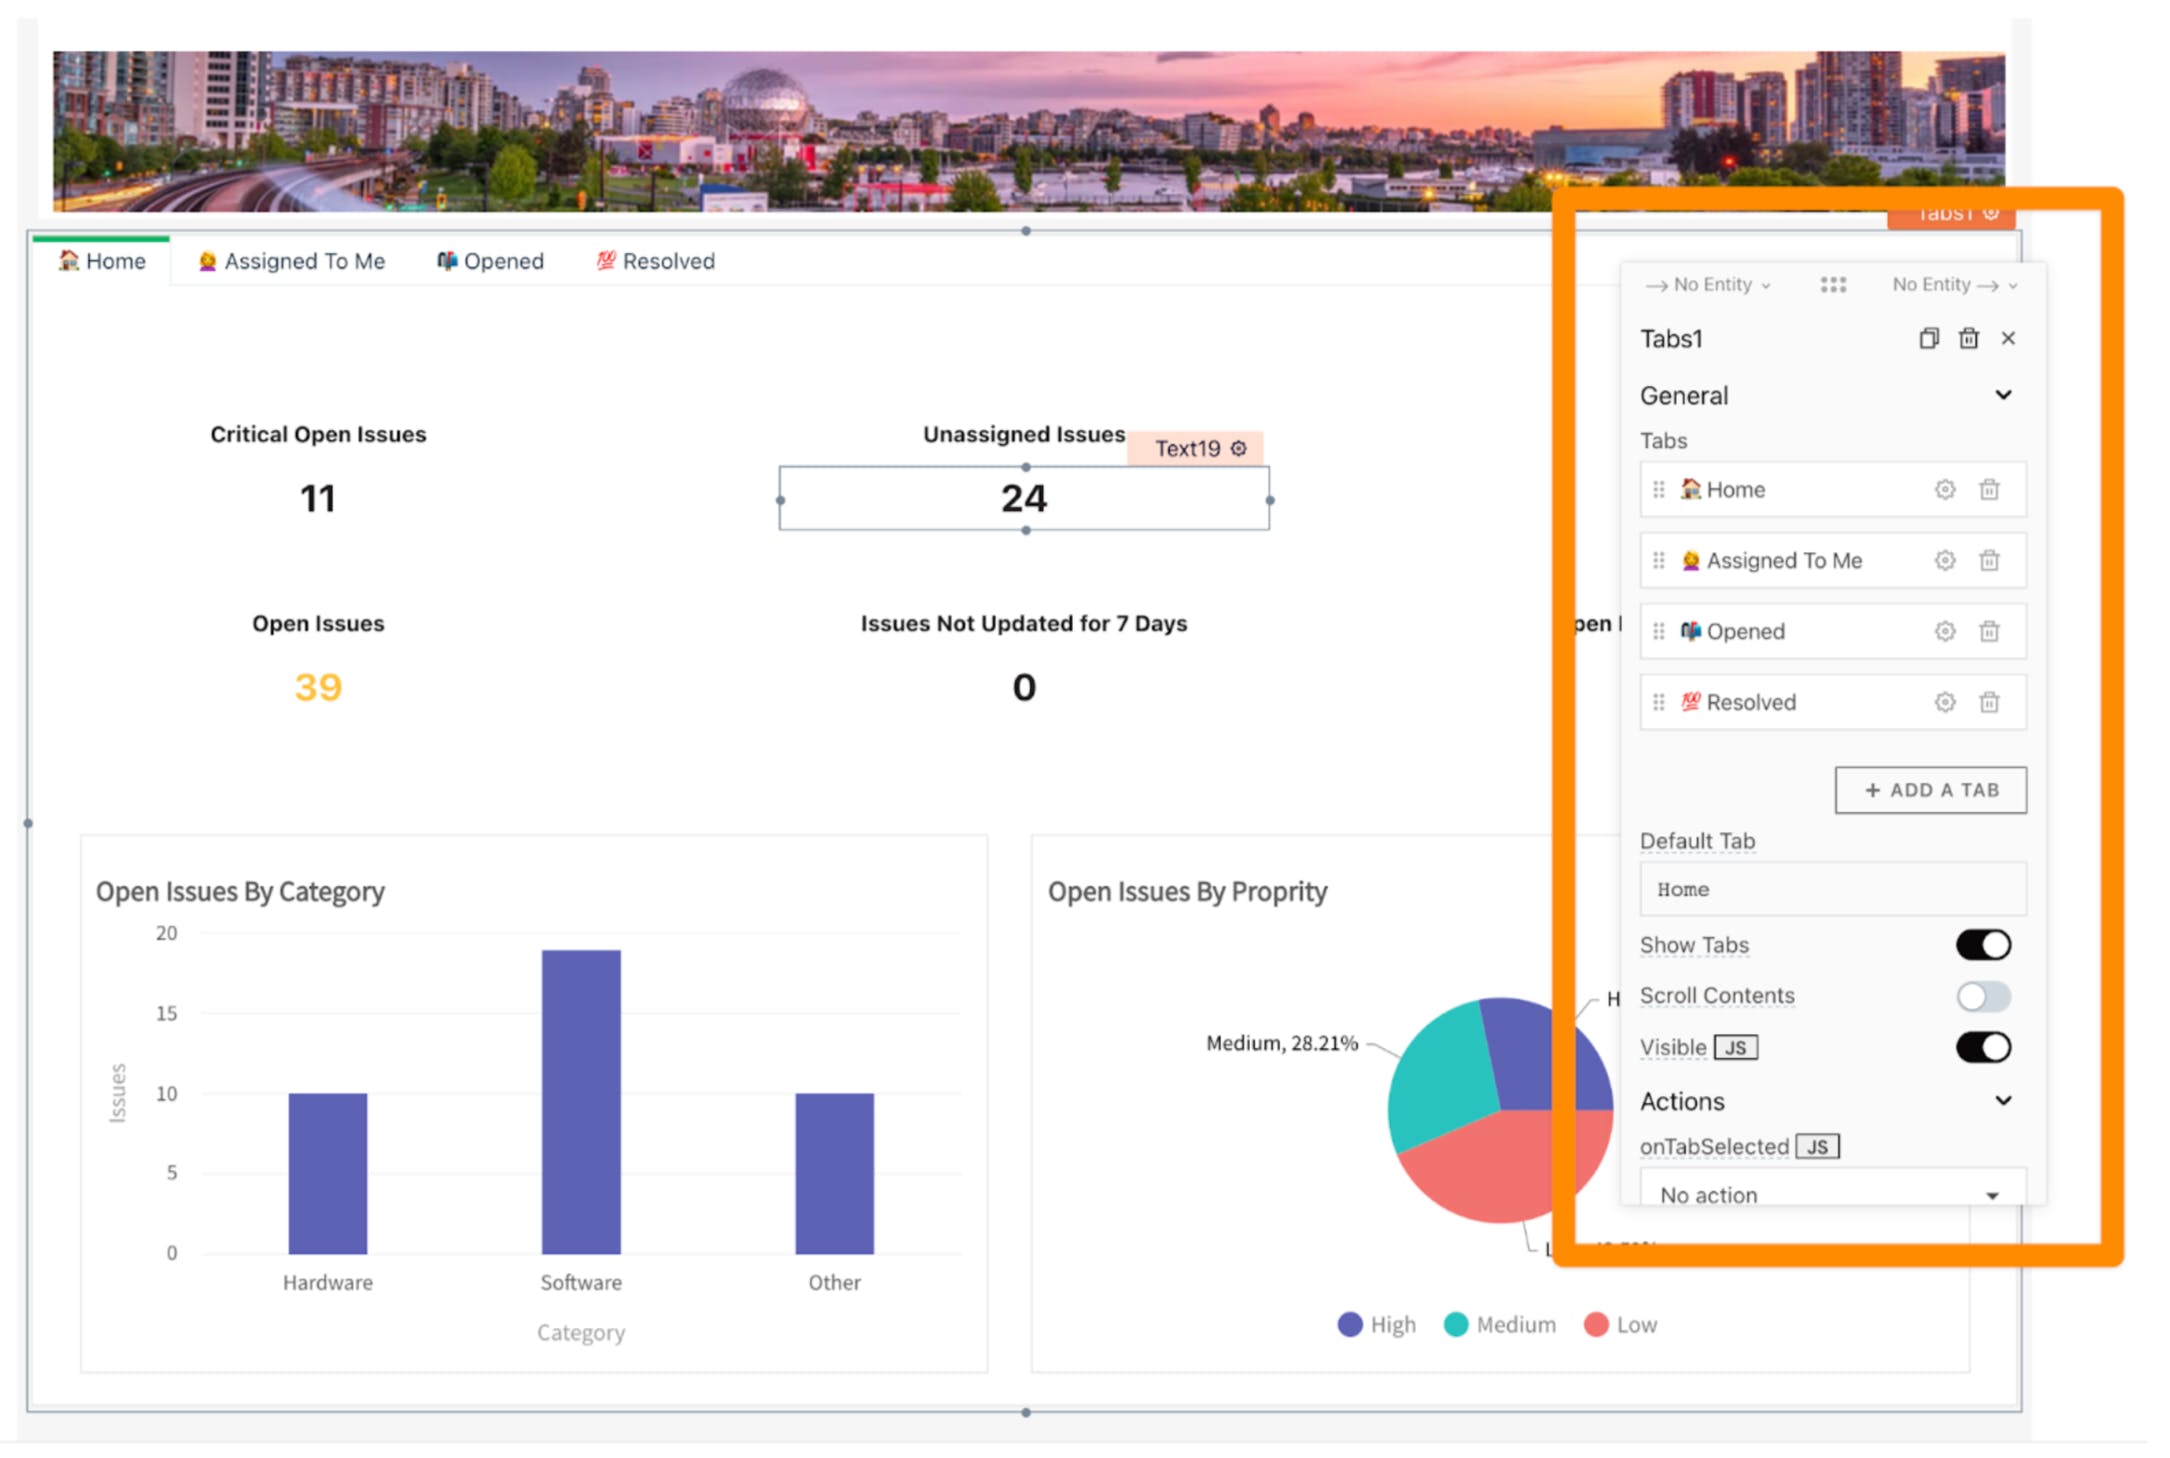
- Click on the + icon next to widgets and drag and drop a Tab widget. We can configure using the property pane by clicking on the cog icon on the top-right corner.
- As seen in the below screenshot, we have added four tabs to support the dashboard.
-
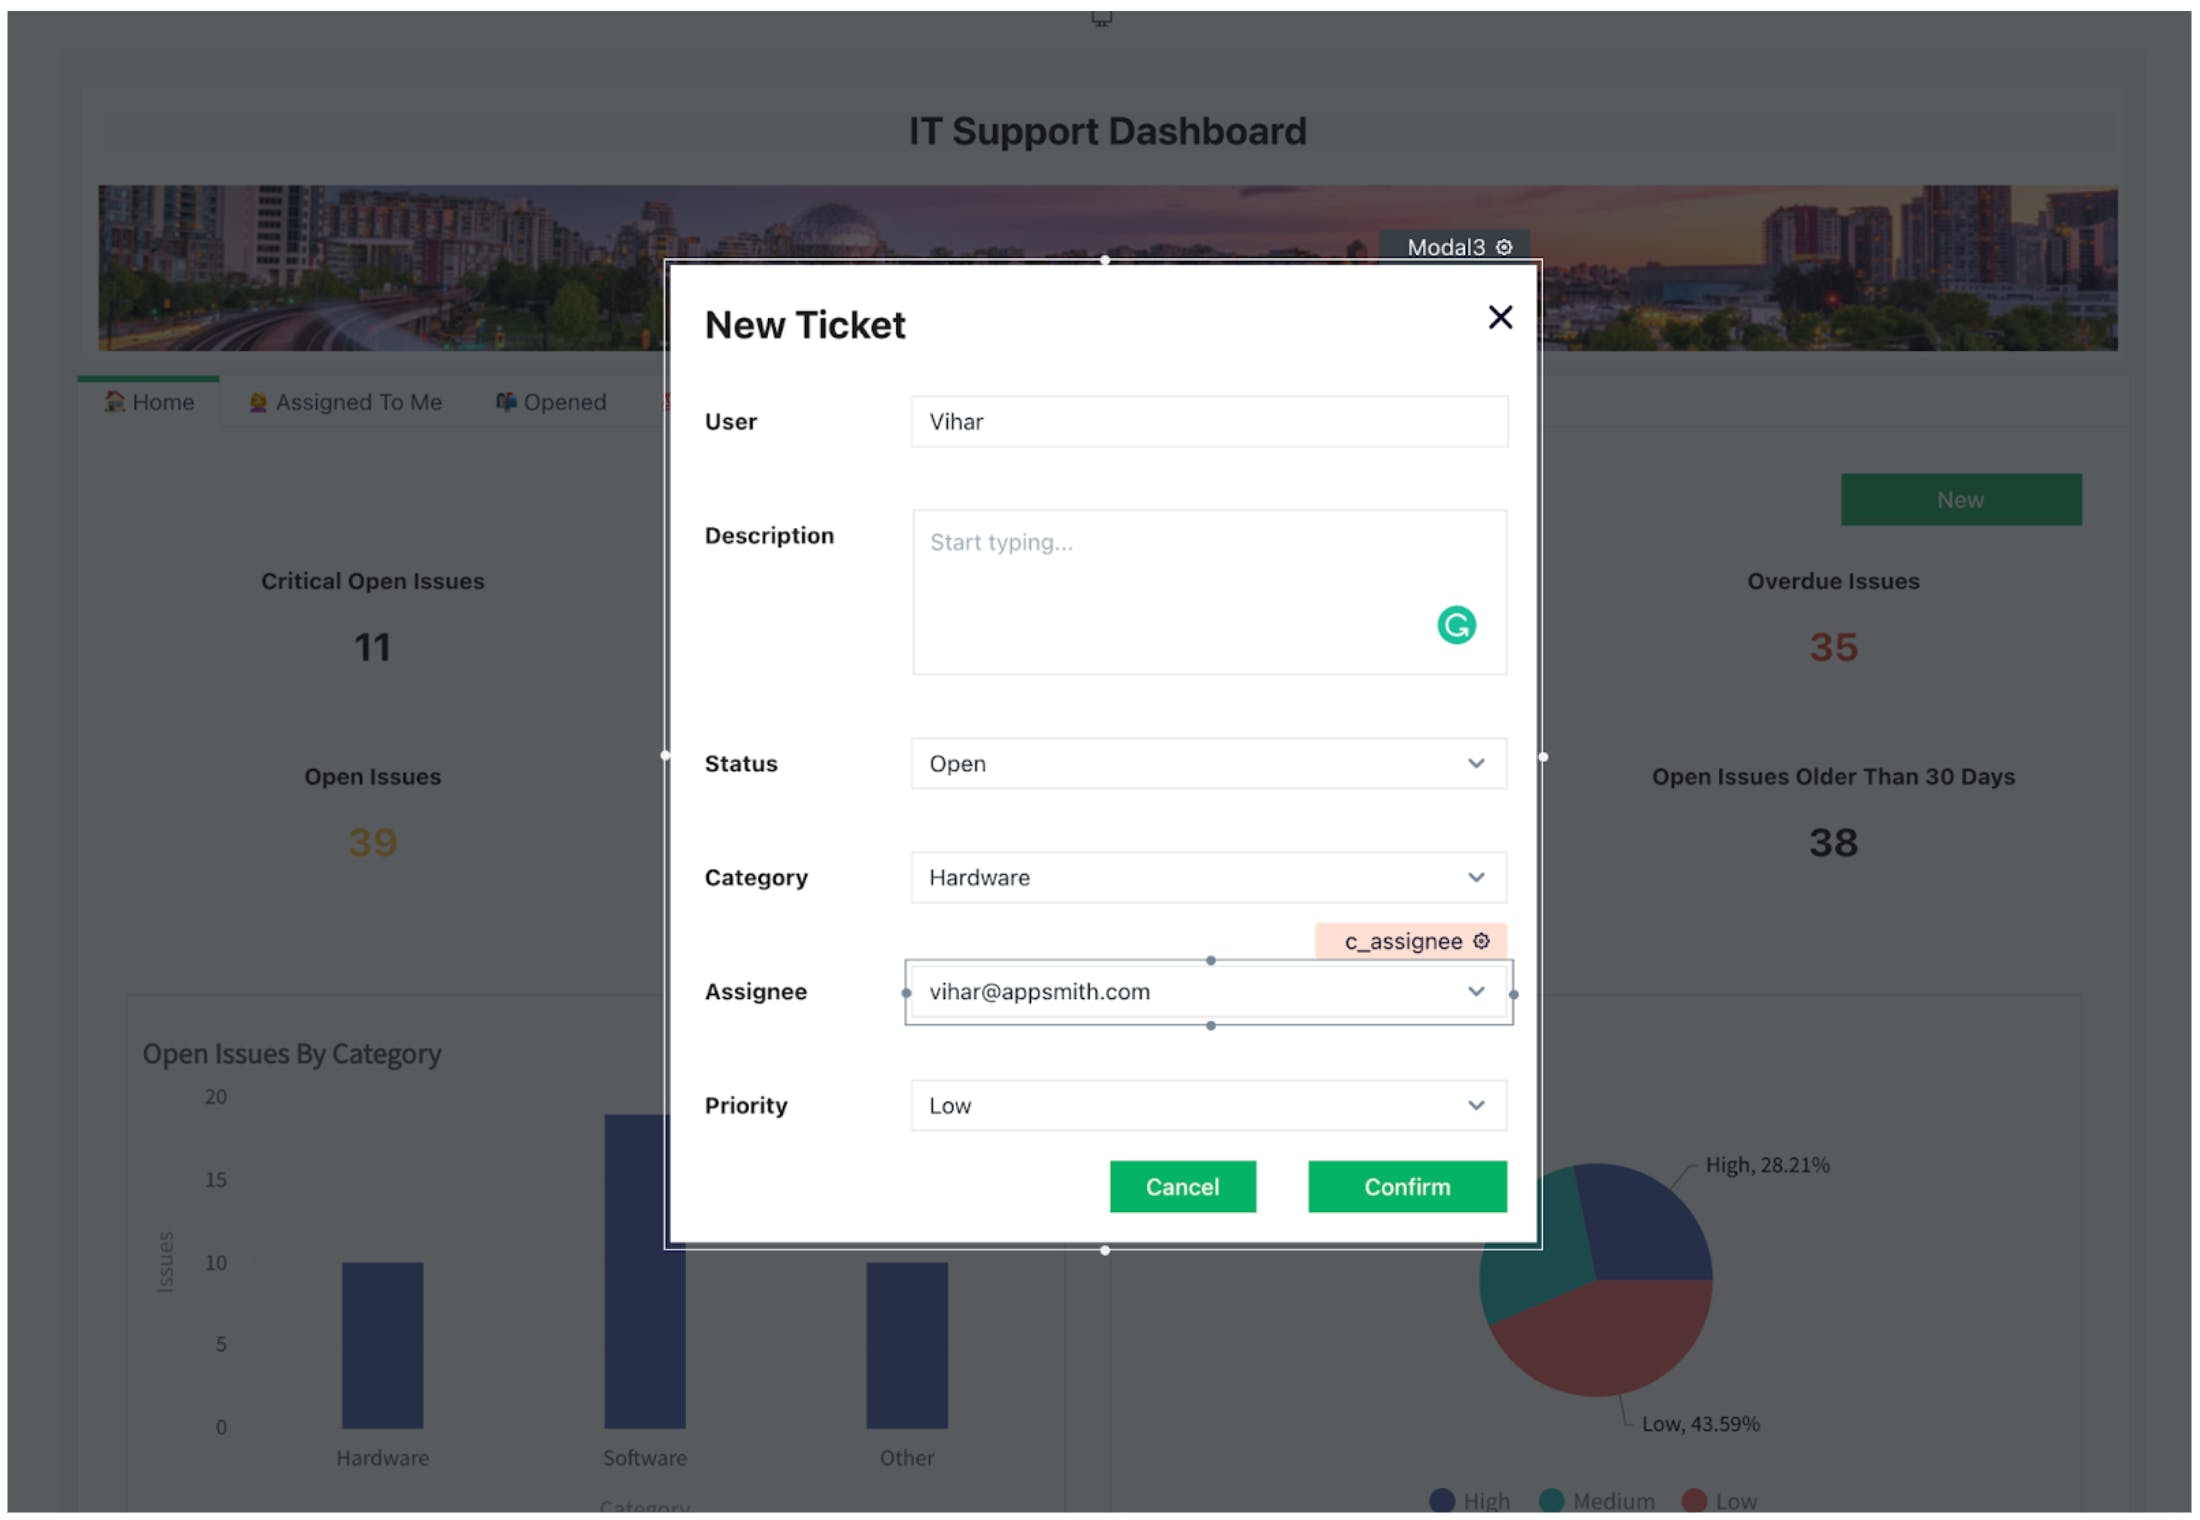
Add widgets to the Home tab to create the dashboard as shown in the screenshot below. For eg: Critical Open Issues is a Text widget and below it is an Input widget which we will bind later to display the number of open tickets.
-
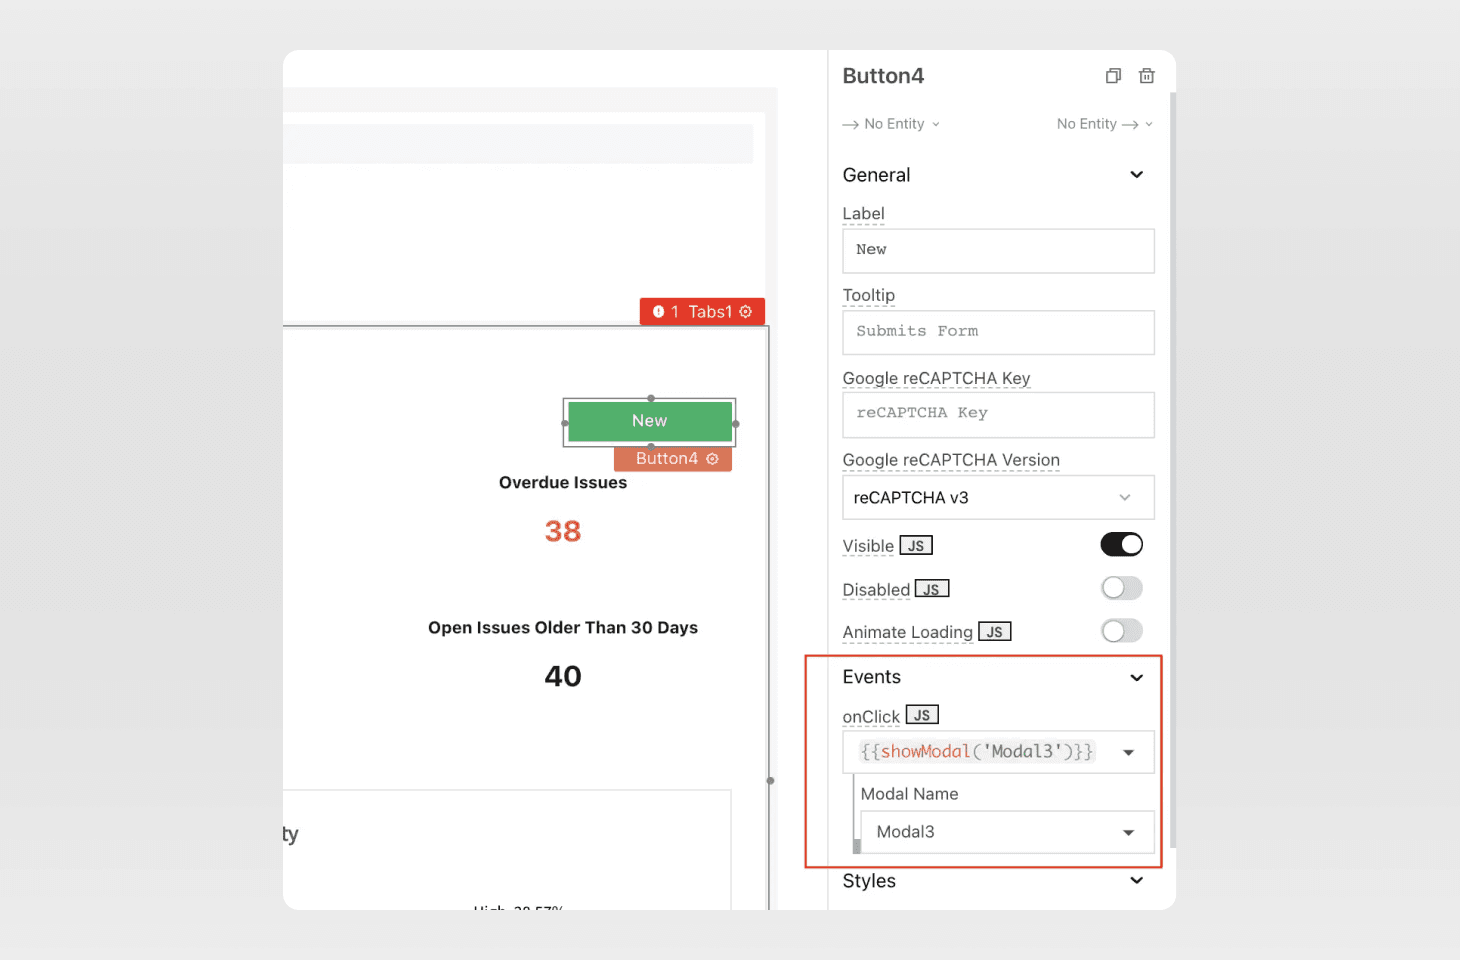
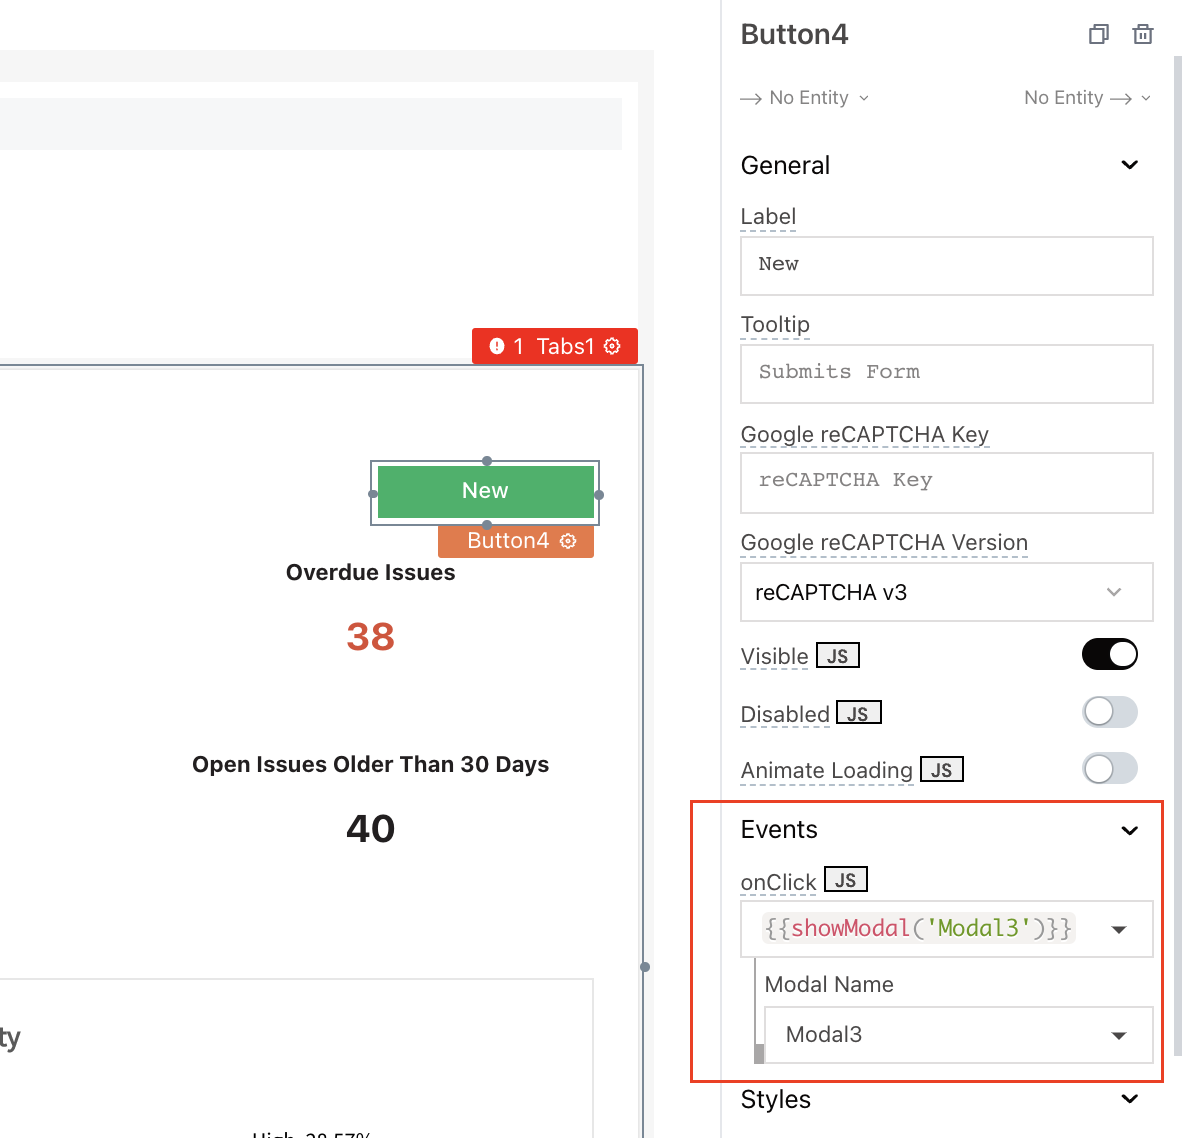
Set up the New button to open a modal which will have a form to raise a new ticket.
- In the modal widget, add a few widgets to accept input when creating a new ticket. Please refer to the screenshot below.
Step 4: Writing Queries in Appsmith and binding data to widgets
- Click on the + icon next to Datasources on the navigation bar and click New Query next to the Supabase connection here to create a new query.

- Rename the query to create_new_ticket under the query pane; here we can write SQL that can collect the data from the widgets using mustache templates.
_10INSERT INTO PUBLIC."tickets"("id","createdAt","user","updatedAt","description",_10"status","priority","category","assignedTo")_10VALUES('{{appsmith.store.ticket.id}}','{{moment().format('yyyy-mm-ddHH:MM:ss')}}','{{c_user.text}}',_10'{{moment().format('yyyy-mm-ddHH:MM:ss')}}','{{c_description.text}}','{{c_status.selectedOptionValue}}',_10'{{c_property.selectedOptionValue}}',_10'{{c_category.selectedOptionValue}}','{{c_assignee.selectedOptionValue}}');
-
Click the Confirm button on the modal and under Events, set the onClick property to execute the create_new_ticket query.
-
Create a second query named get_tickets that will list all the tickets.
_10SELECT * FROM public."tickets";
- Drag and drop a table widget under the Assigned To Me tab. Open the property pane and add the following snippet under Table Data to bind the query results.
_10{_10 {_10 get_tickets.data.filter(_10 (t) => t.assignedTo === 'confidence@appsmith.com' && t.status !== 'closed'_10 )_10 }_10}
- Drag and drop a table widget under the Resolved tab. Open the property pane and add the following snippet under Table Data to bind the query results.
_10{_10 {_10 get_tickets.data.filter((t) => t.status === 'open')_10 }_10}
- Drag and drop a table widget under the Closed tab. Open the property pane and add the following snippet under Table Data to bind the query results.
_10{_10 {_10 get_tickets.data.filter((t) => t.status === 'closed')_10 }_10}
Step 5: Creating Charts in Appsmith
- On the Home tab, click on the first Chart widget. Add Title Open Issues By Category. Change the Chart Type property to Column Chart.
- Update the x-axis and y-axis Labels under Axis on the property pane.
- Add the following code snippet under the Series Data property to bind the data to be displayed on the x and y axes.
_14[_14 {_14 "x": "Hardware",_14 "y": {{get_tickets.data.filter(t => t.status==='open' && t.category==='hardware').length}}_14 },_14 {_14 "x": "Software",_14 "y": {{get_tickets.data.filter(t => t.status==='open' && t.category==='software').length}}_14 },_14 {_14 "x": "Other",_14 "y": {{get_tickets.data.filter(t => t.status==='open' && t.category==='other').length}}_14 }_14]
- The second chart will be a pie chart. Add the title, axes labels as mentioned above,
- Add the following code snippet under the Series Data property of the pie chart.
_14[_14 {_14 "x": "High",_14 "y": {{get_tickets.data.filter(t => t.status==='open' && t.priority==='high').length}}_14 },_14 {_14 "x": "Medium",_14 "y": {{get_tickets.data.filter(t => t.status==='open' && t.priority==='medium').length}}_14 },_14 {_14 "x": "Low",_14 "y": {{get_tickets.data.filter(t => t.status==='open' && t.priority==='low').length}}_14 }_14]
Resources
- Appsmith official website.
- Appsmith GitHub.
- Appsmith documentation.
Details
Third-party integrations and docs are managed by Supabase partners.