
CloudFlare Workers
Overview
Using Supabase in Cloudflare Workers has always been a great way to interact with your data from the edge. Supabase-js communicates with your Supabase Postgres instance via HTTP using PostgREST, so you never need to worry about running out of database connections.
In this guide we'll walk you through a new addition to the Cloudflare Workers dashboard - the ability to authenticate directly with your Supabase account, and automatically inject your Supabase environment variables into your Worker code.
How To Enable Supabase Integration in Cloudflare Workers
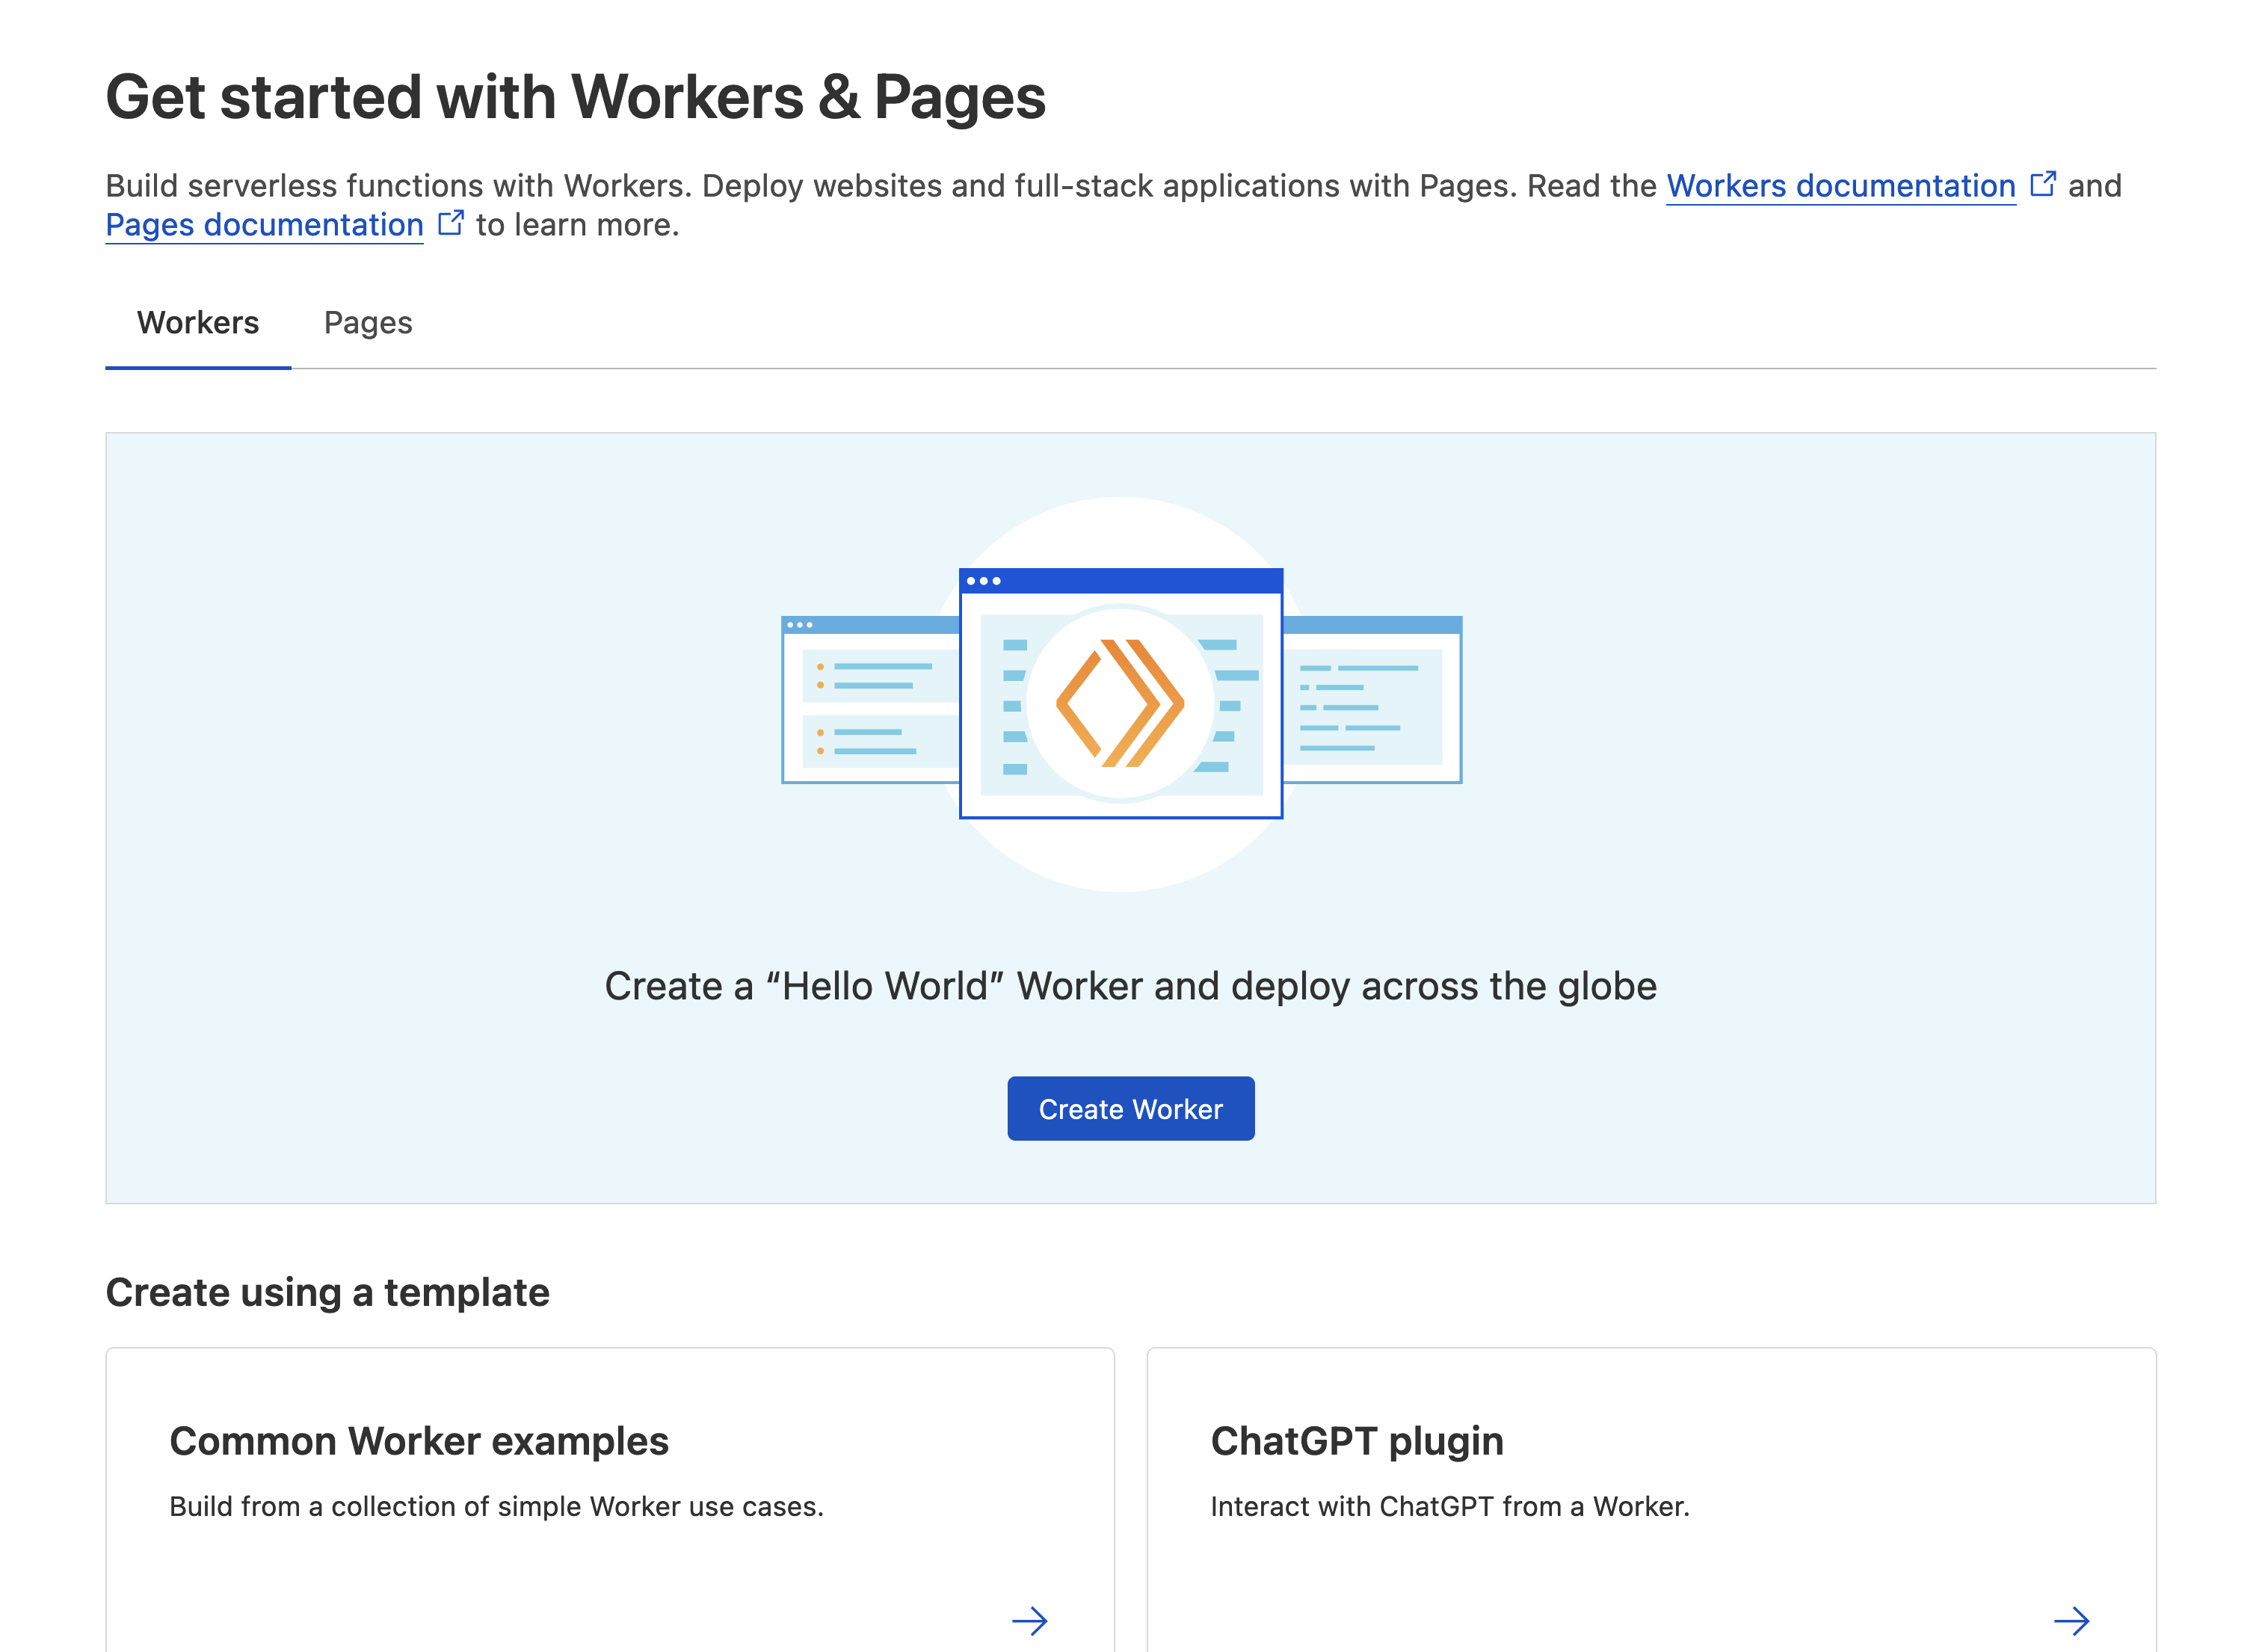
Start by heading to the Cloudflare Dashboard, go to the Workers & Pages tab and hit 'Create Application' followed by 'Create Worker'.
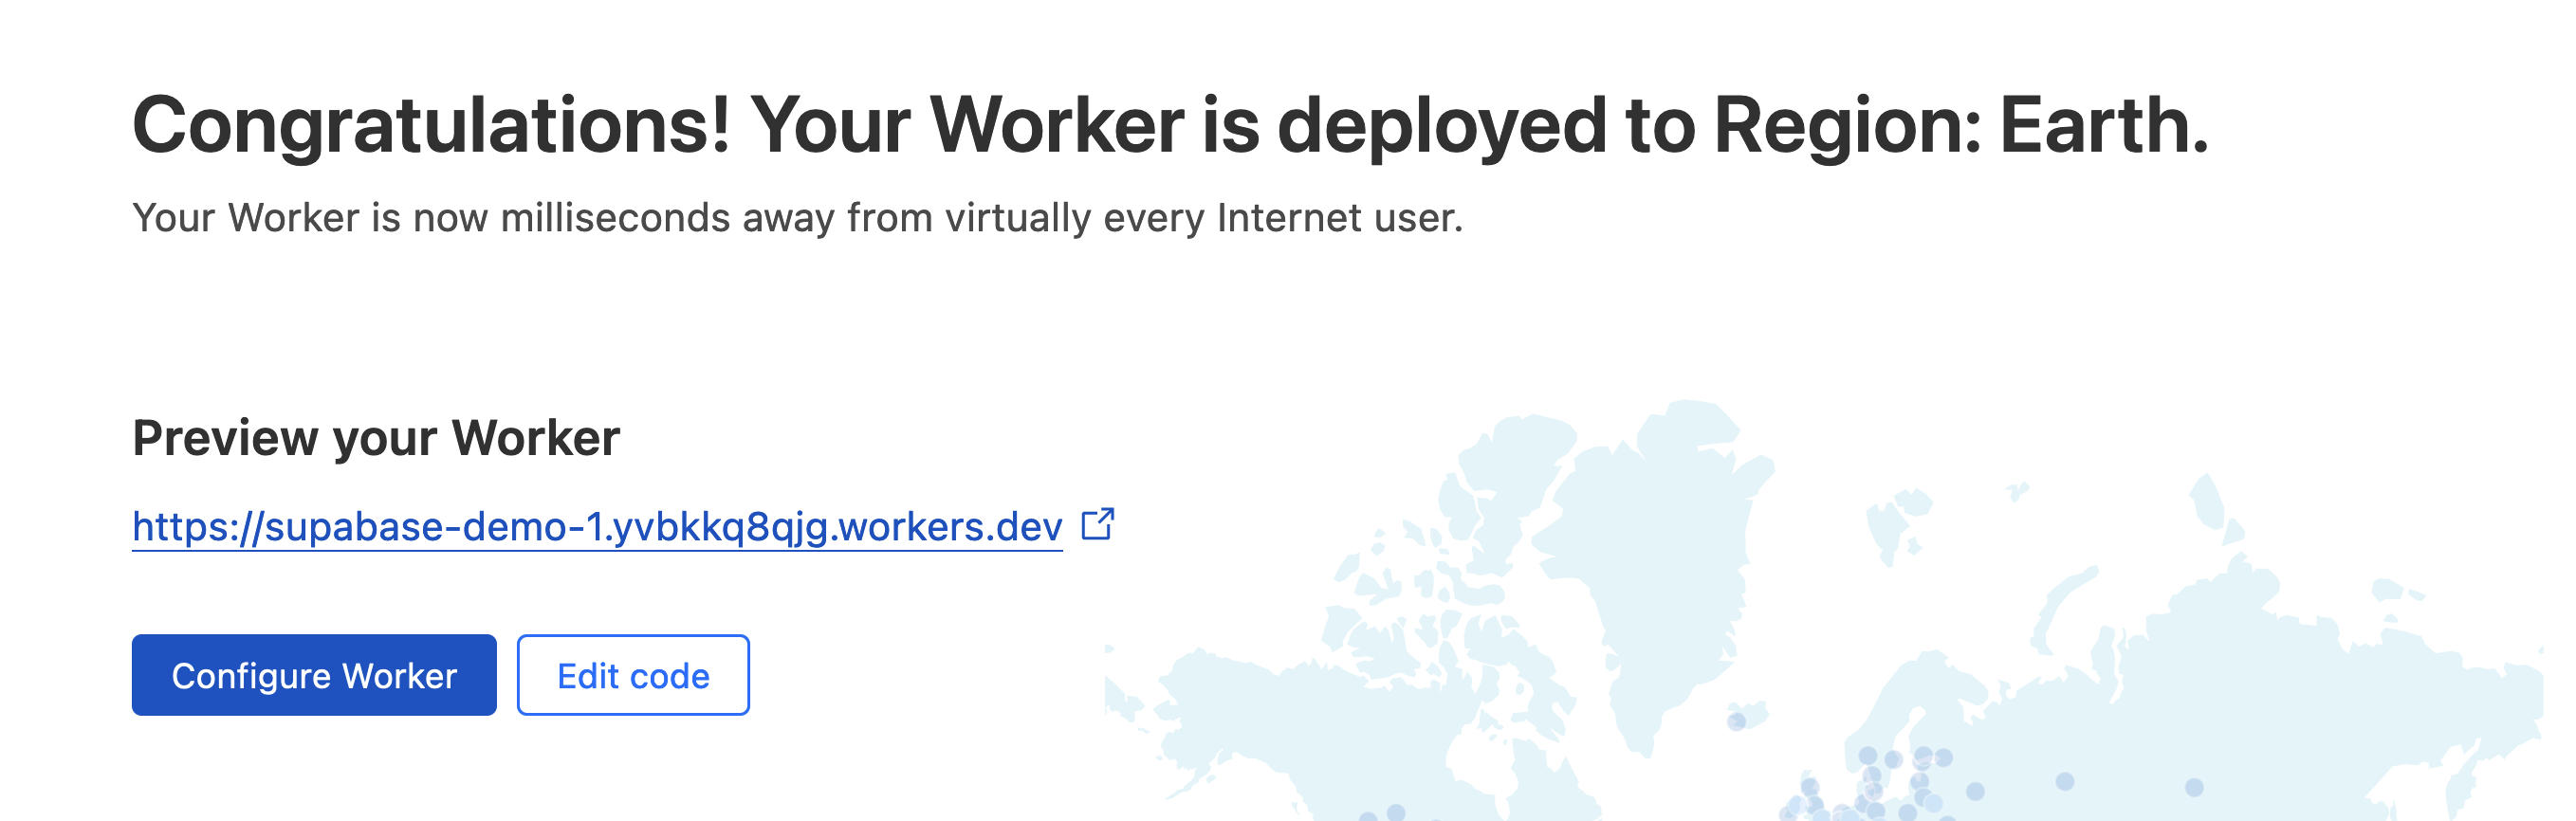
Deploy the Hello World example Worker. Once it's deployed hit 'Configure Worker'.
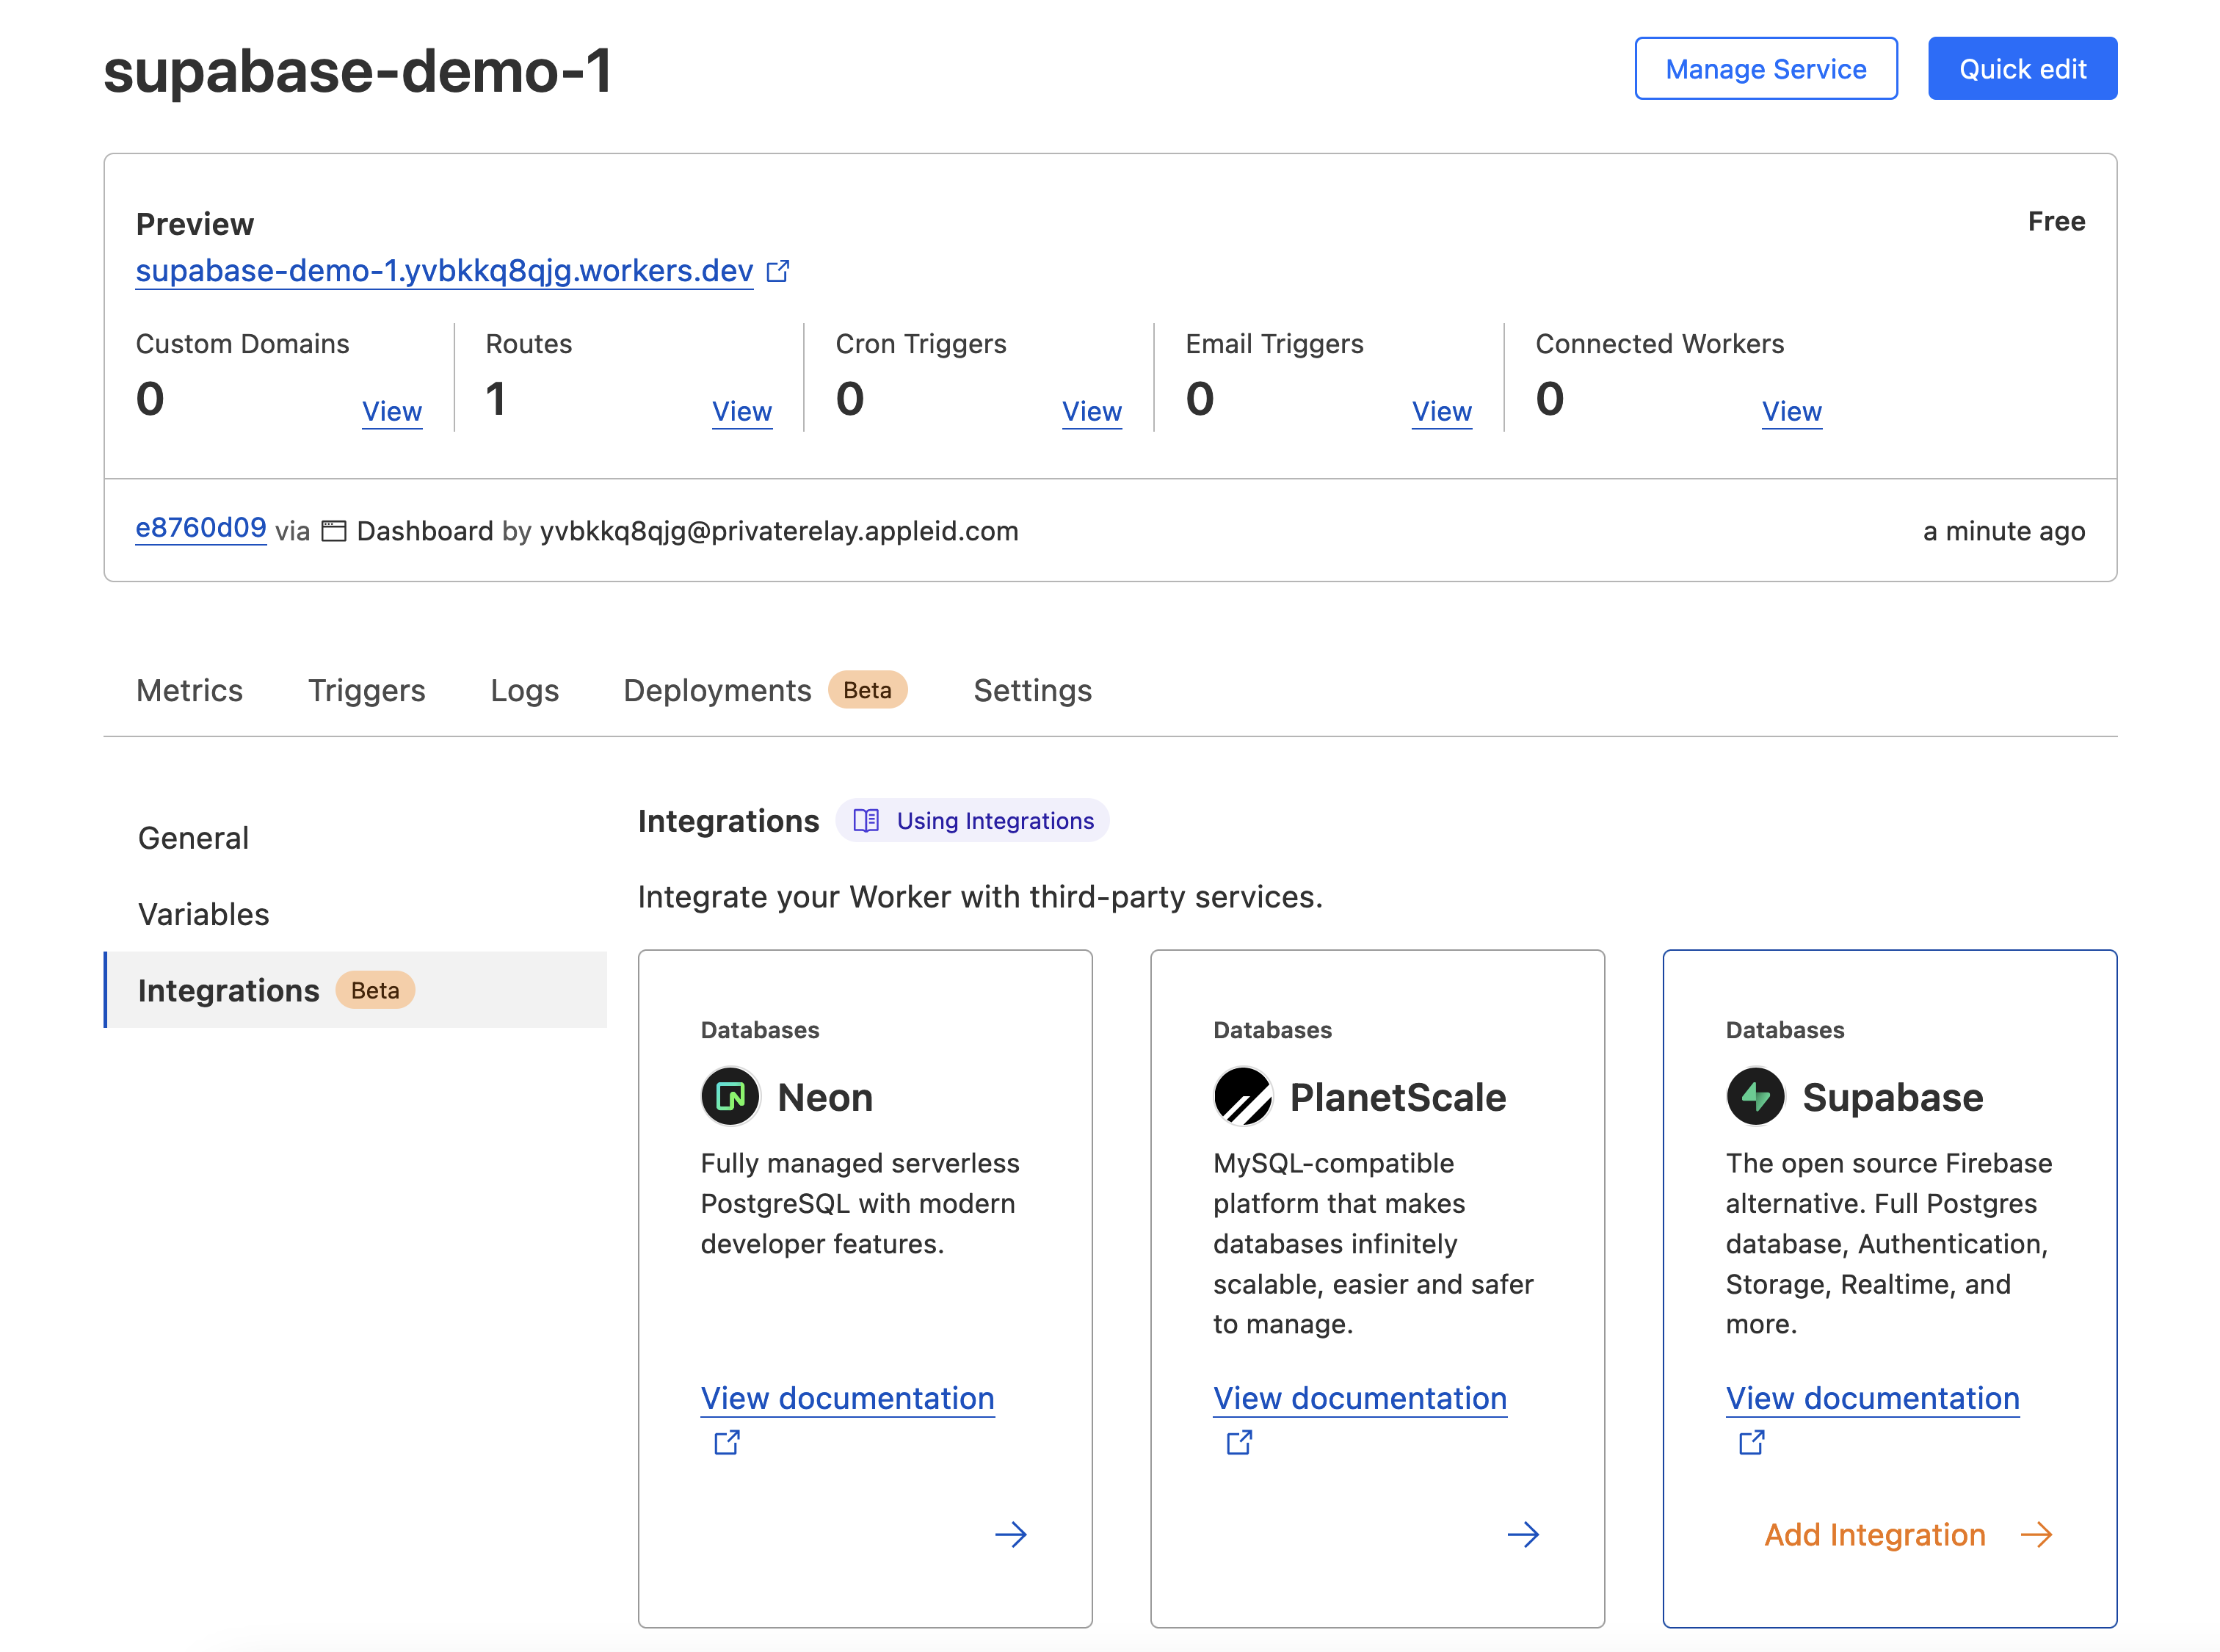
On the configuration page select the Settings tab, followed by the Integrations option.
You should now see the database integration options. On the Supabase card, click 'Add Integration'
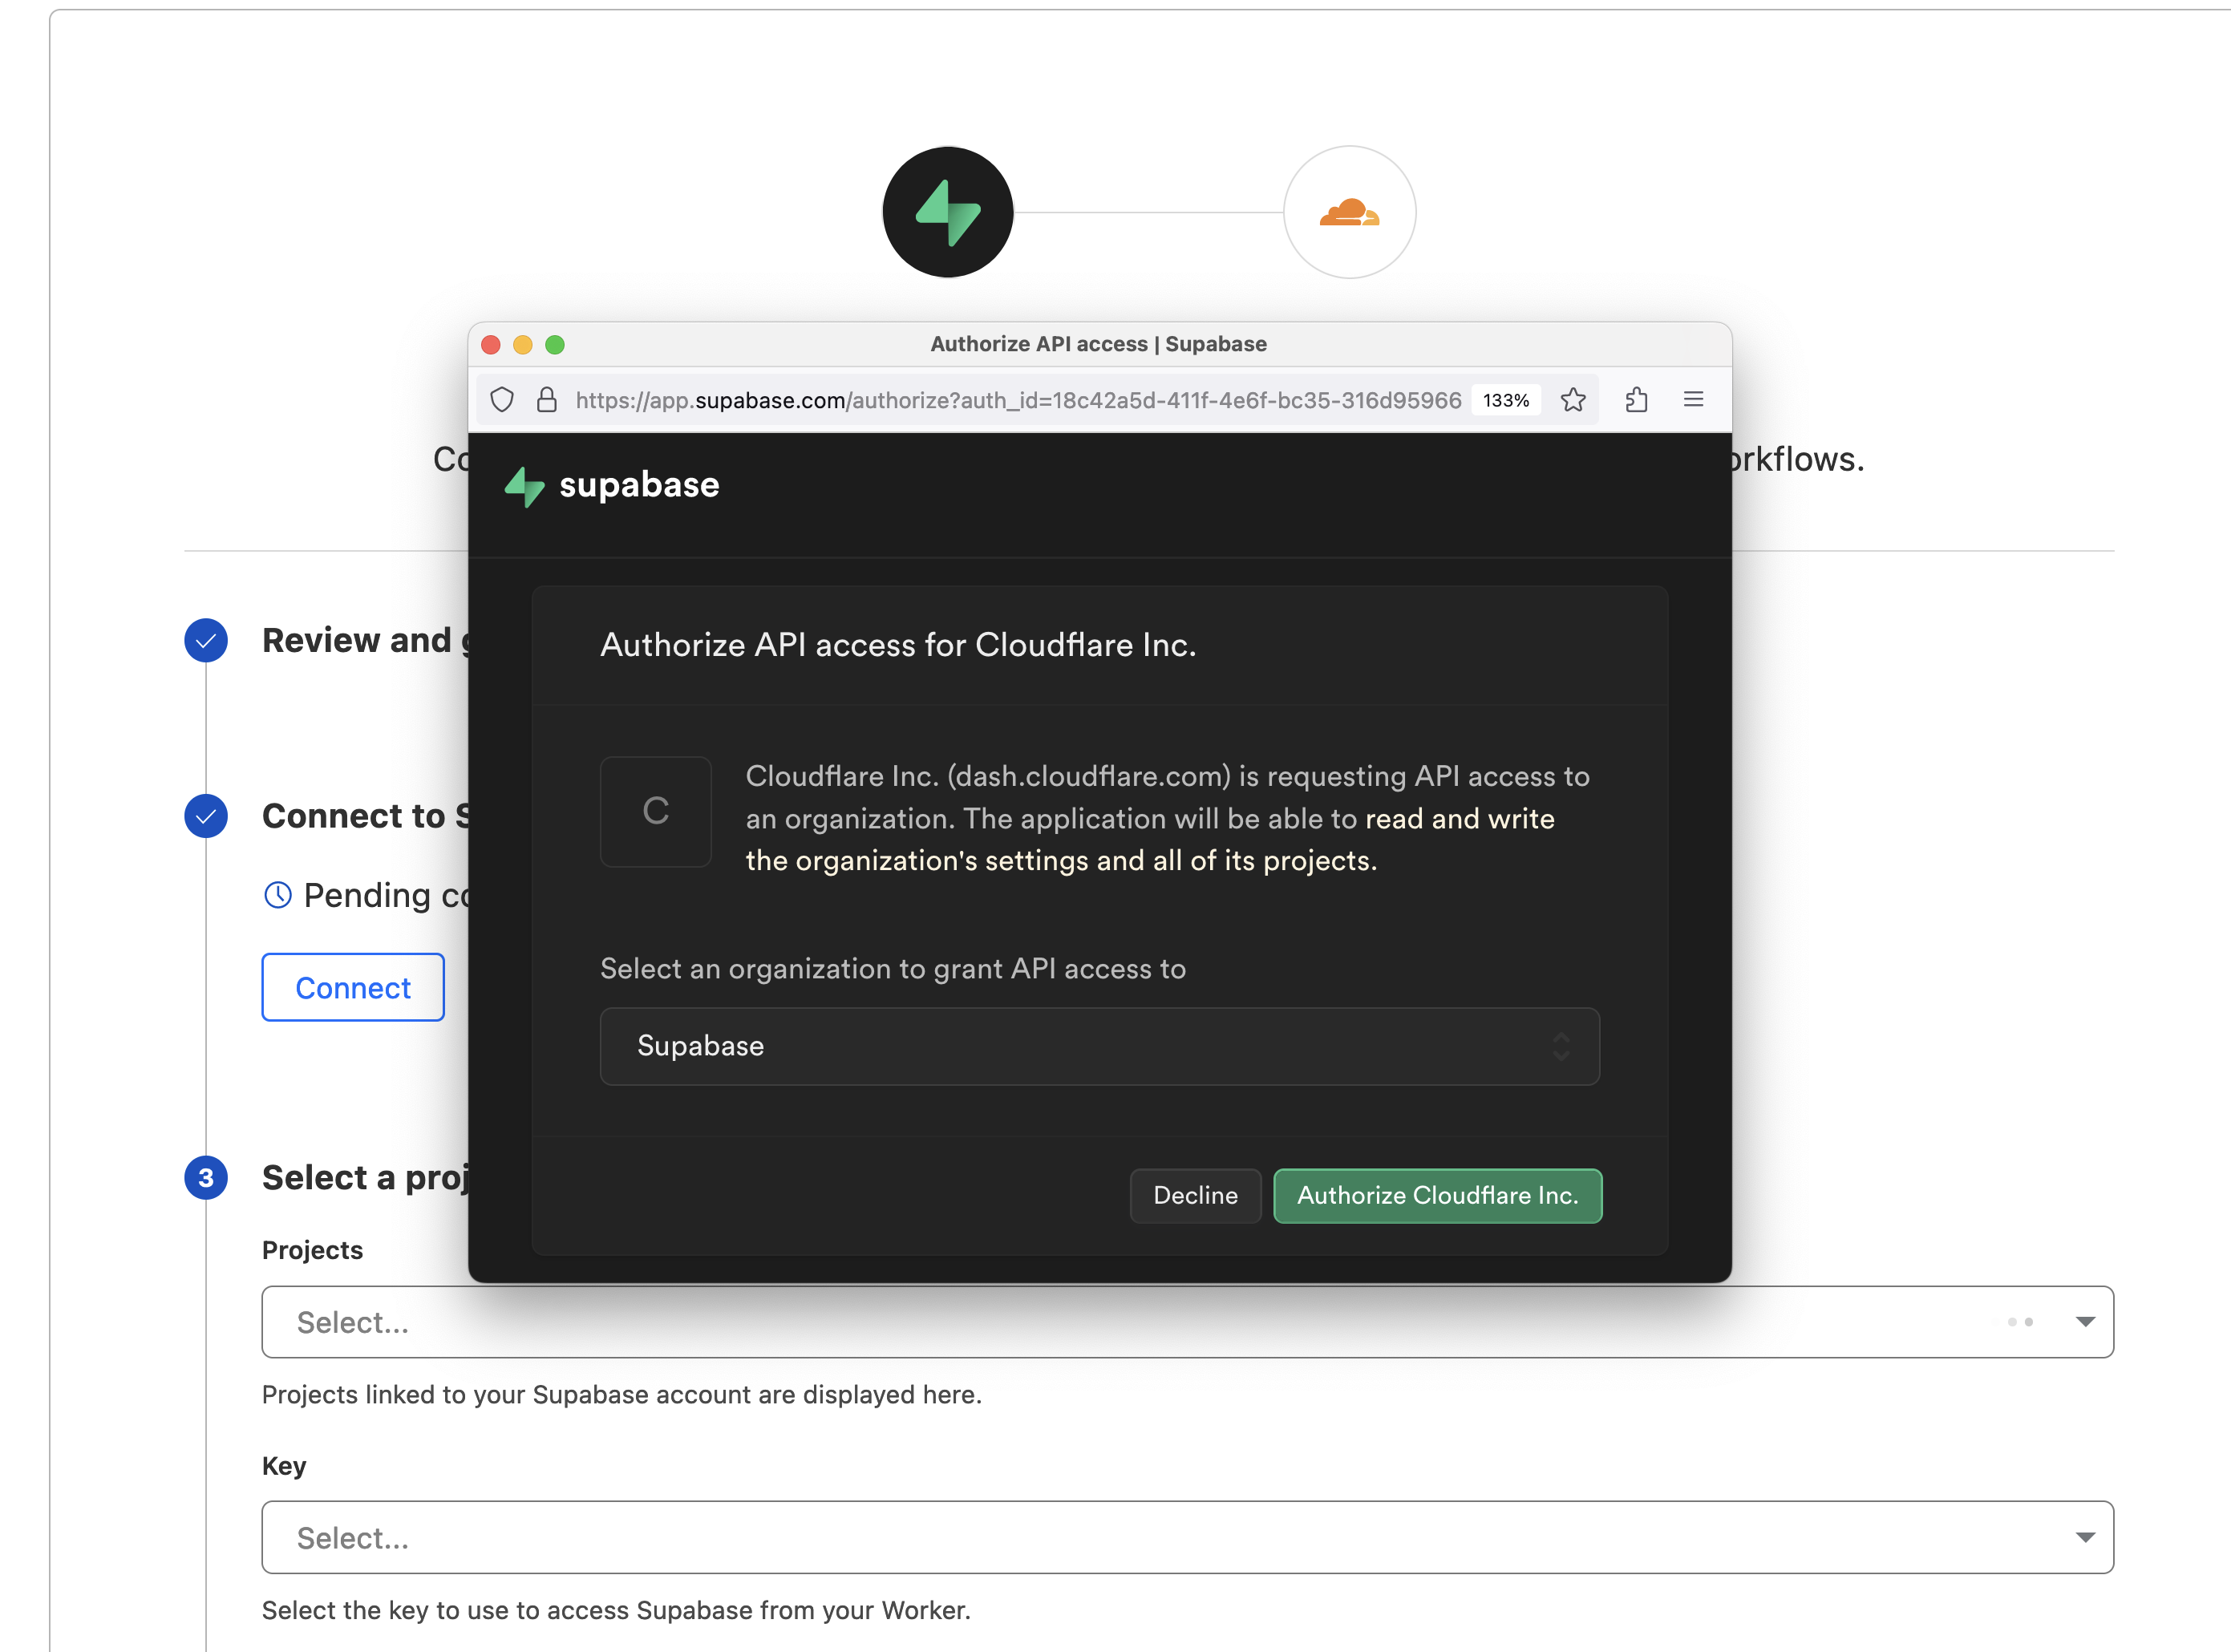
After reviewing and accepting the terms, you will be shown the option to connect and a Supabase popup should appear.
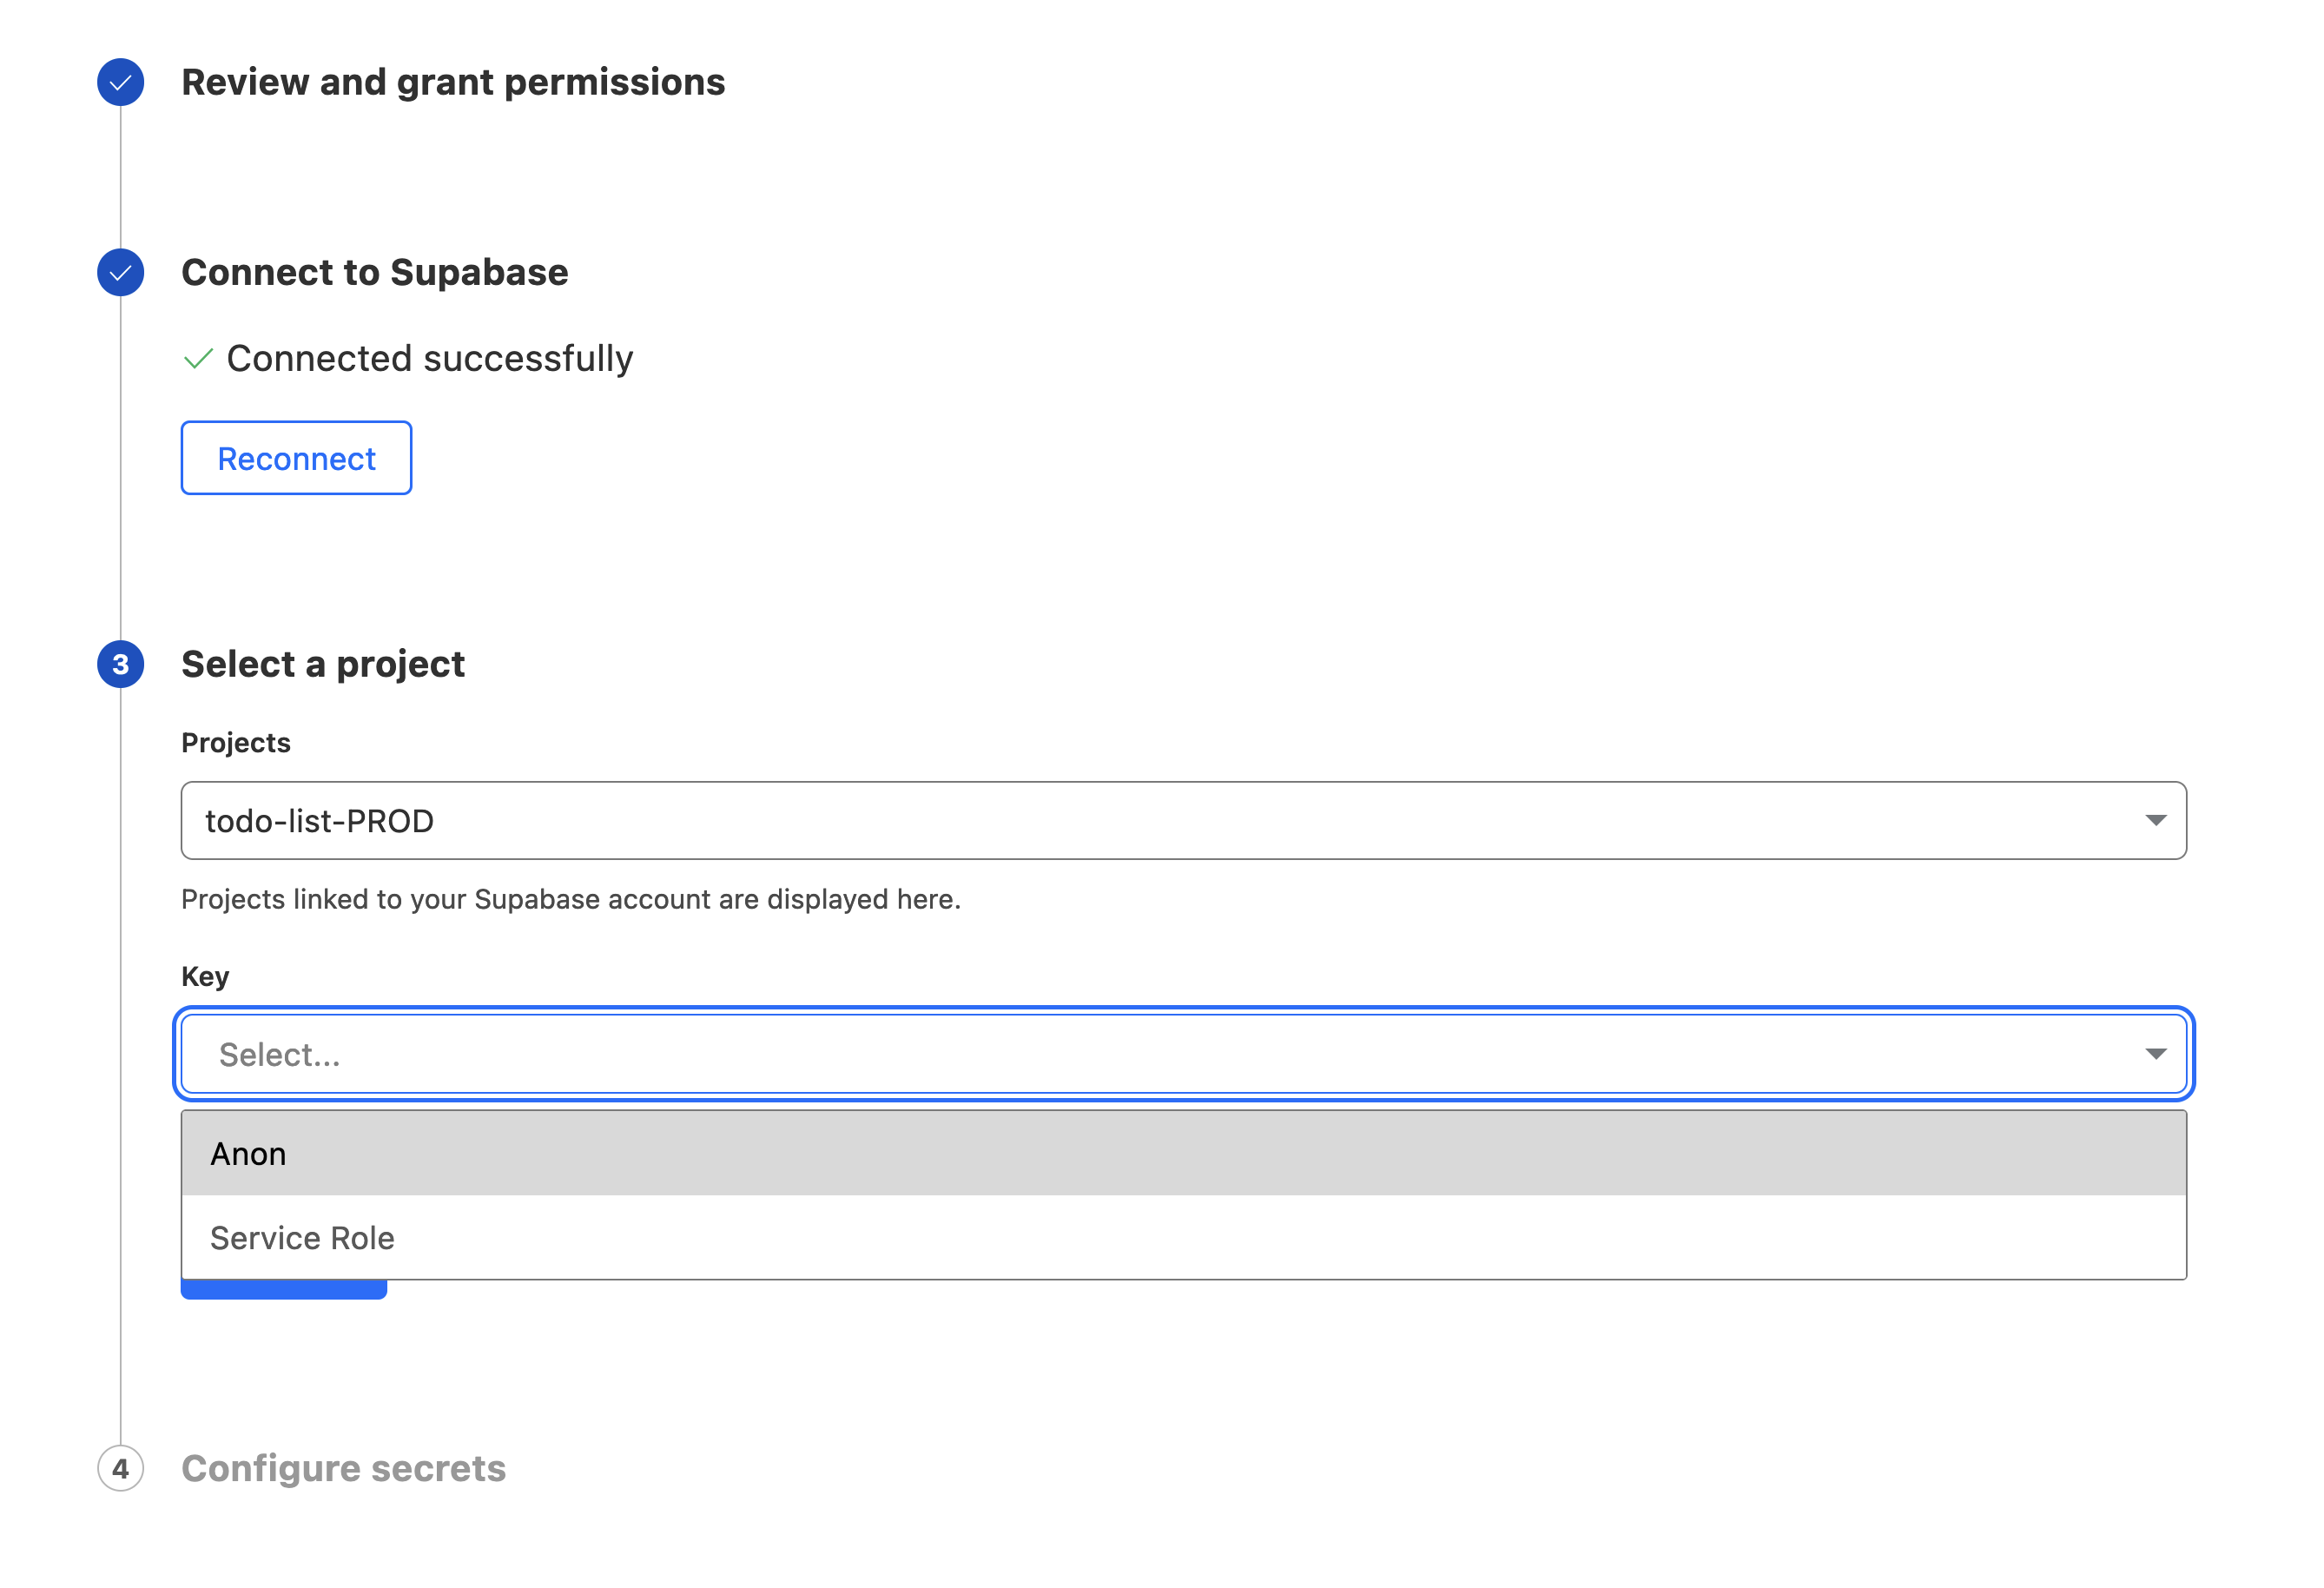
Follow the flow by selecting your Supabase Org and the Project you wish to connect to. If you don't have any projects yet, head over to the Supabase Dashboard to create one.
Once it's connected you will be given the option to select which Supabase Key you want to pull into the Worker context.
The Anon key here is one that always adhires to the Database's RLS policies (read more on Row Level Security).
The Service Role is typically ok to use in backend contexts, such as Cloudflare Workers, but note that this key bypasses your Row Level Security policies, and has the ablity to read, write, and delete any data in your database.
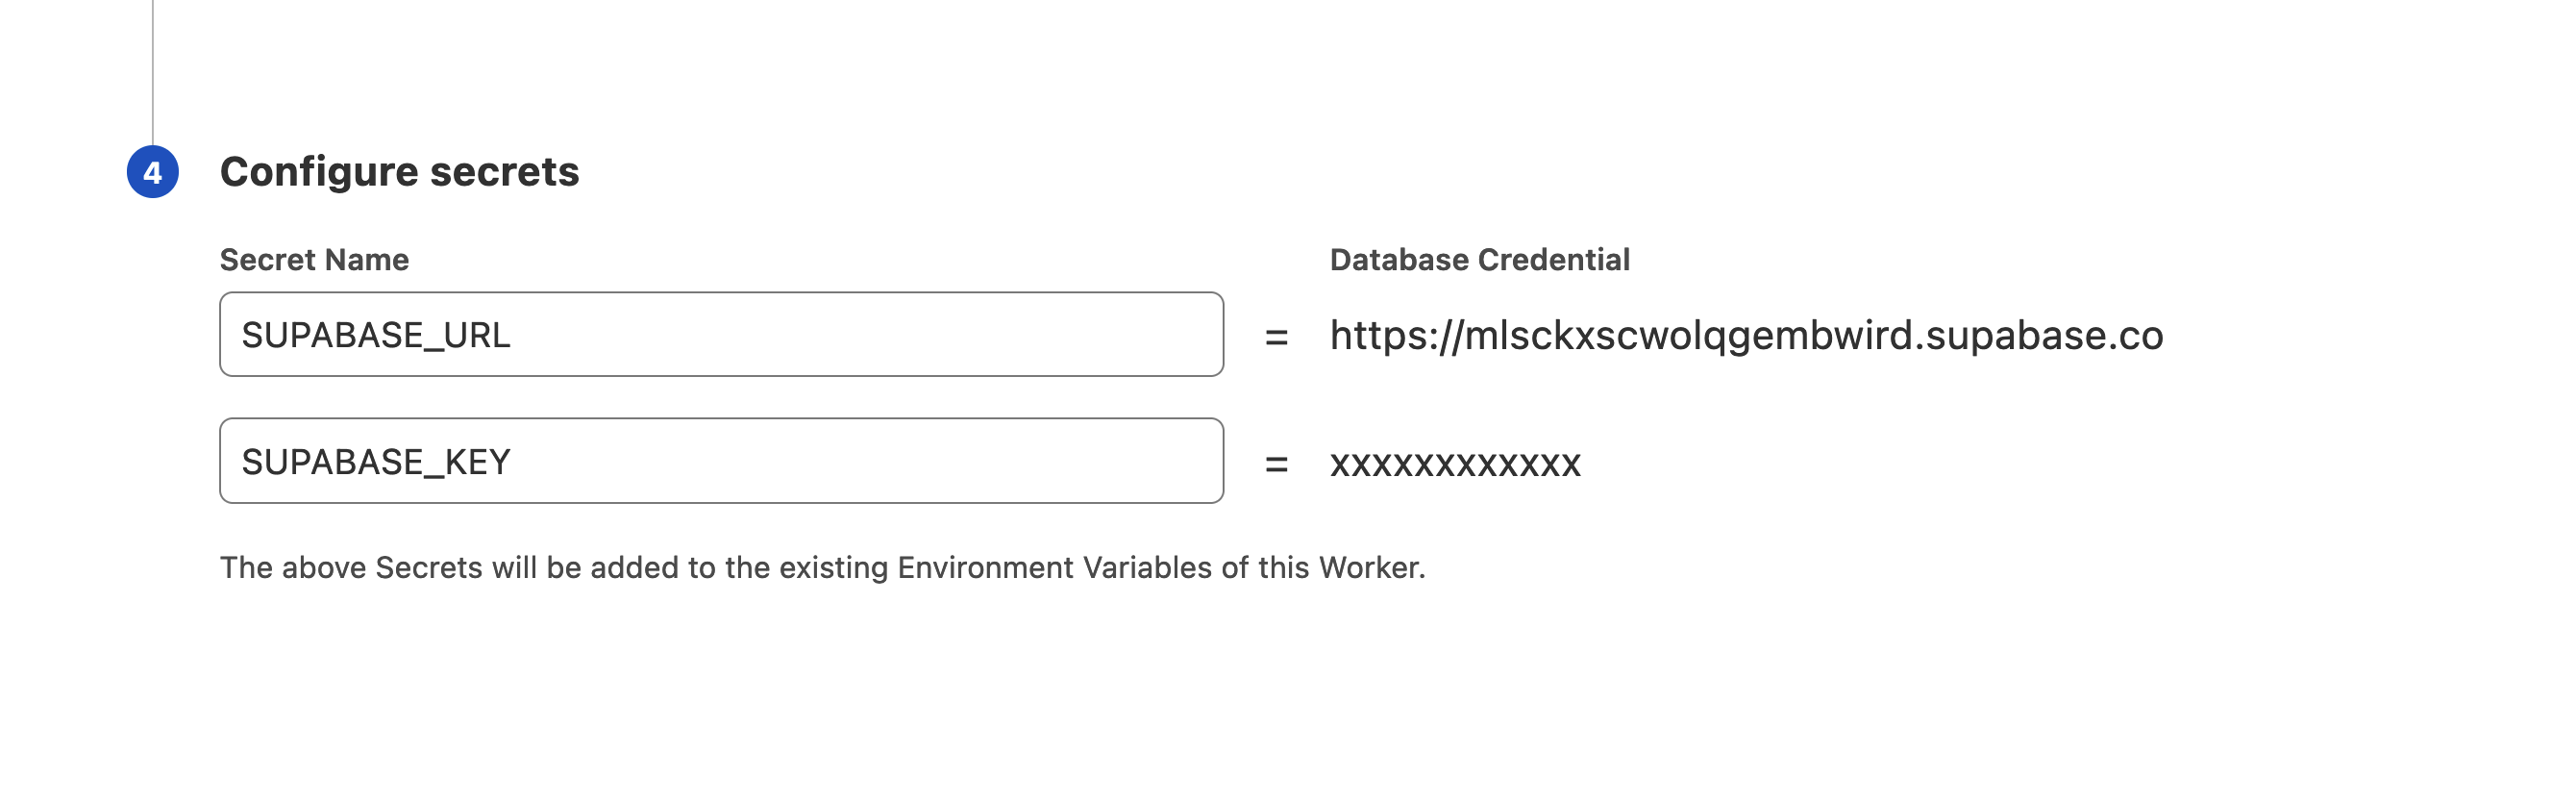
Once this is done the SUPABASE_KEY and SUPABASE_URL environment variables will now be available from your Cloudflare Worker code.
You can now install the supabase-js client in your Worker:
npm install @supabase/supabase-js
Then you can initiate the Supabase client, and start querying your data:
_14import { createClient } from '@supabase/supabase-js'_14_14export default {_14 async fetch(request, env) {_14 const supabase = createClient(env.SUPABASE_URL, env.SUPABASE_KEY)_14 const { data, error } = await supabase.from('countries').select('*')_14 if (error) throw error_14 return new Response(JSON.stringify(data), {_14 headers: {_14 'Content-Type': 'application/json',_14 },_14 })_14 },_14}
The snippet above assumes you already have a countries table. Run the following in the SQL Editor in the Supabase Dashboard if you wish to install this demo schema:
_24create table countries (_24 id serial primary key,_24 name varchar(255) not null_24);_24_24insert into countries_24 (name)_24values_24 ('Oceania');_24_24insert into countries_24 (name)_24values_24 ('Genovia');_24_24insert into countries_24 (name)_24values_24 ('Wakanda');_24_24insert into countries_24 (name)_24values_24 ('Lilliput');
Remember that you don't need to use supabase-js to connect to your Supabase database, you can connect "directly" to the underlying Postgres database using the connection string (every Supabase database comes pre-installed with a connection pooler), or you can try Cloudflare's new TCP socket method of connecting to Postgres directly from Cloudflare Workers.
Details
Third-party integrations and docs are managed by Supabase partners.