Set Up SSO with Google Workspace
This feature is only available on the Team and Enterprise Plans. If you are an existing Team or Enterprise Plan customer, continue with the setup below.
Looking for docs on how to add Single Sign-On support in your Supabase project? Head on over to Single Sign-On with SAML 2.0 for Projects.
Supabase supports single sign-on (SSO) using Google Workspace (formerly known as G Suite).
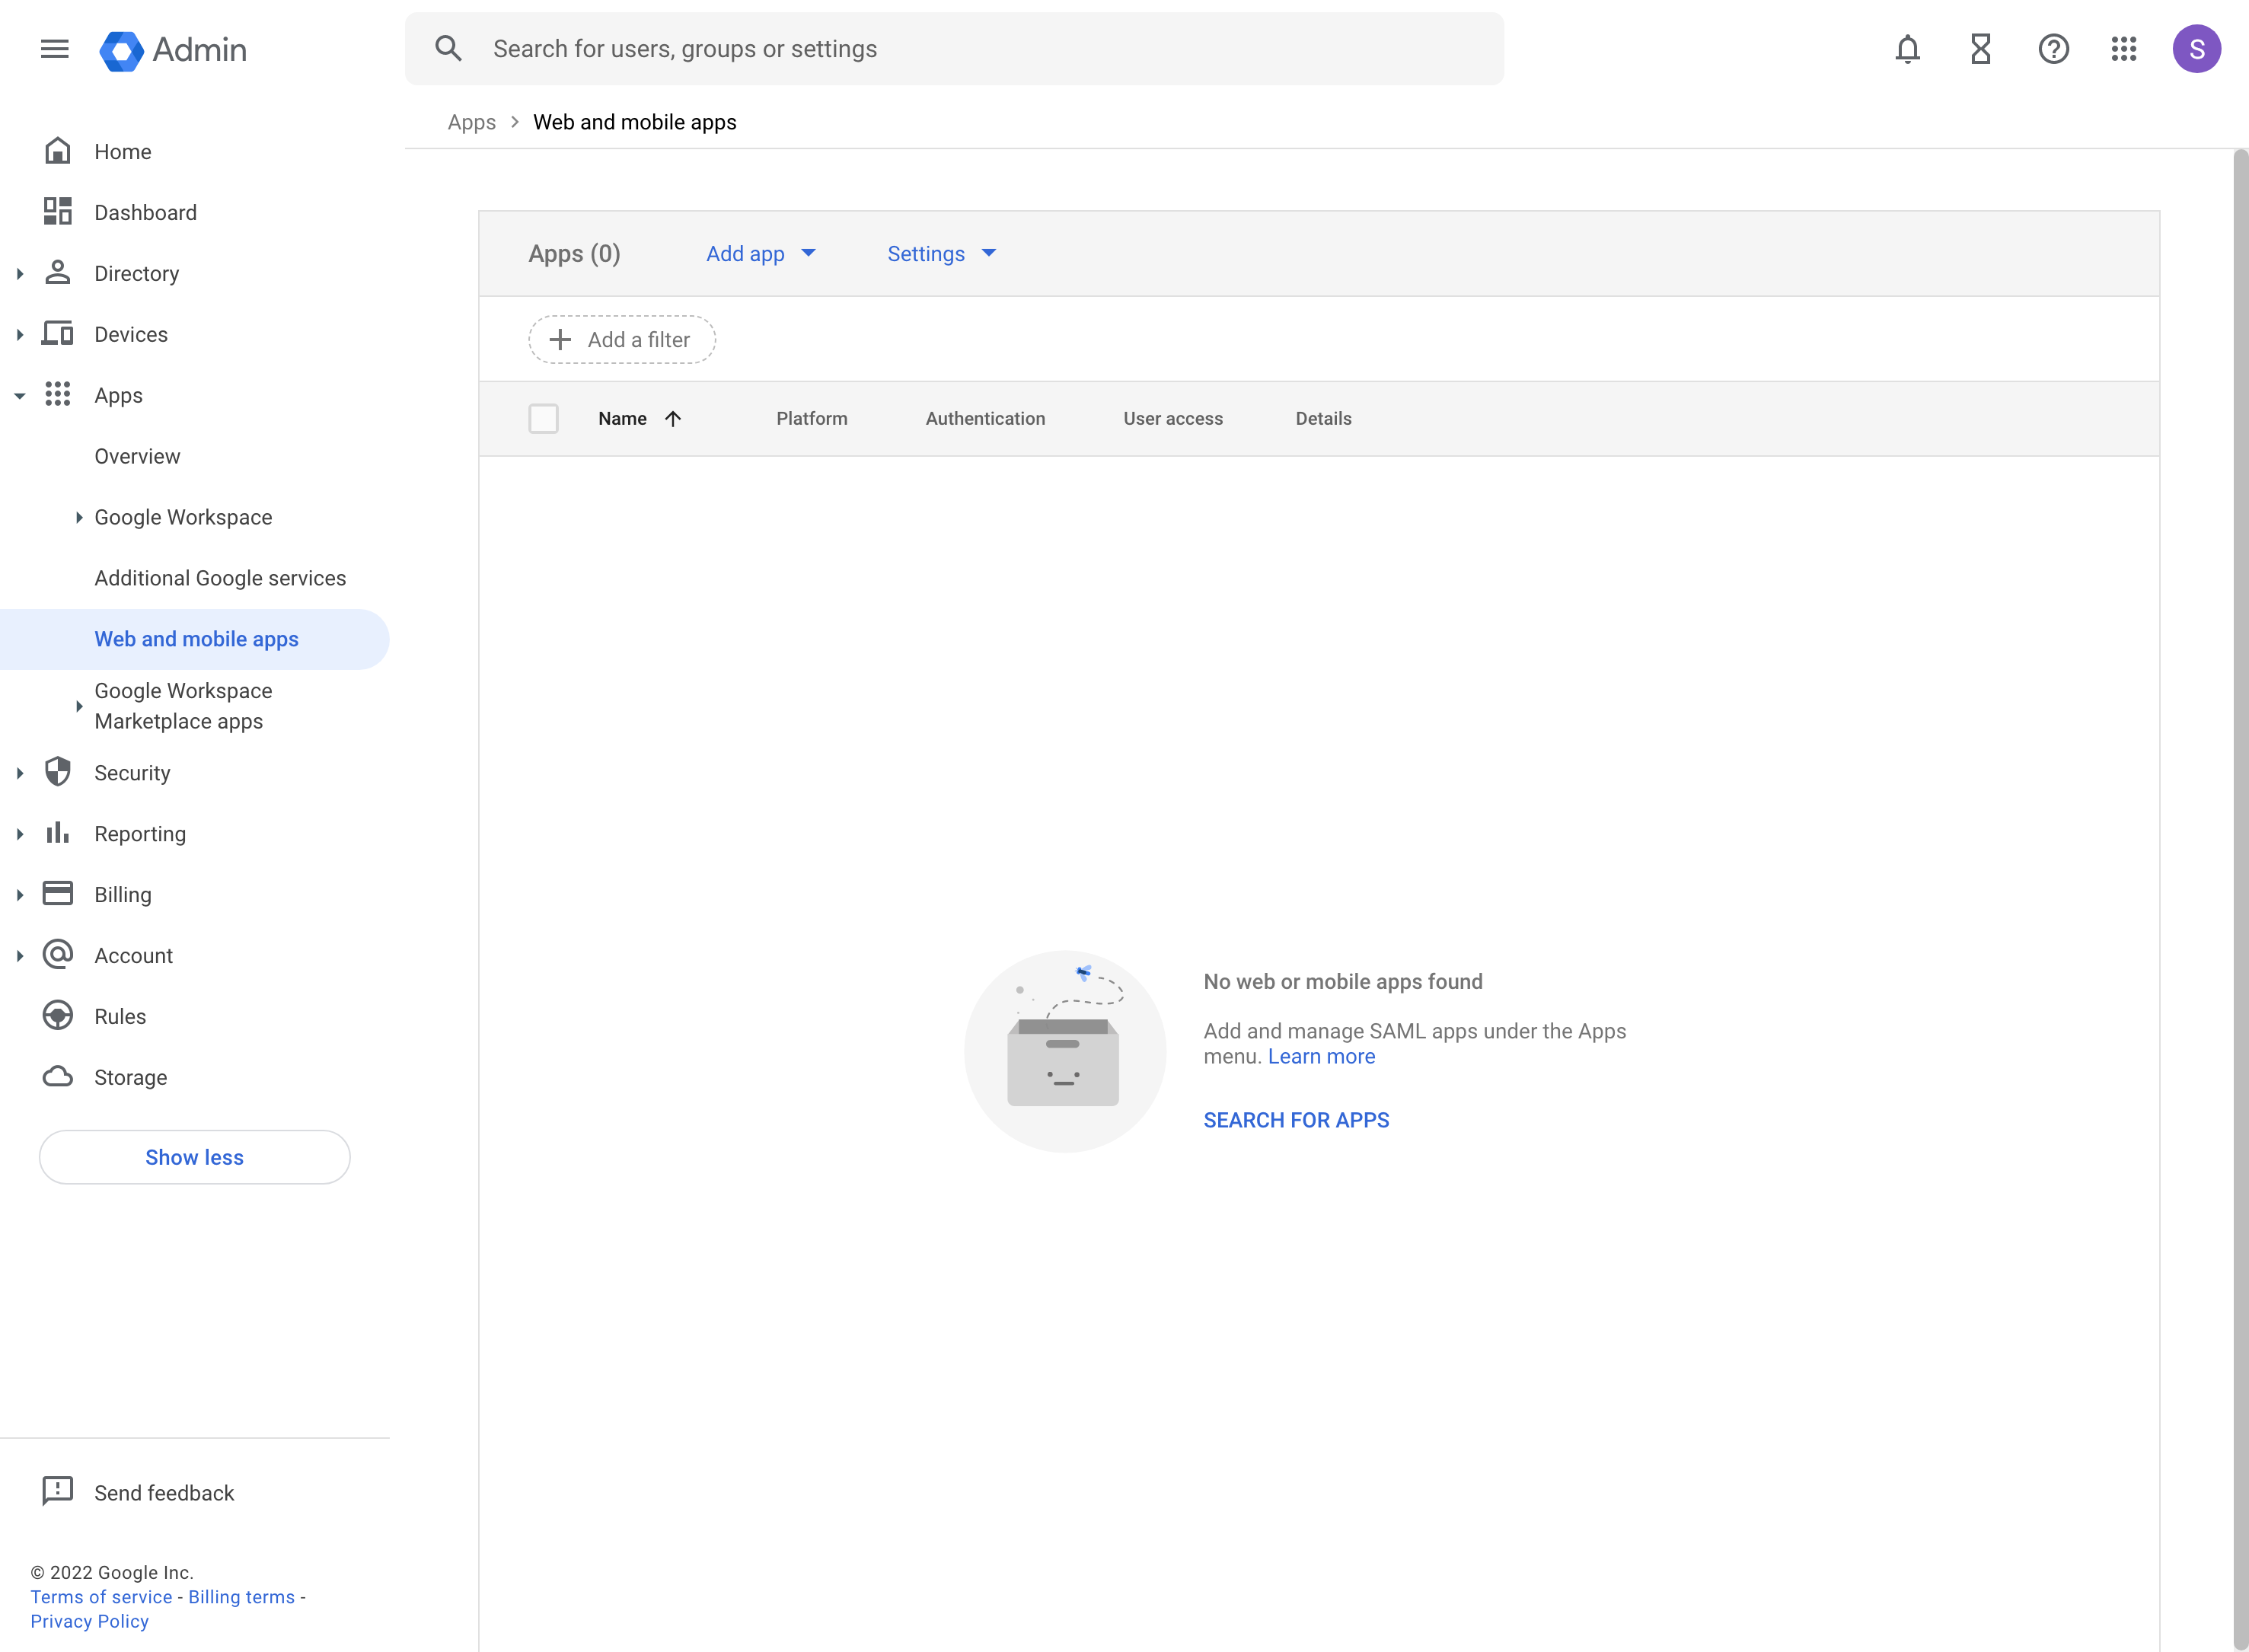
Step 1: Open the Google Workspace web and mobile apps console
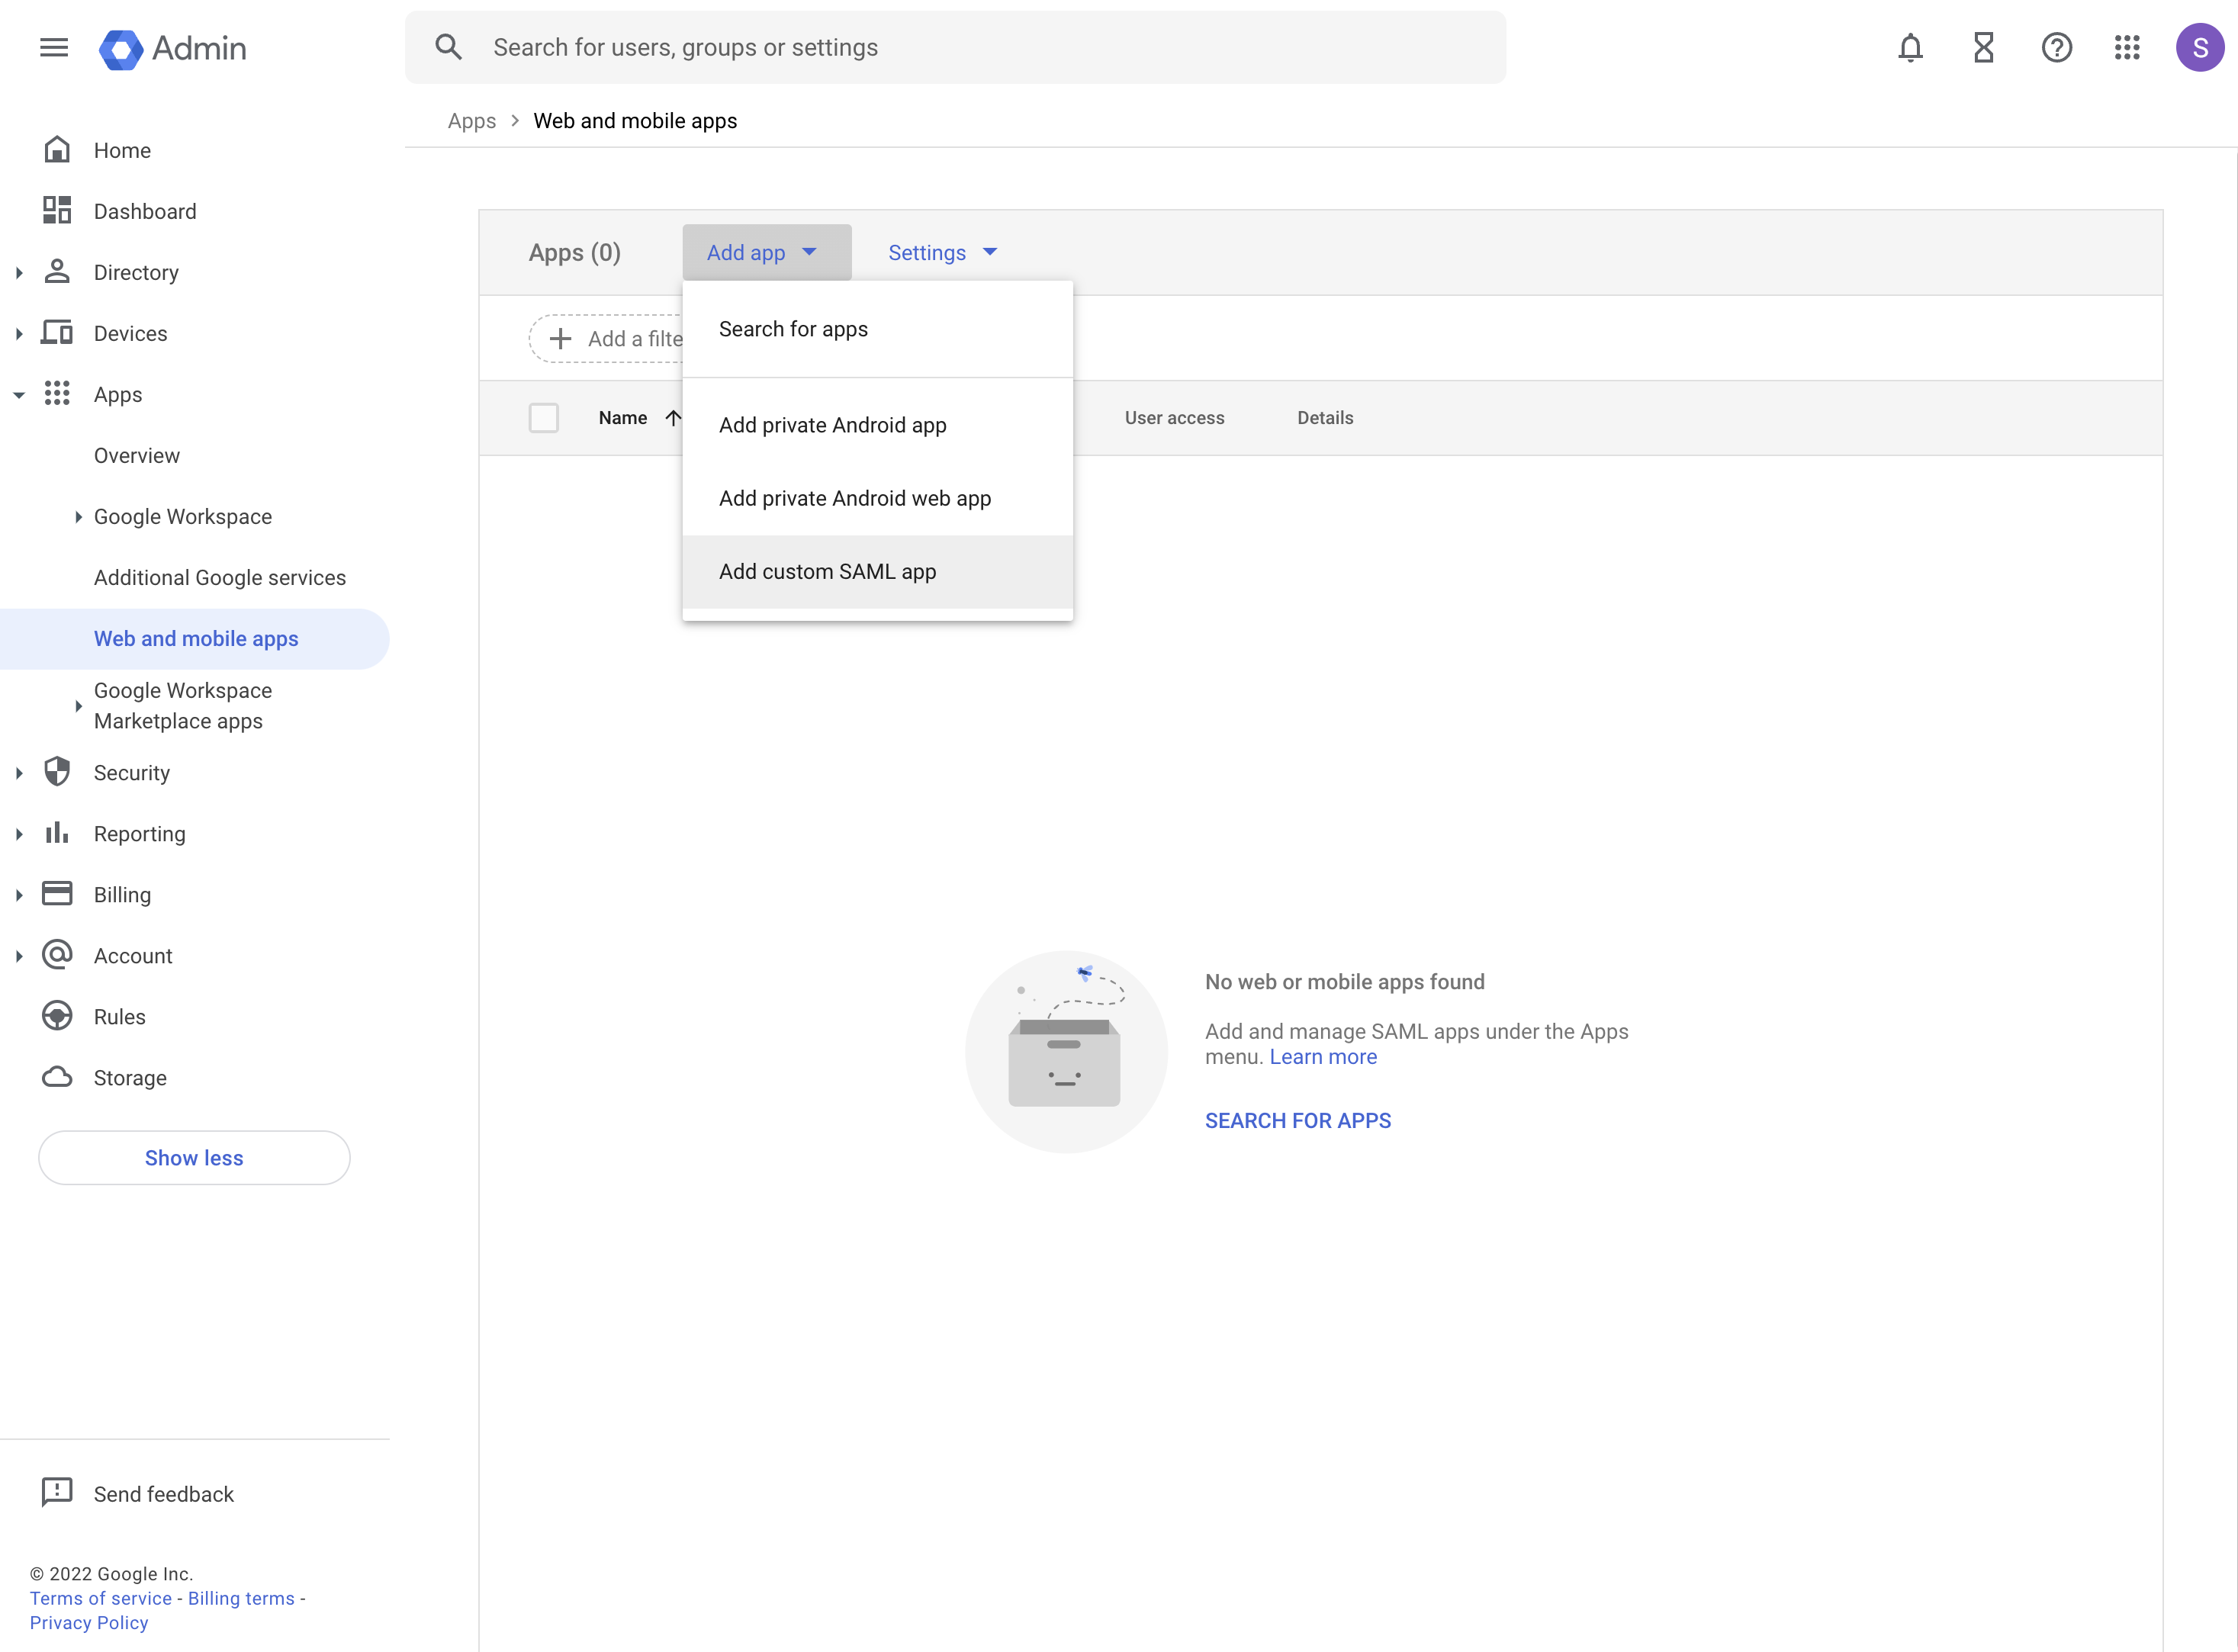
Step 2: Choose to add custom SAML app
From the Add app button in the toolbar choose Add custom SAML app.
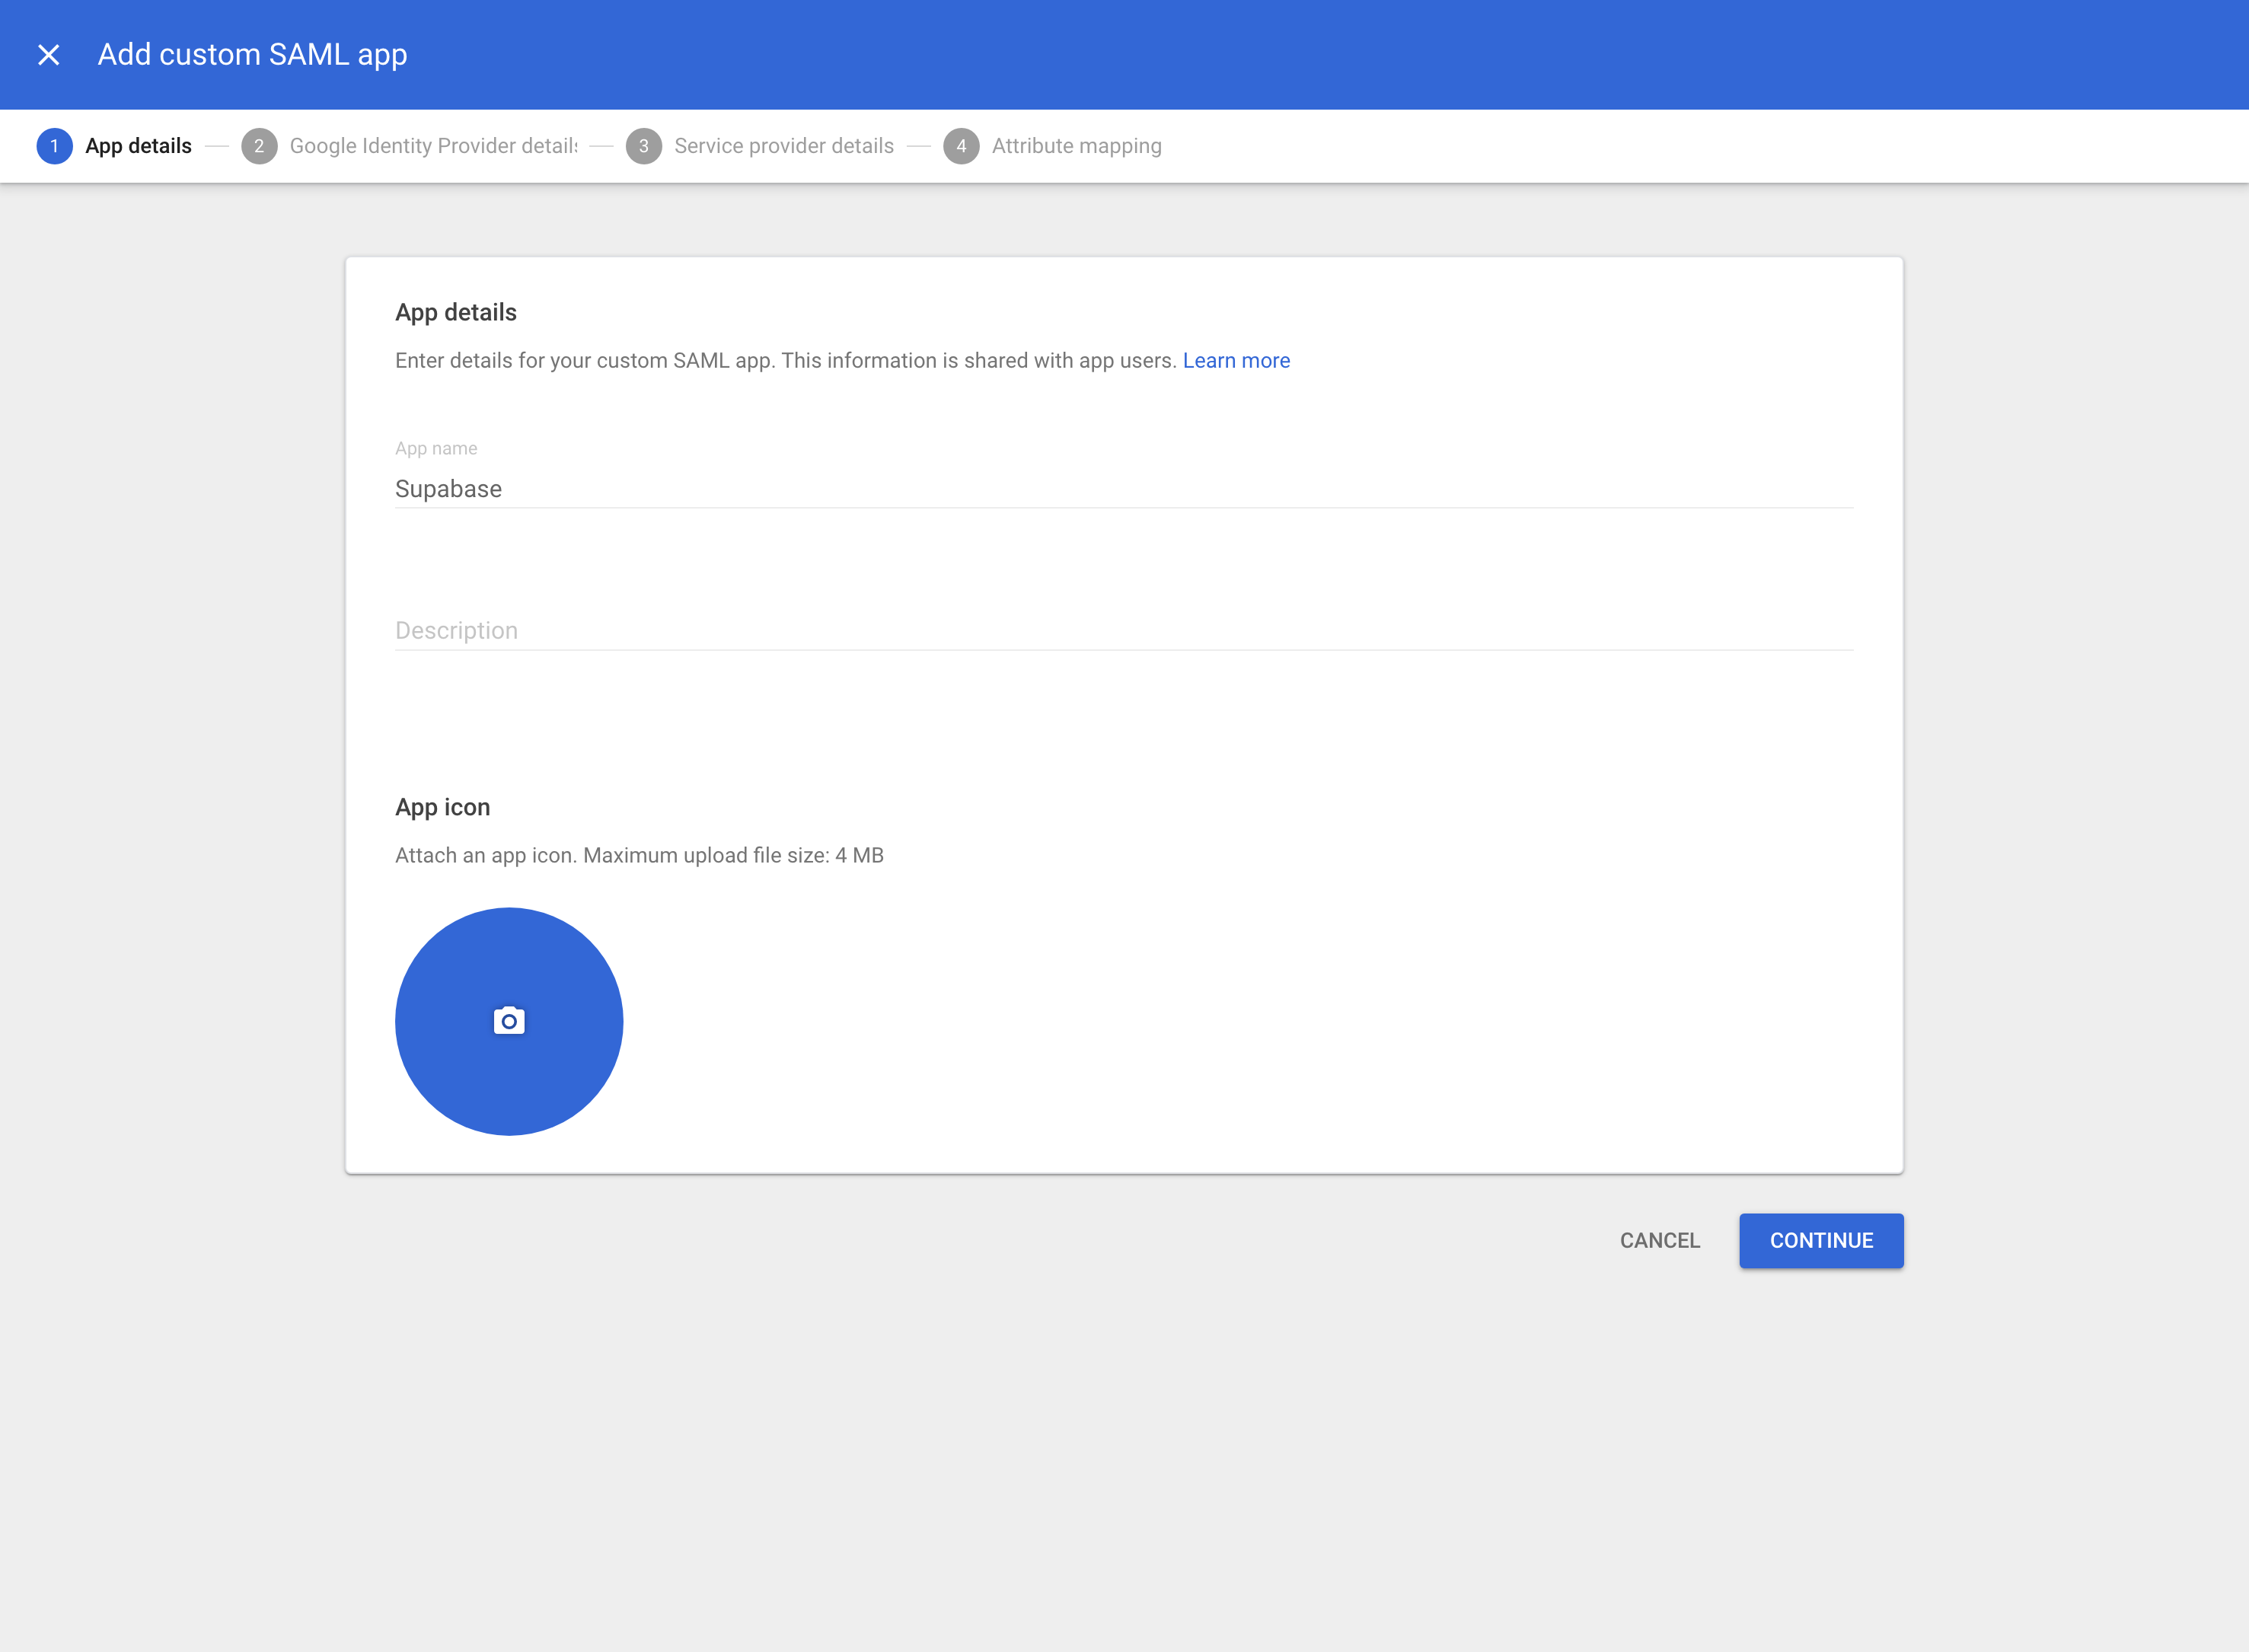
Step 3: Fill out app details
The information you enter here is for visibility into your Google Workspace. You can choose any values you like. Supabase as a name works well for most use cases. Optionally enter a description.
Step 4: Download IdP metadata
This is a very important step. Click on DOWNLOAD METADATA and save the file that was downloaded. You will need to upload this file later in Step 10.
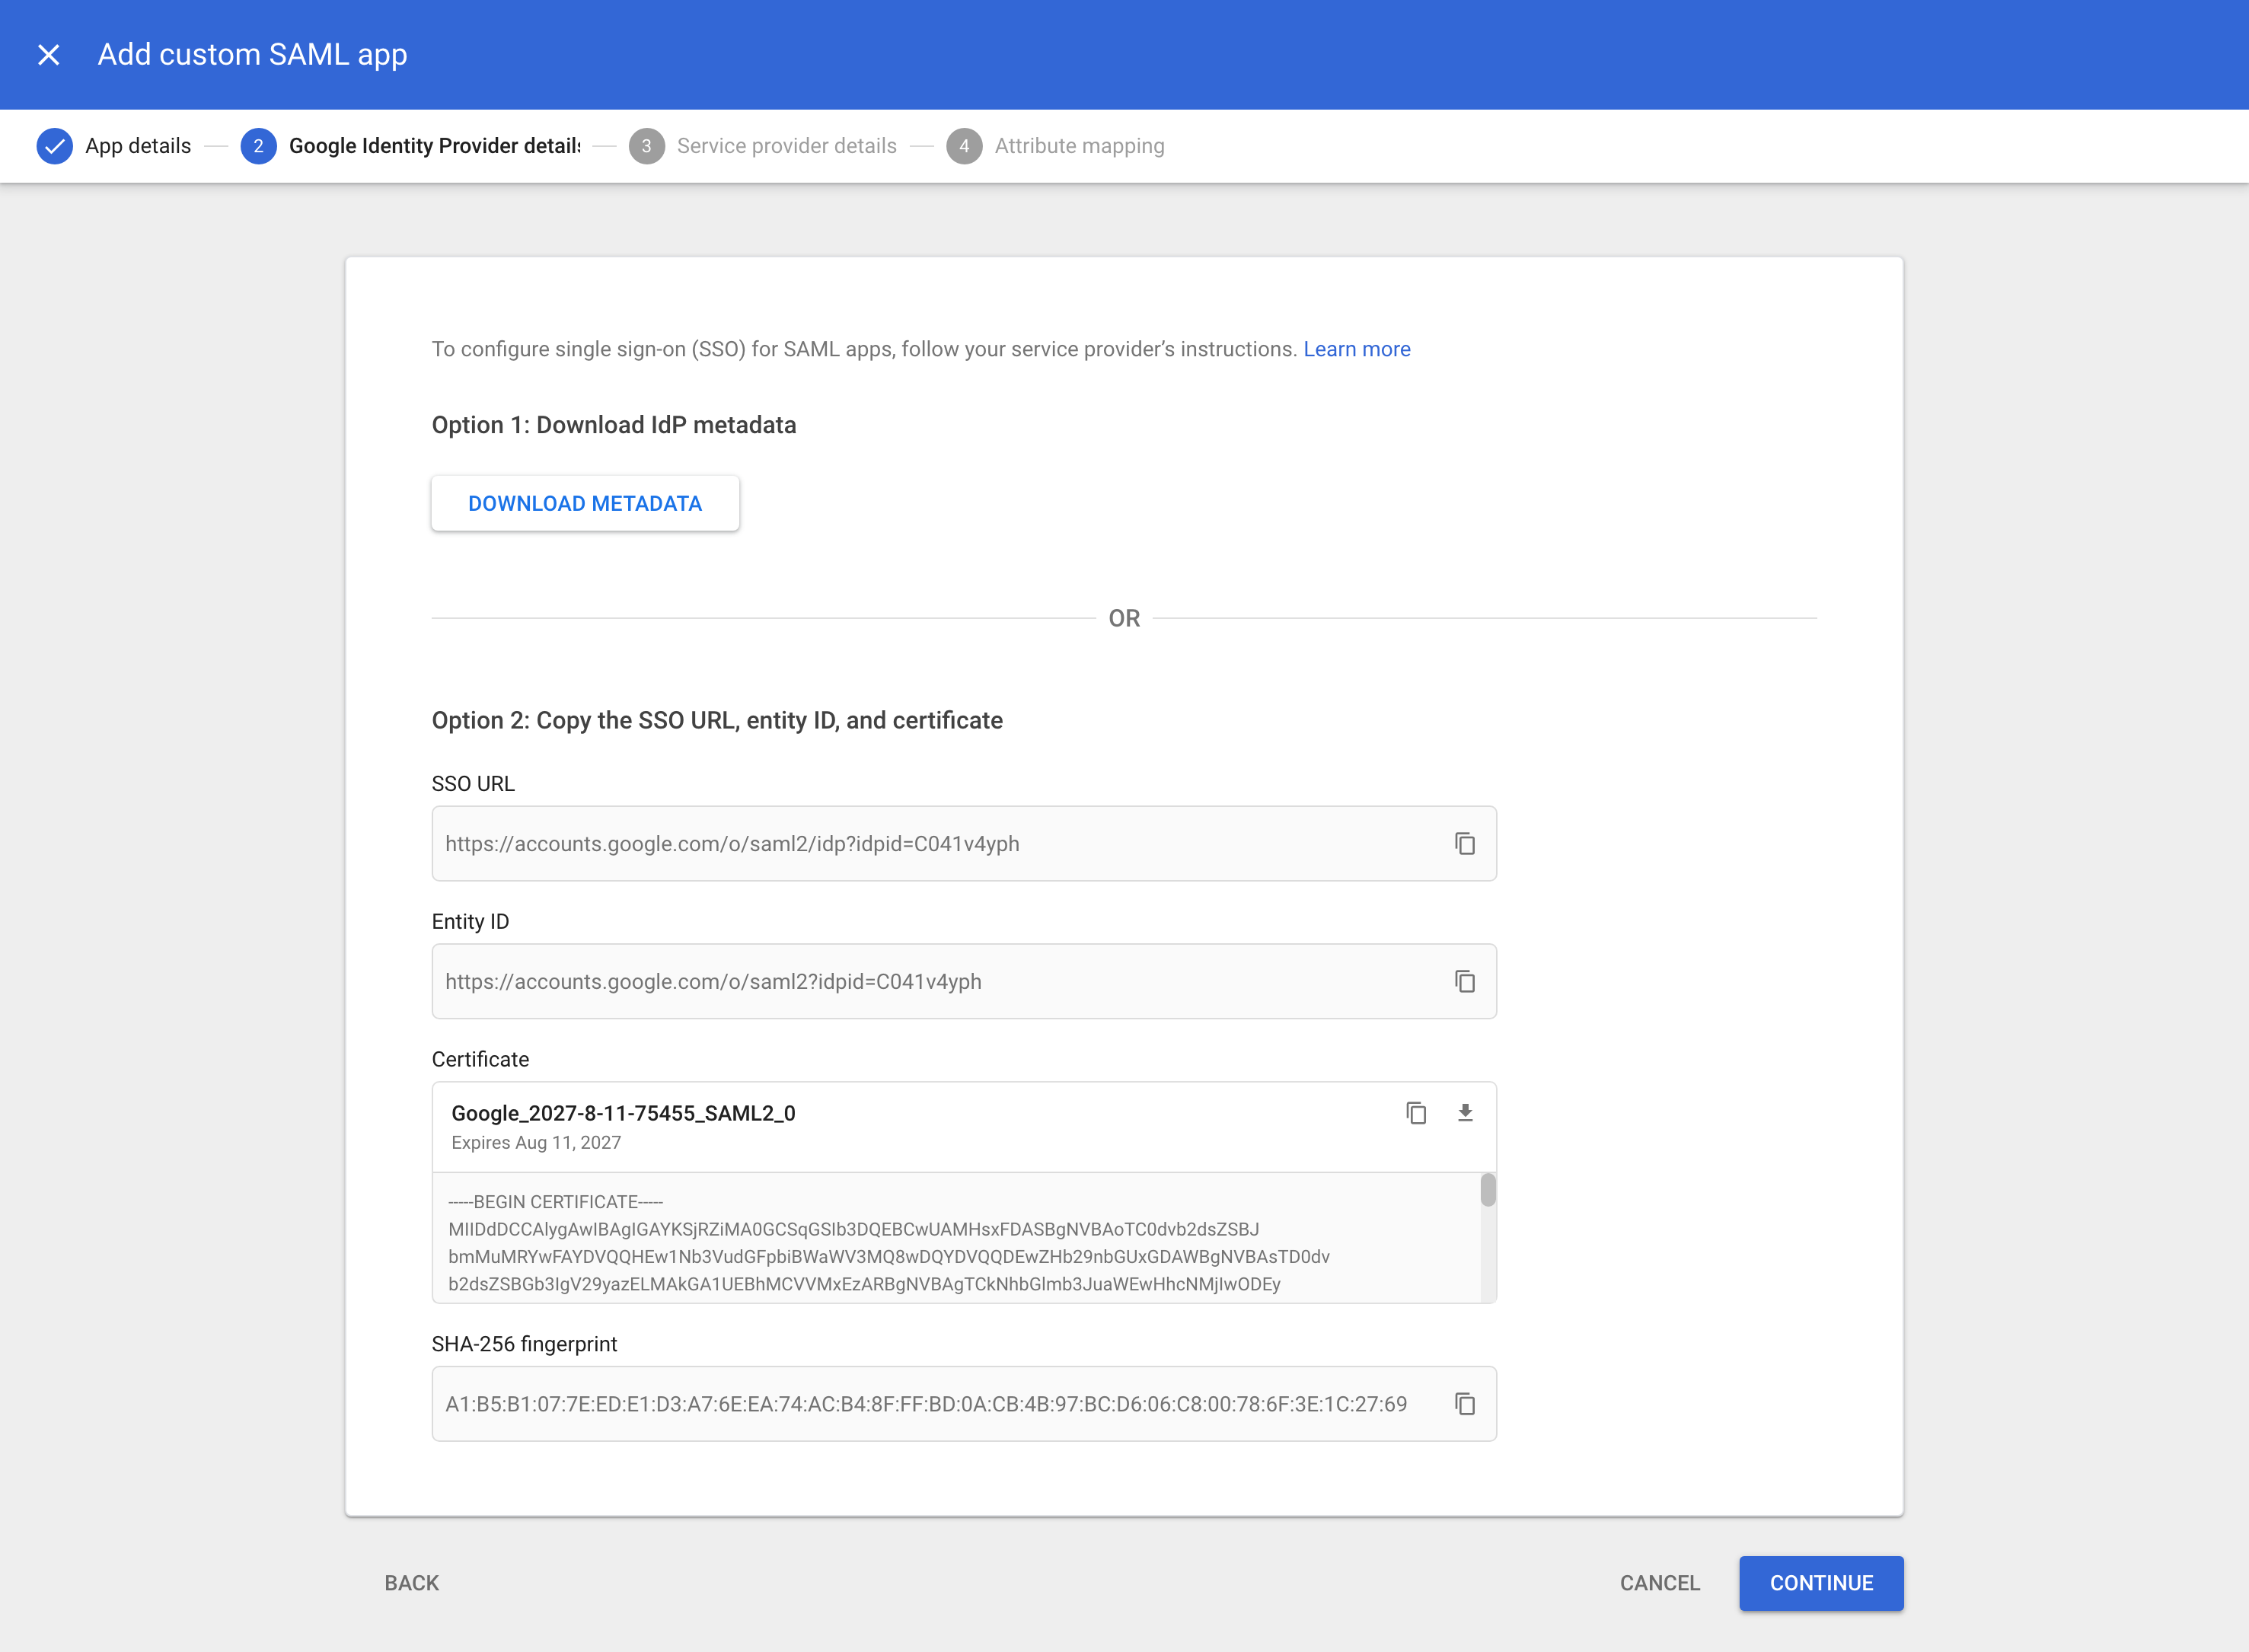
Important: Make sure the certificate as shown on screen has at least 1 year before it expires. Mark down this date in your calendar so you will be reminded that you need to update the certificate without any downtime for your users.
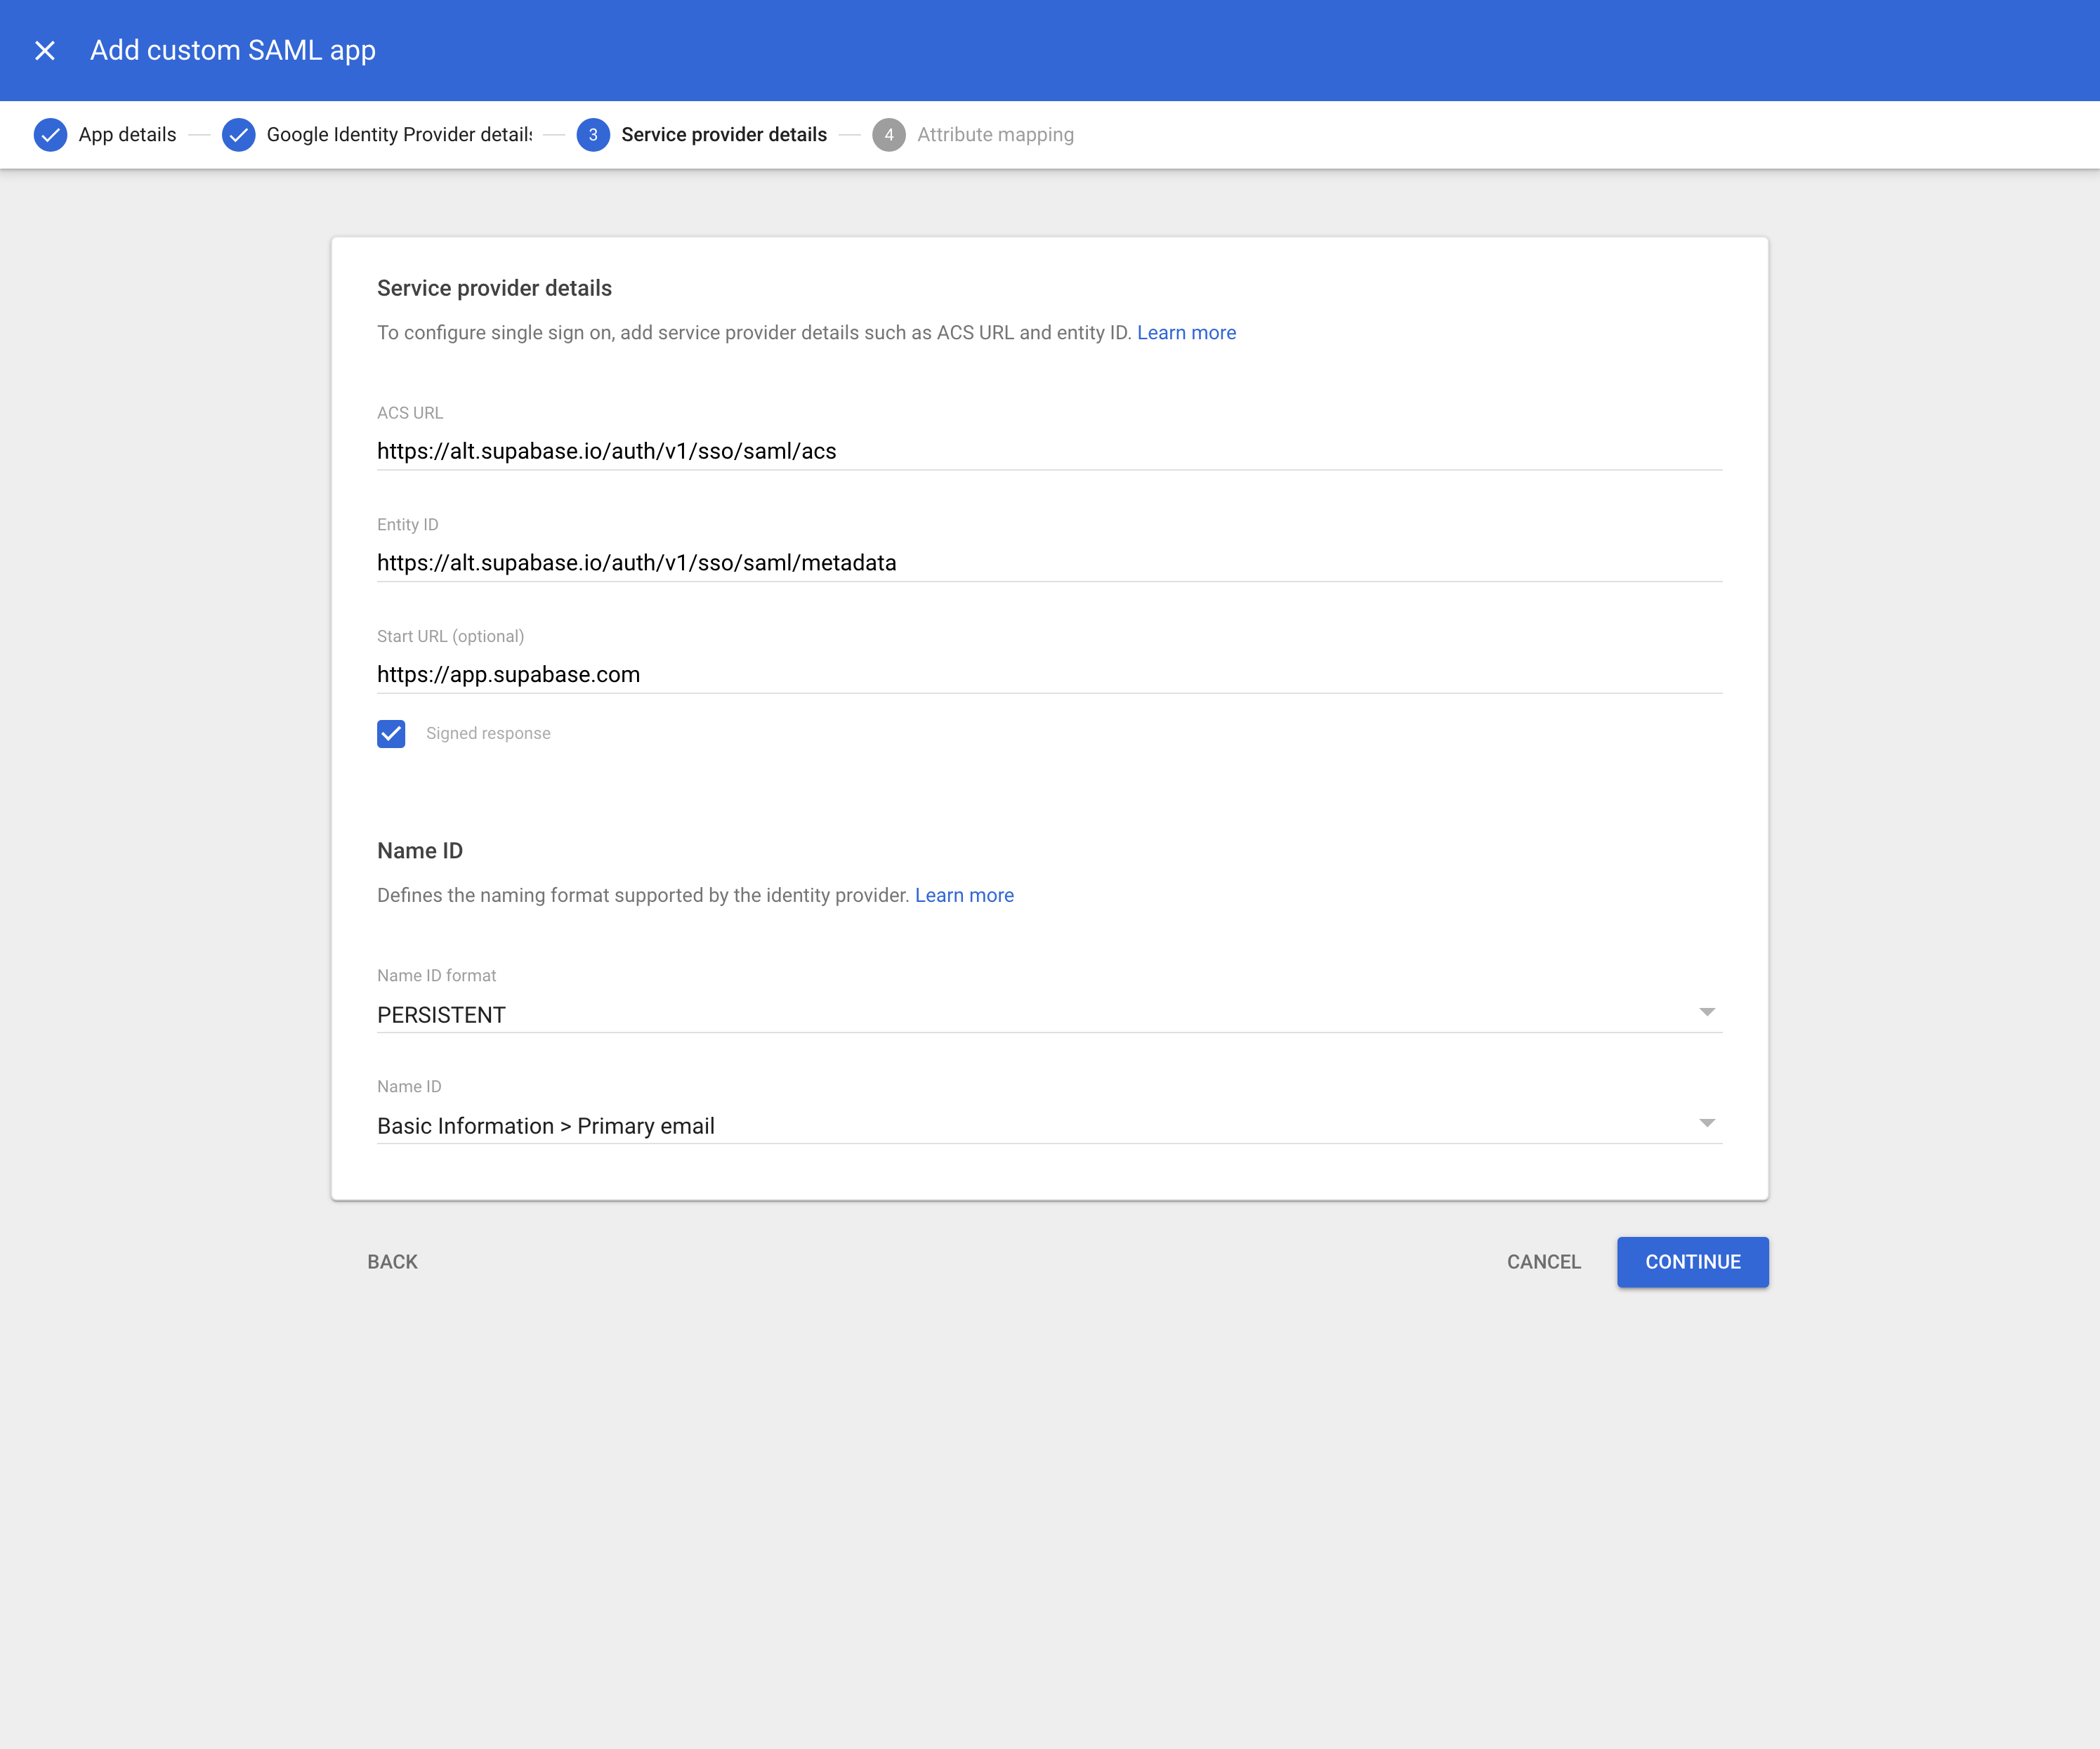
Step 5: Add service provider details
Fill out these service provider details on the next screen.
| Detail | Value |
|---|---|
| ACS URL | https://alt.supabase.io/auth/v1/sso/saml/acs |
| Entity ID | https://alt.supabase.io/auth/v1/sso/saml/metadata |
| Start URL | https://supabase.com/dashboard |
| Name ID format | PERSISTENT |
| Name ID | Basic Information > Primary email |
Step 6: Configure attribute mapping
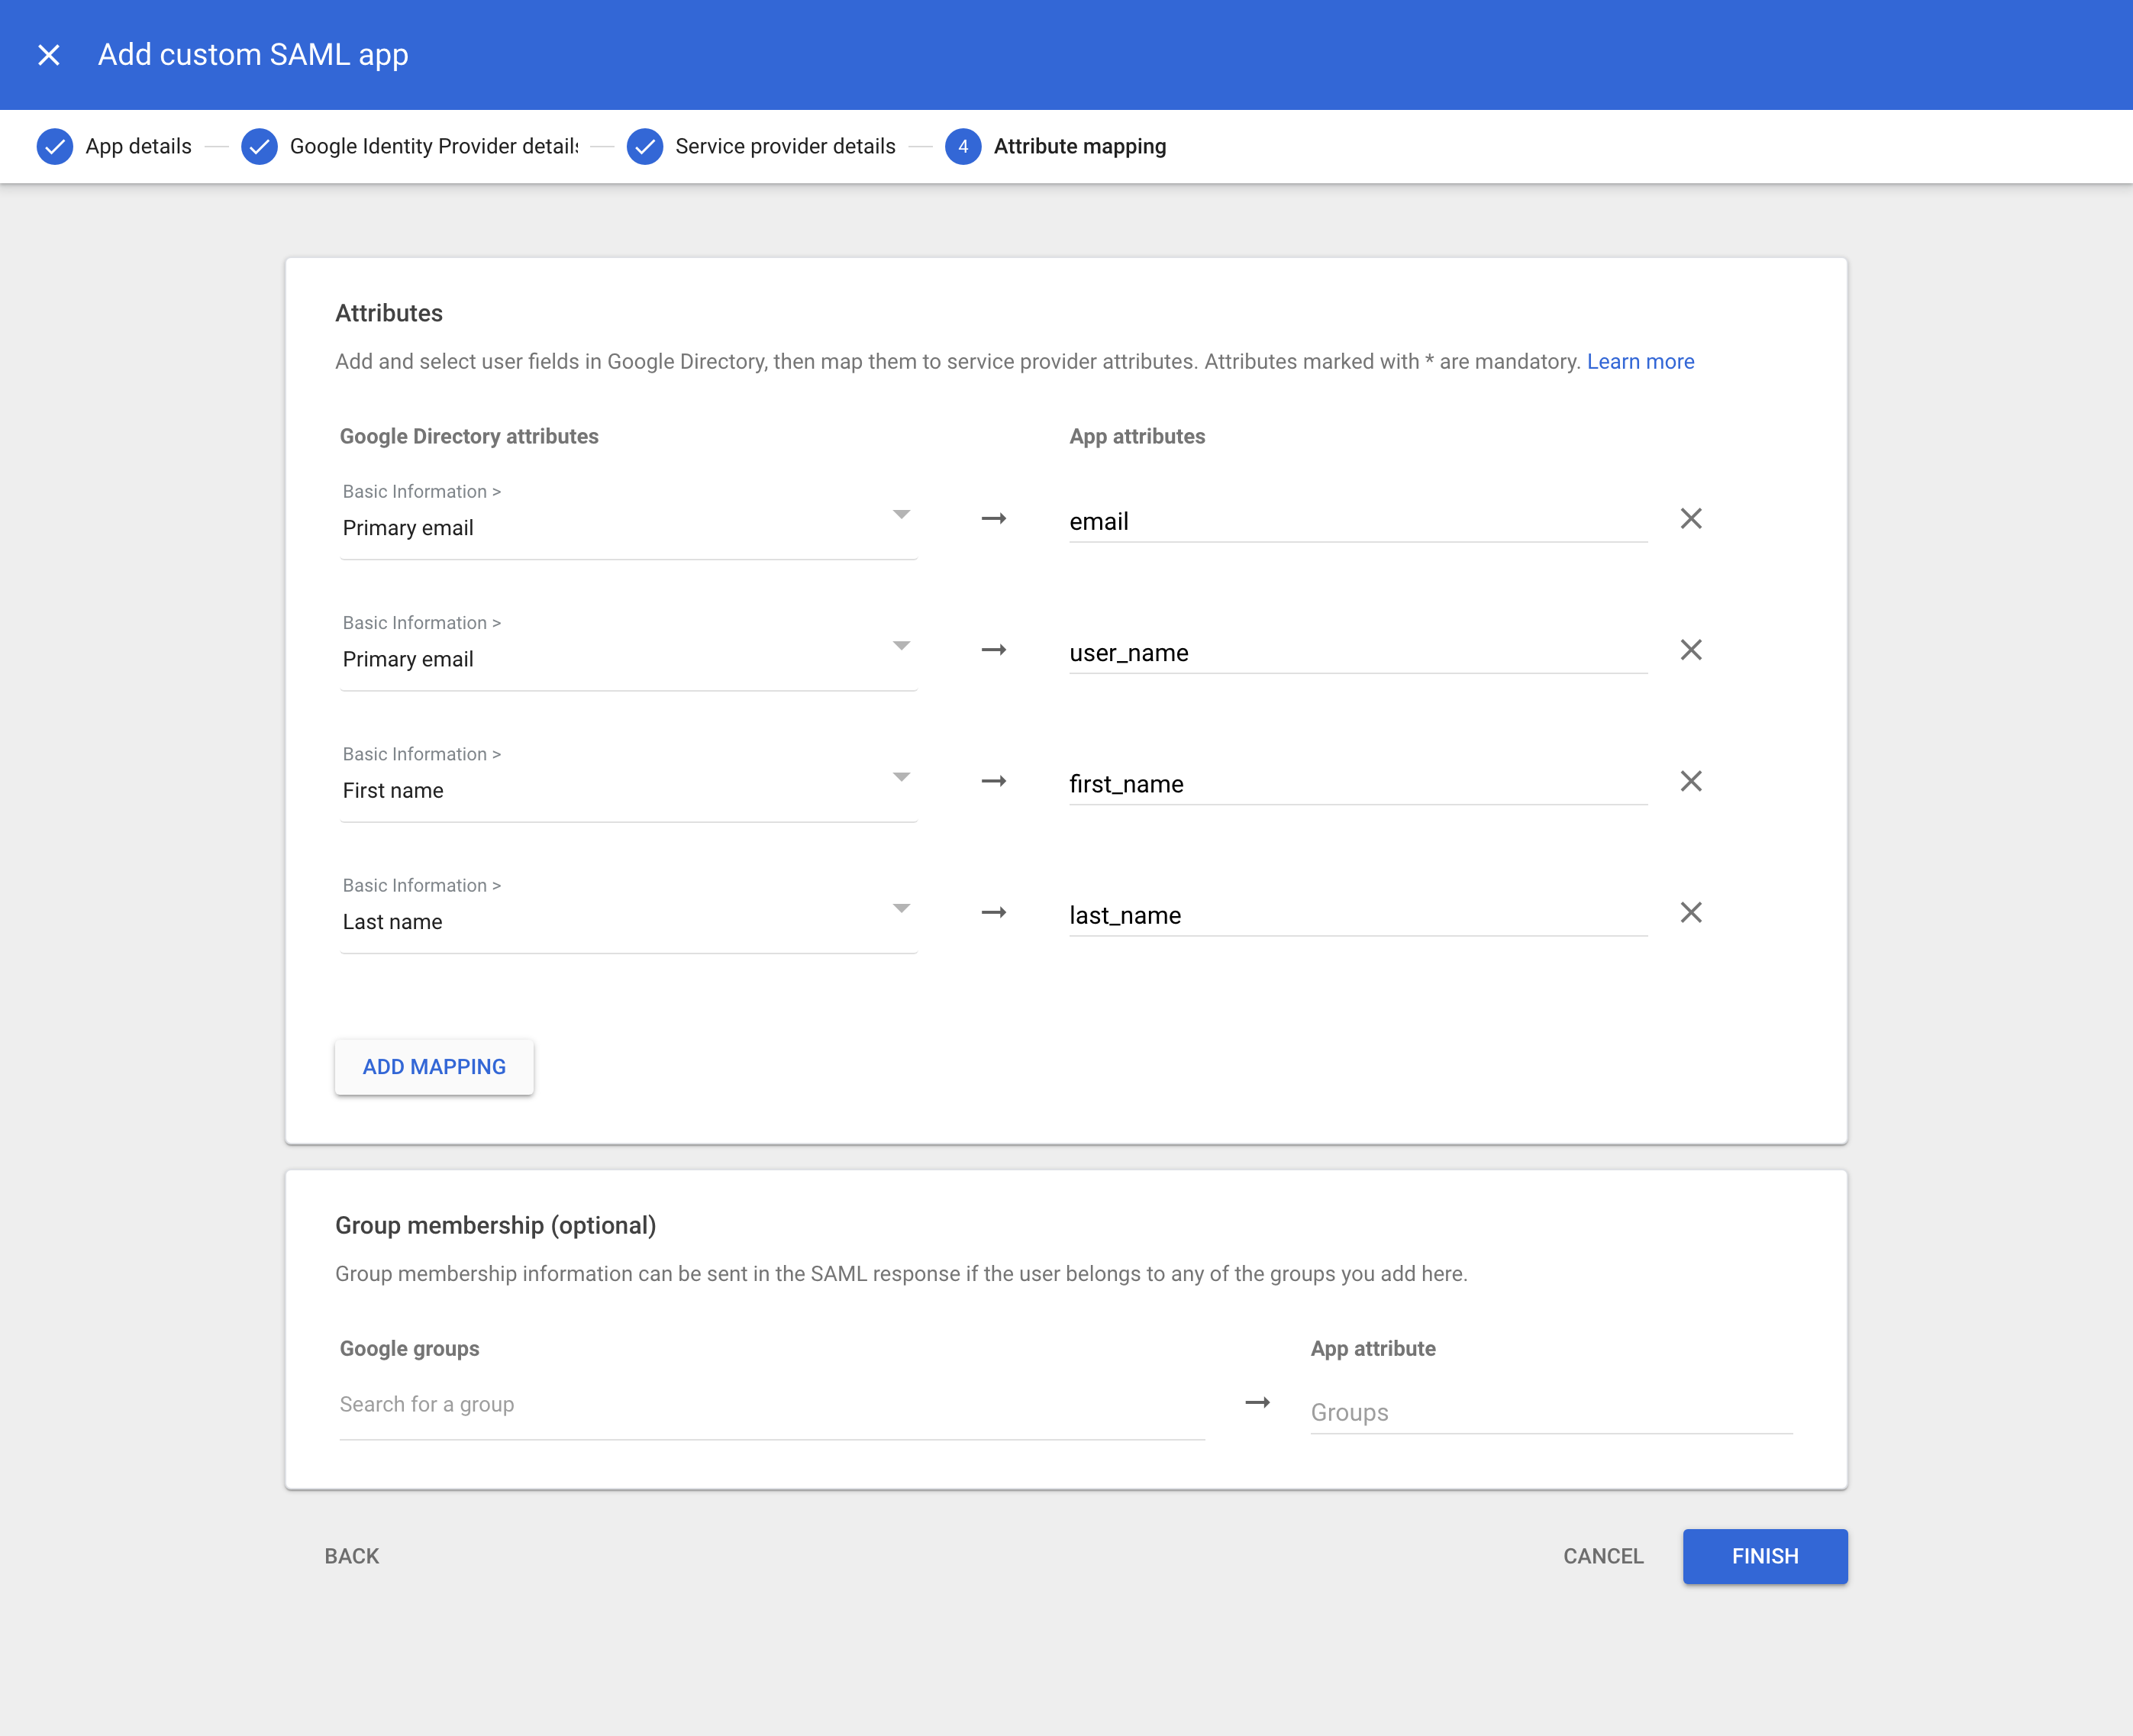
Attribute mappings allow Supabase to get information about your Google Workspace users on each login.
A Primary email to email mapping is required. Other mappings shown below are optional and configurable depending on your Google Workspace setup. If in doubt, replicate the same config as shown.
Any changes you make from this screen will be used later in Step 10: Configure Attribute Mapping.
Step 7: Configure user access
You can configure which Google Workspace user accounts will get access to Supabase. This is important if you wish to limit access to your software engineering teams.
You can configure this access by clicking on the User access card (or down-arrow). Follow the instructions on screen.
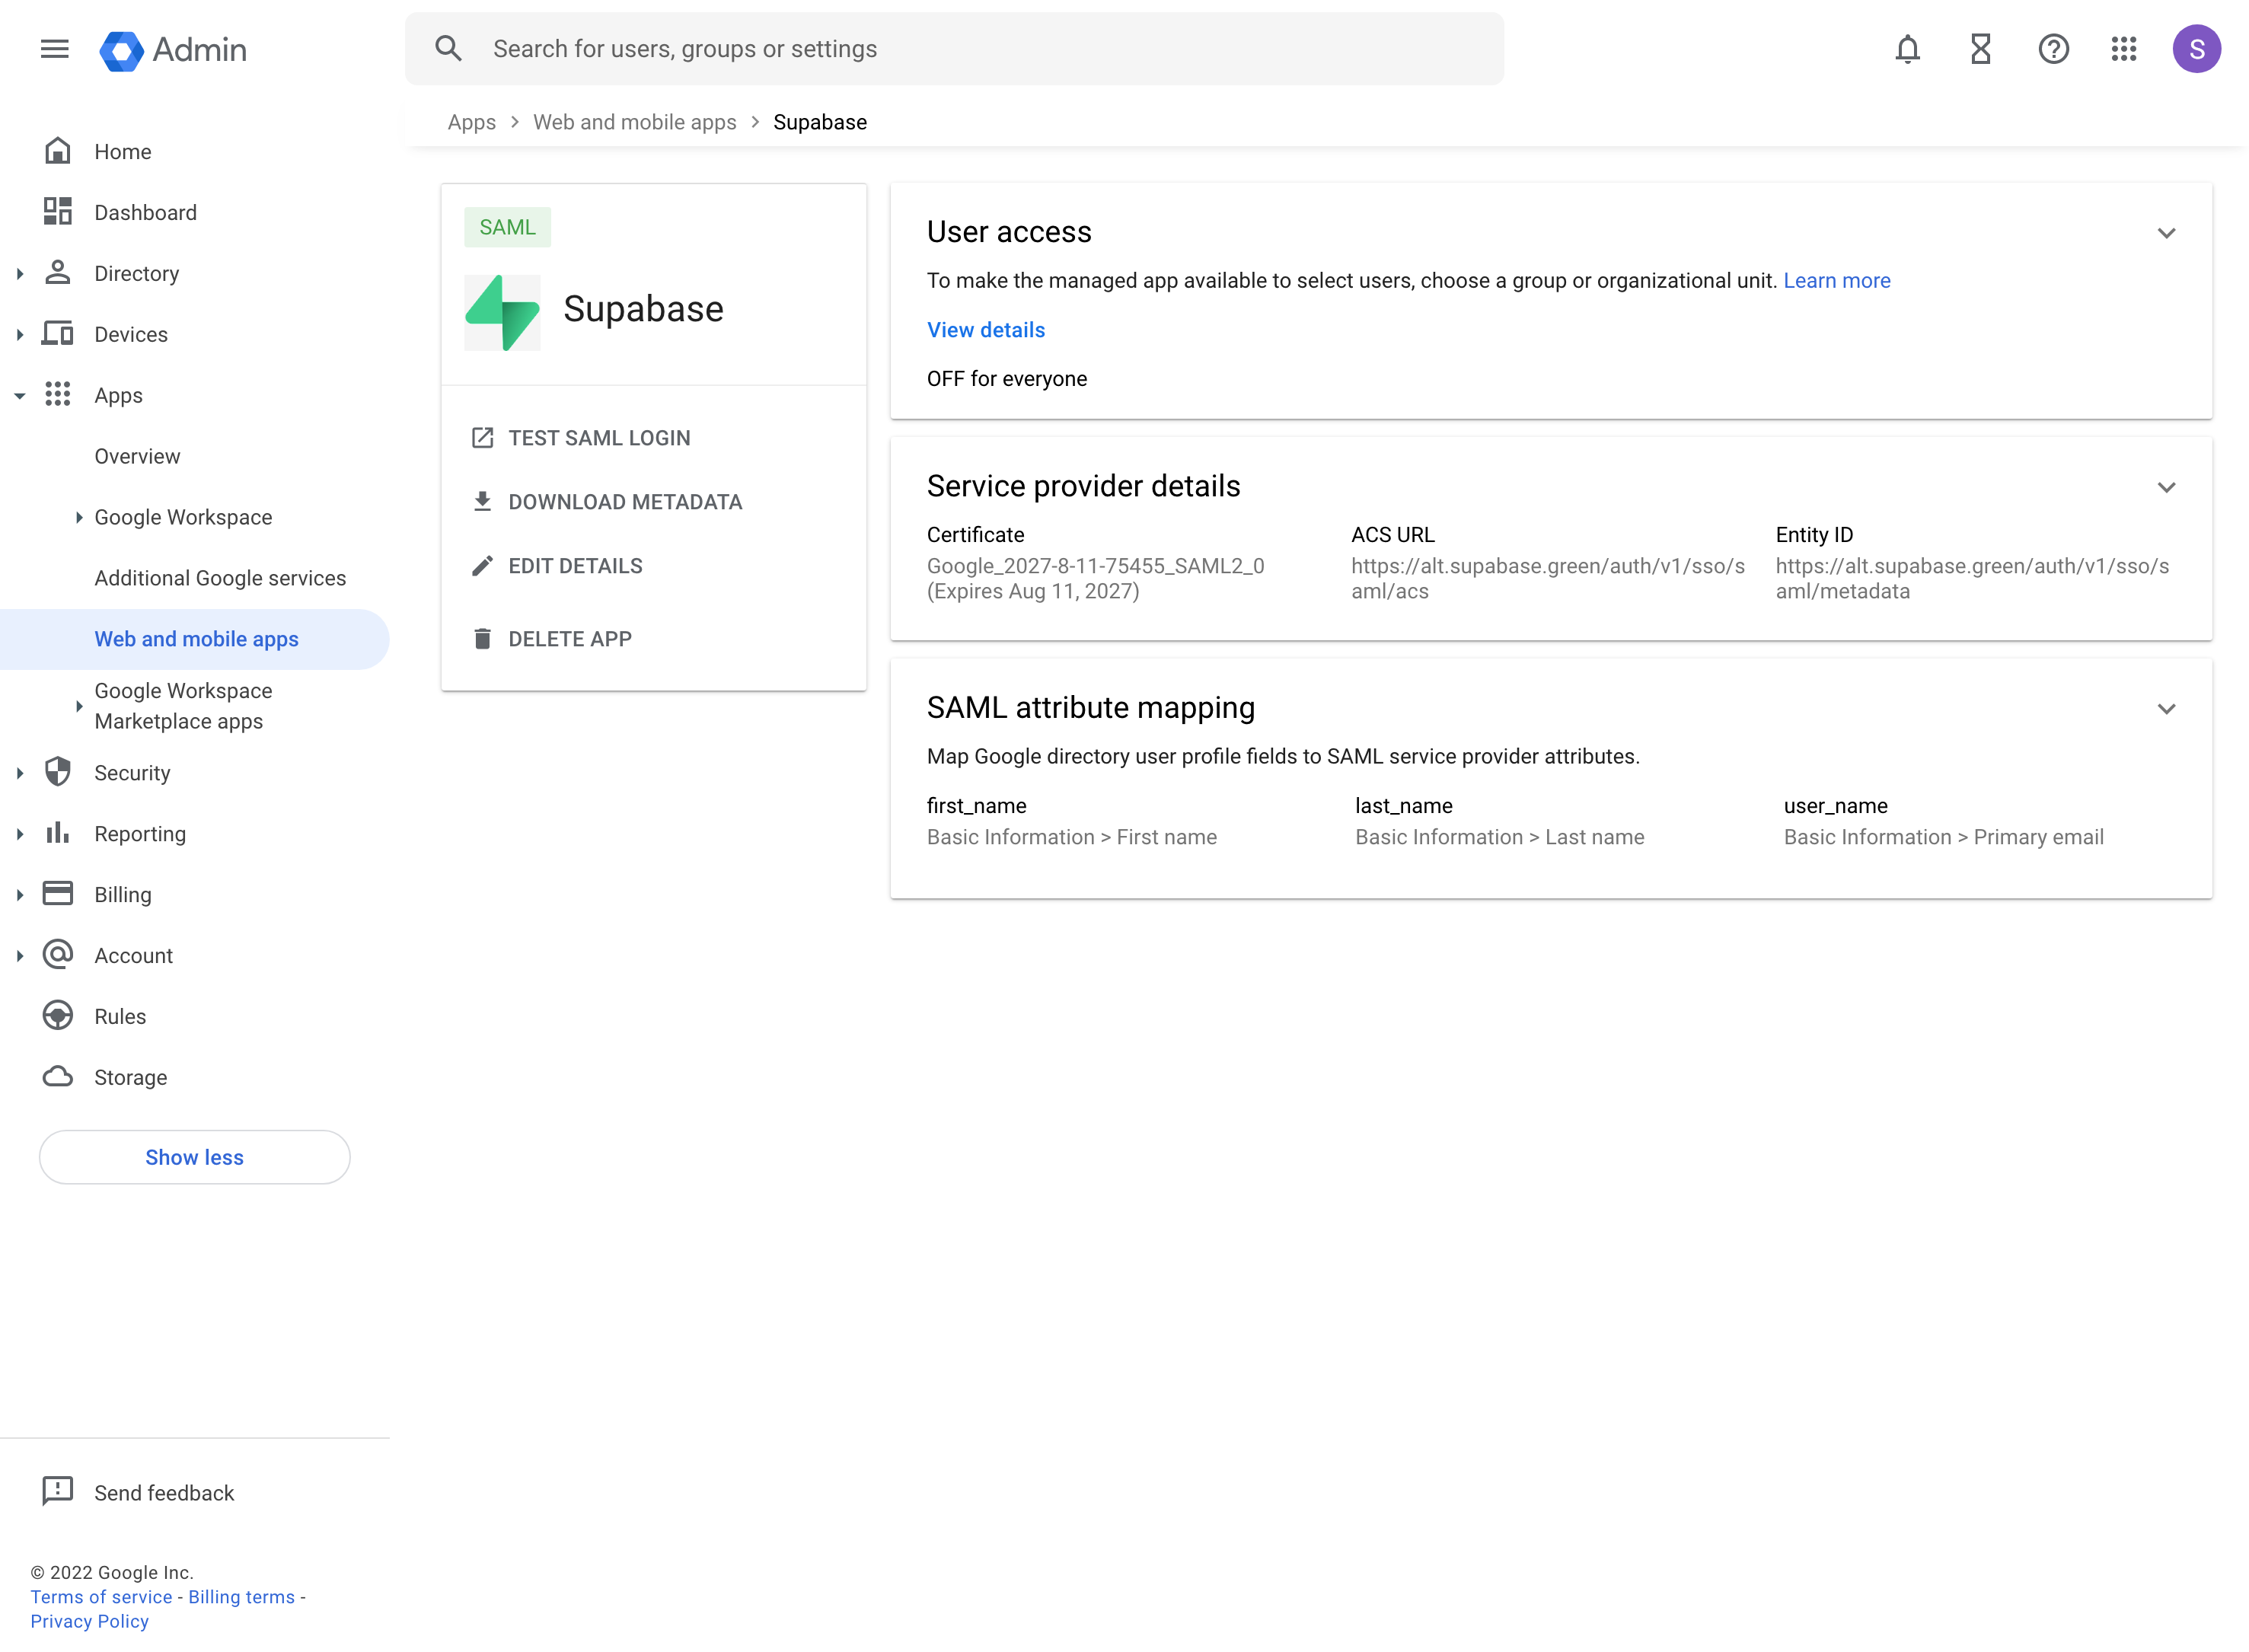
Changes from this step sometimes take a while to propagate across Google's systems. Wait at least 15 minutes before testing your changes.
Step 8: Enable SSO in the Dashboard
-
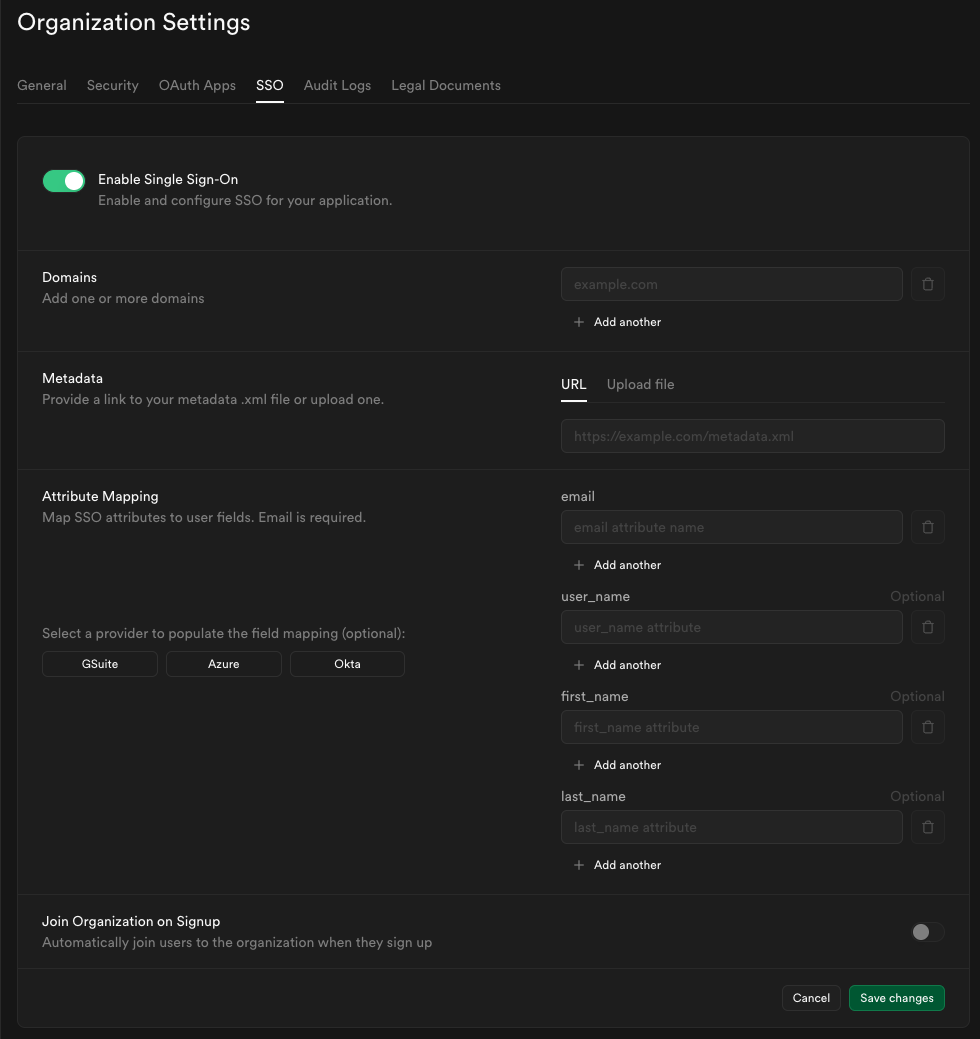
Visit the SSO tab under the Organization Settings page.

-
Toggle Enable Single Sign-On to begin configuration. Once enabled, the configuration form appears.
Step 9: Configure domains
Enter one or more domains associated with your users email addresses (e.g., supabase.com).
These domains determine which users are eligible to sign in via SSO.

If your organization uses more than one email domain - for example, supabase.com for staff and supabase.io for contractors - you can add multiple domains here. All listed domains will be authorized for SSO sign-in.

We do not permit use of public domains like gmail.com, yahoo.com.
Step 10: Configure metadata
Upload the metadata file you downloaded in Step 6 into the Metadata Upload File field.

Step 11: Configure attribute mapping
Enter the SAML attributes you filled out in Step 6 into the Attribute Mapping section.
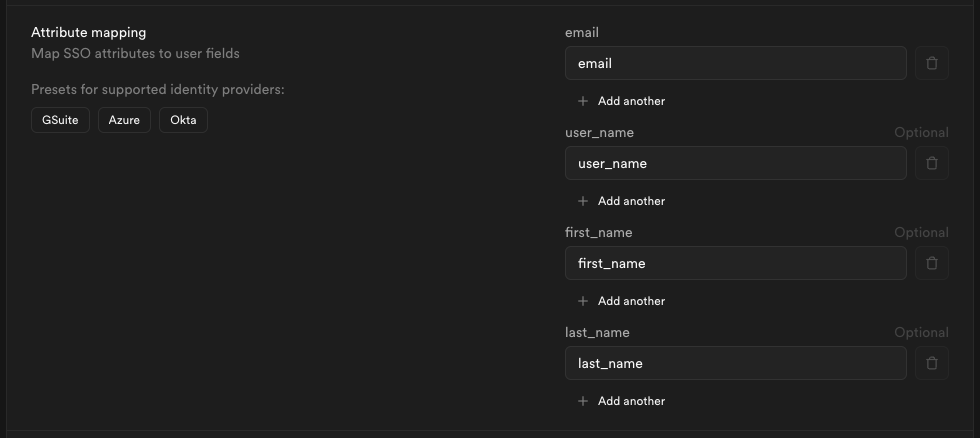
If you did not customize your settings you may save some time by clicking the G Suite preset.
Step 12: Join organization on signup (optional)
By default this setting is disabled, users logging in via SSO will not be added to your organization automatically.

Toggle this on if you want SSO-authenticated users to be automatically added to your organization when they log in via SSO.

When auto-join is enabled, you can choose the default role for new users:

Choose a role that fits the level of access you want to grant to new members.
Visit access-control documentation for details about each role.
Step 13: Save changes and test single sign-on
When you click Save changes, your new SSO configuration is applied immediately. From that moment, any user with an email address matching one of your configured domains who visits your organization's sign-in URL will be routed through the SSO flow.
We recommend asking a few users to test signing in via their Google Workspace account. They can do this by entering their email address on the Sign in with SSO page.
If SSO sign-in doesn't work as expected, contact your Supabase support representative for assistance.