Set Up SSO with Okta
This feature is only available on the Team and Enterprise Plans. If you are an existing Team or Enterprise Plan customer, continue with the setup below.
Looking for docs on how to add Single Sign-On support in your Supabase project? Head on over to Single Sign-On with SAML 2.0 for Projects.
Supabase supports single sign-on (SSO) using Okta.
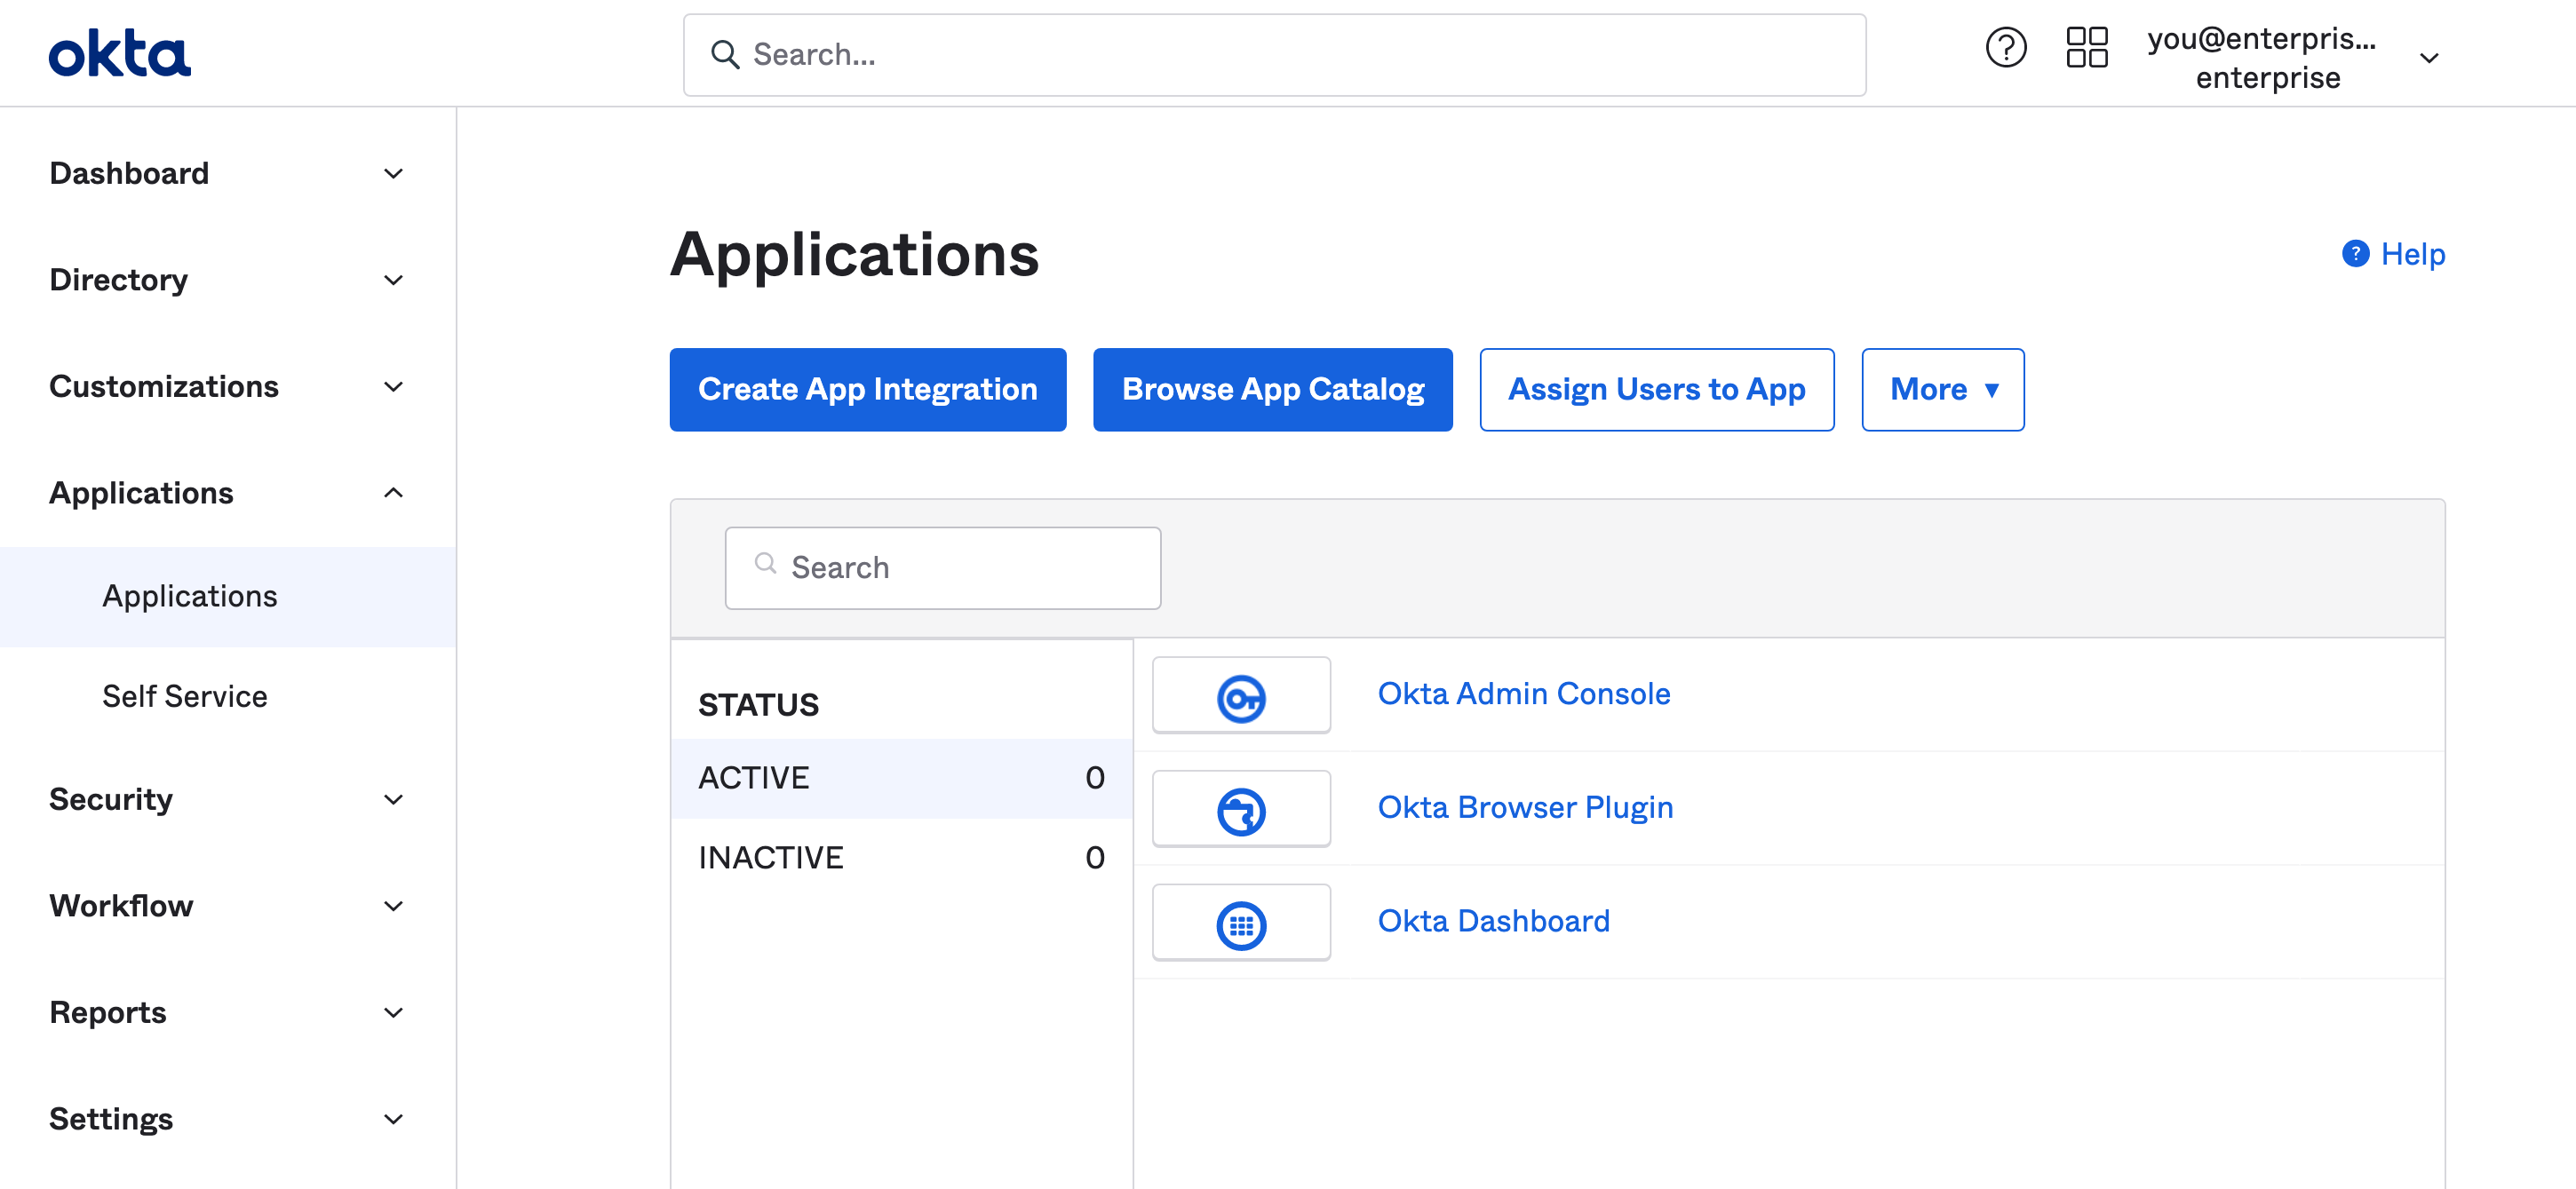
Step 1: Choose to create an app integration in the applications dashboard #
Navigate to the Applications dashboard of the Okta admin console. Click Create App Integration.
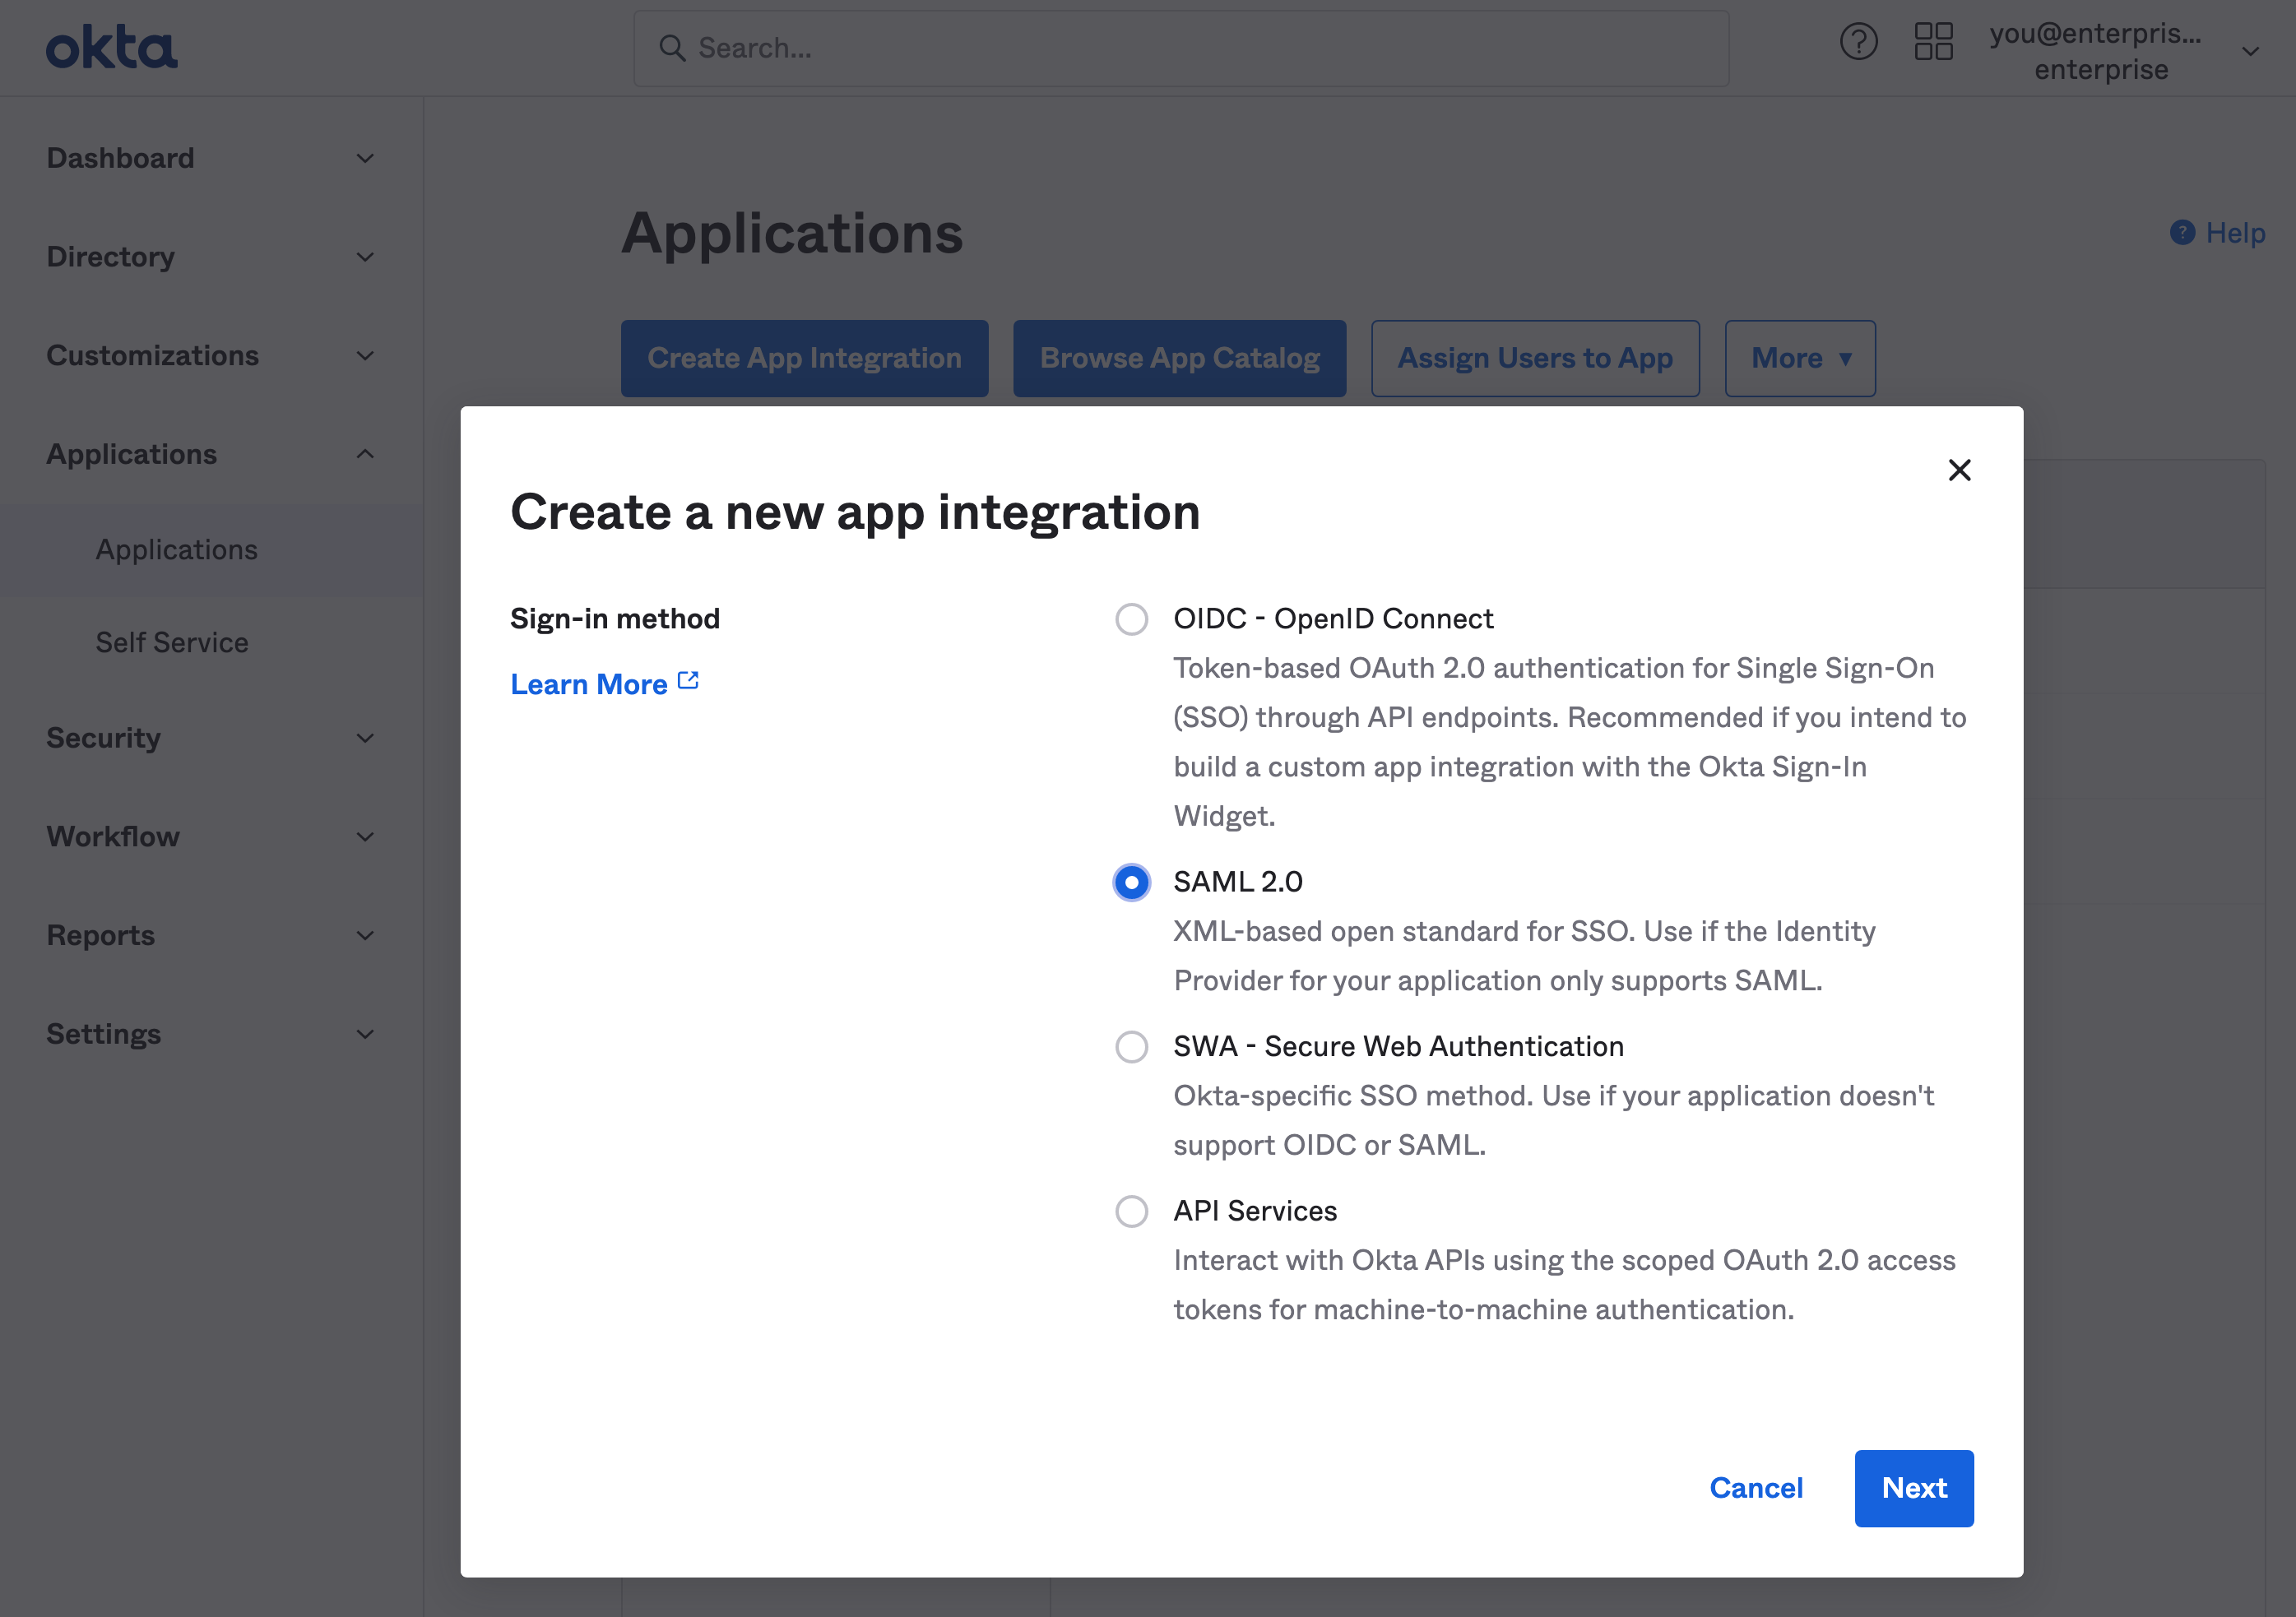
Step 2: Choose SAML 2.0 in the app integration dialog #
Supabase supports the SAML 2.0 SSO protocol. Choose it from the Create a new app integration dialog.
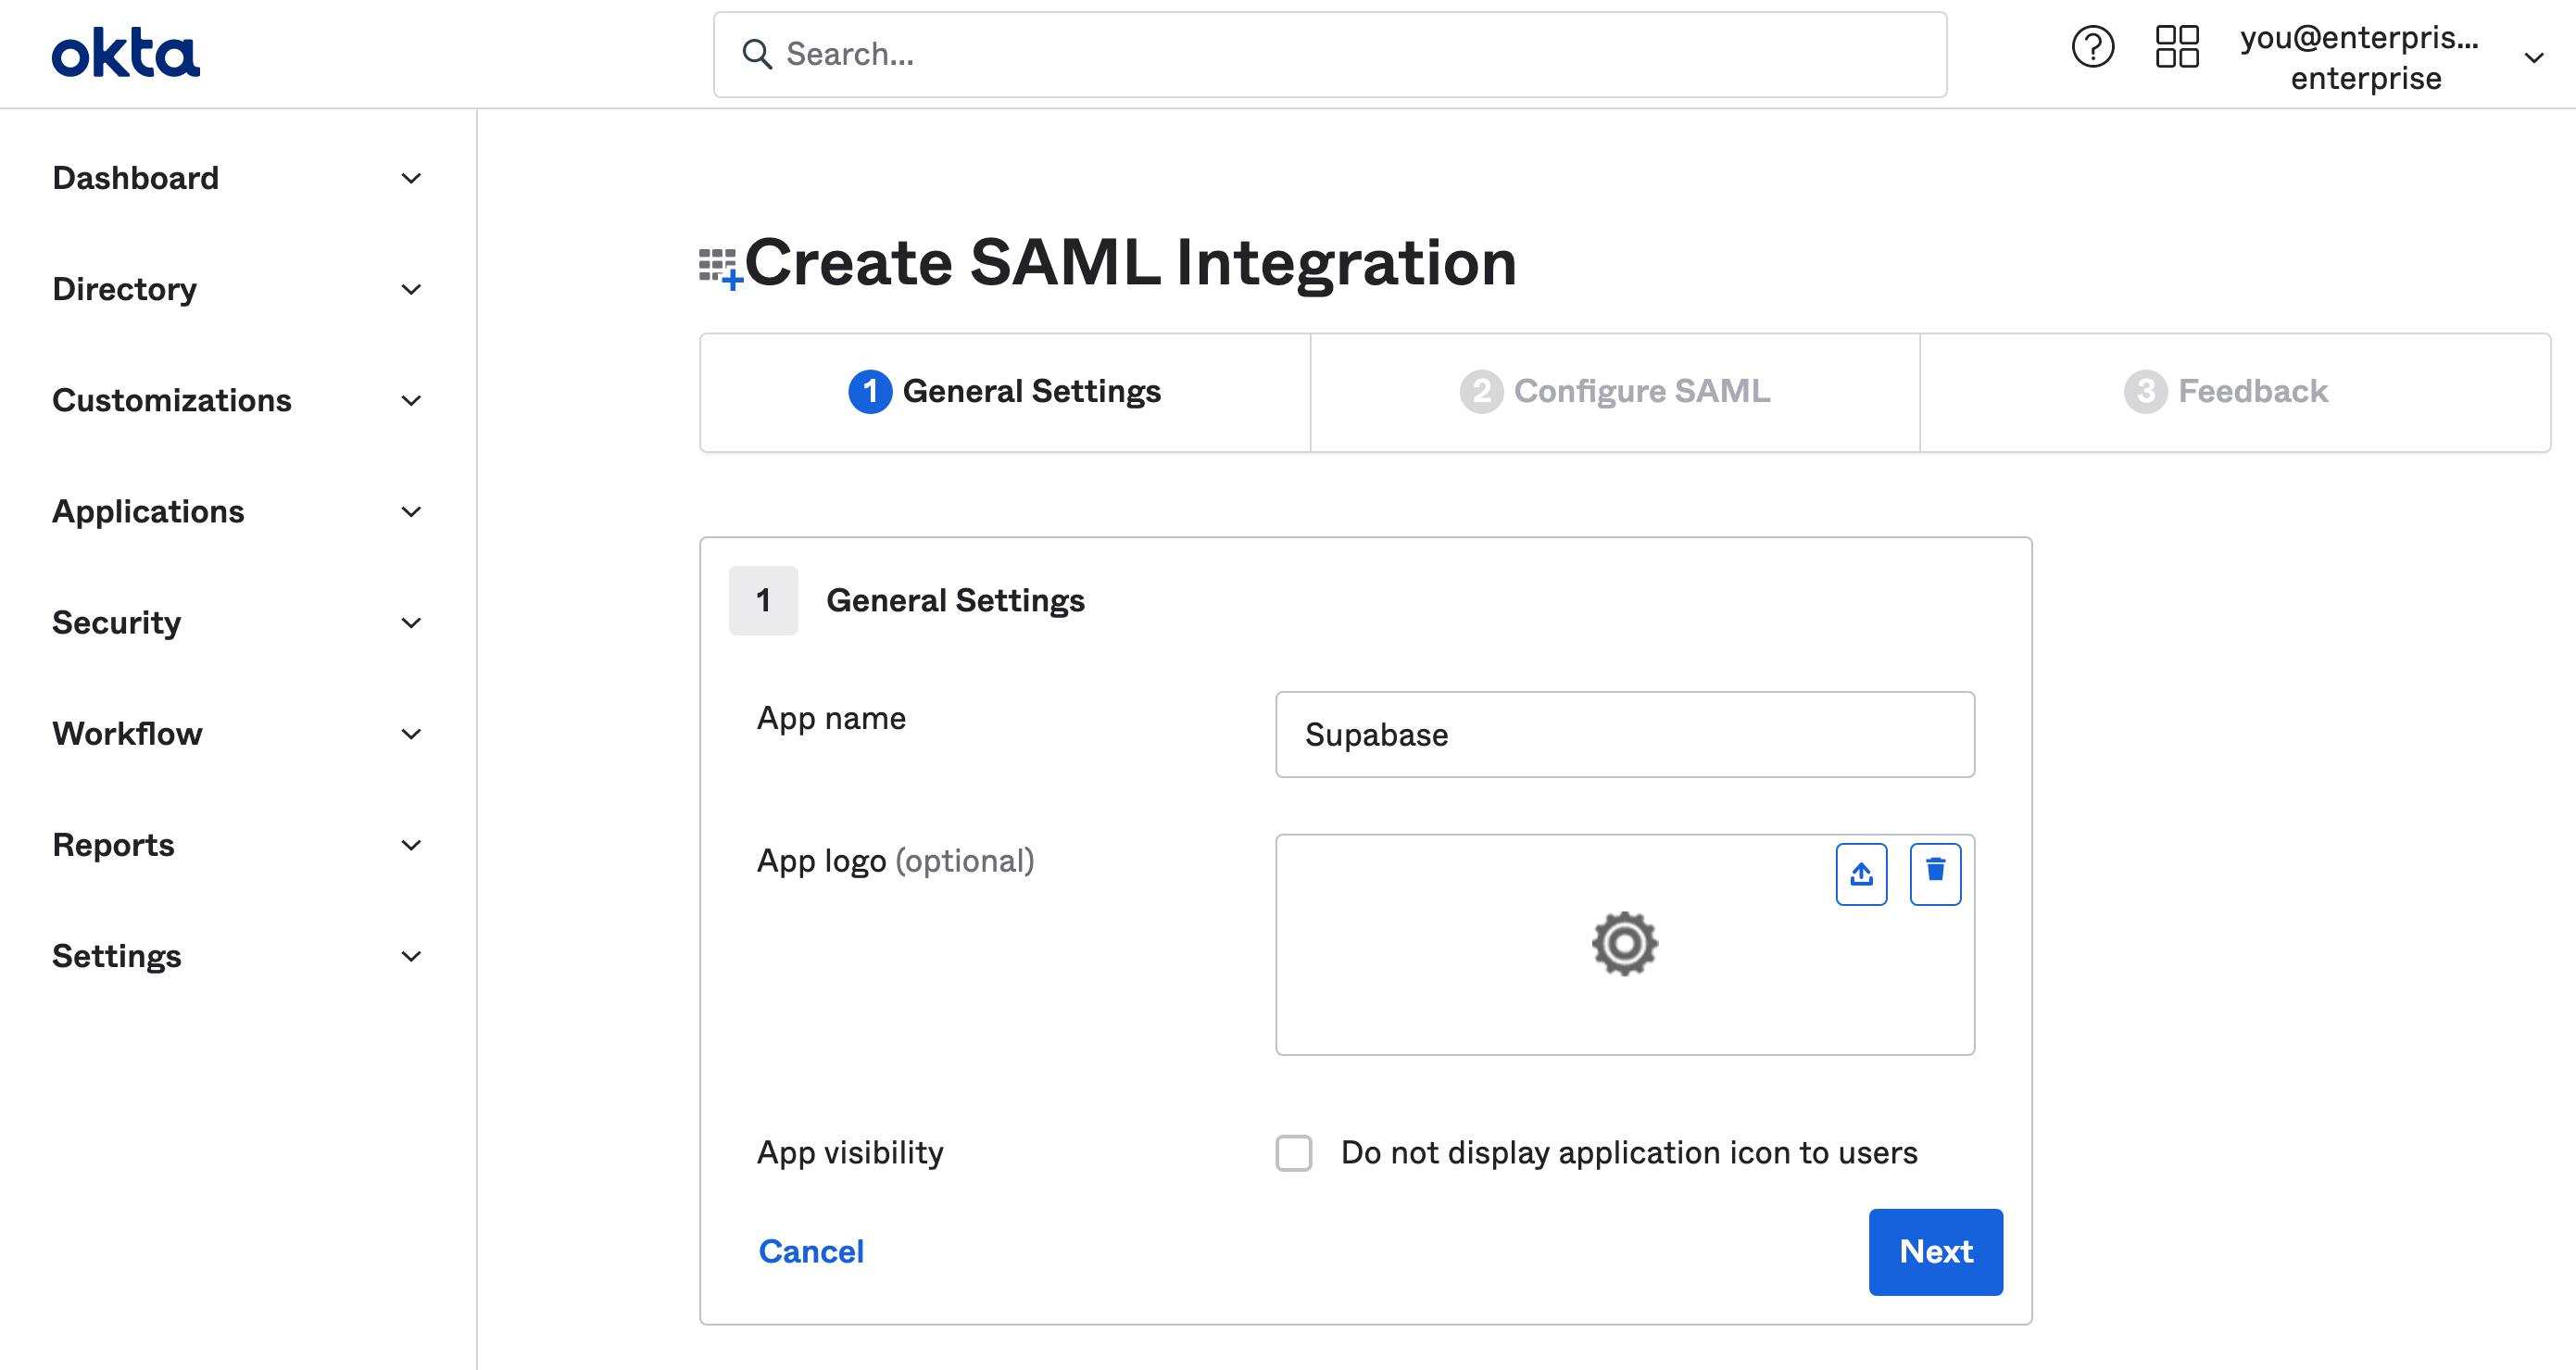
Step 3: Fill out general settings #
The information you enter here is for visibility into your Okta applications menu. You can choose any values you like. Supabase as a name works well for most use cases.
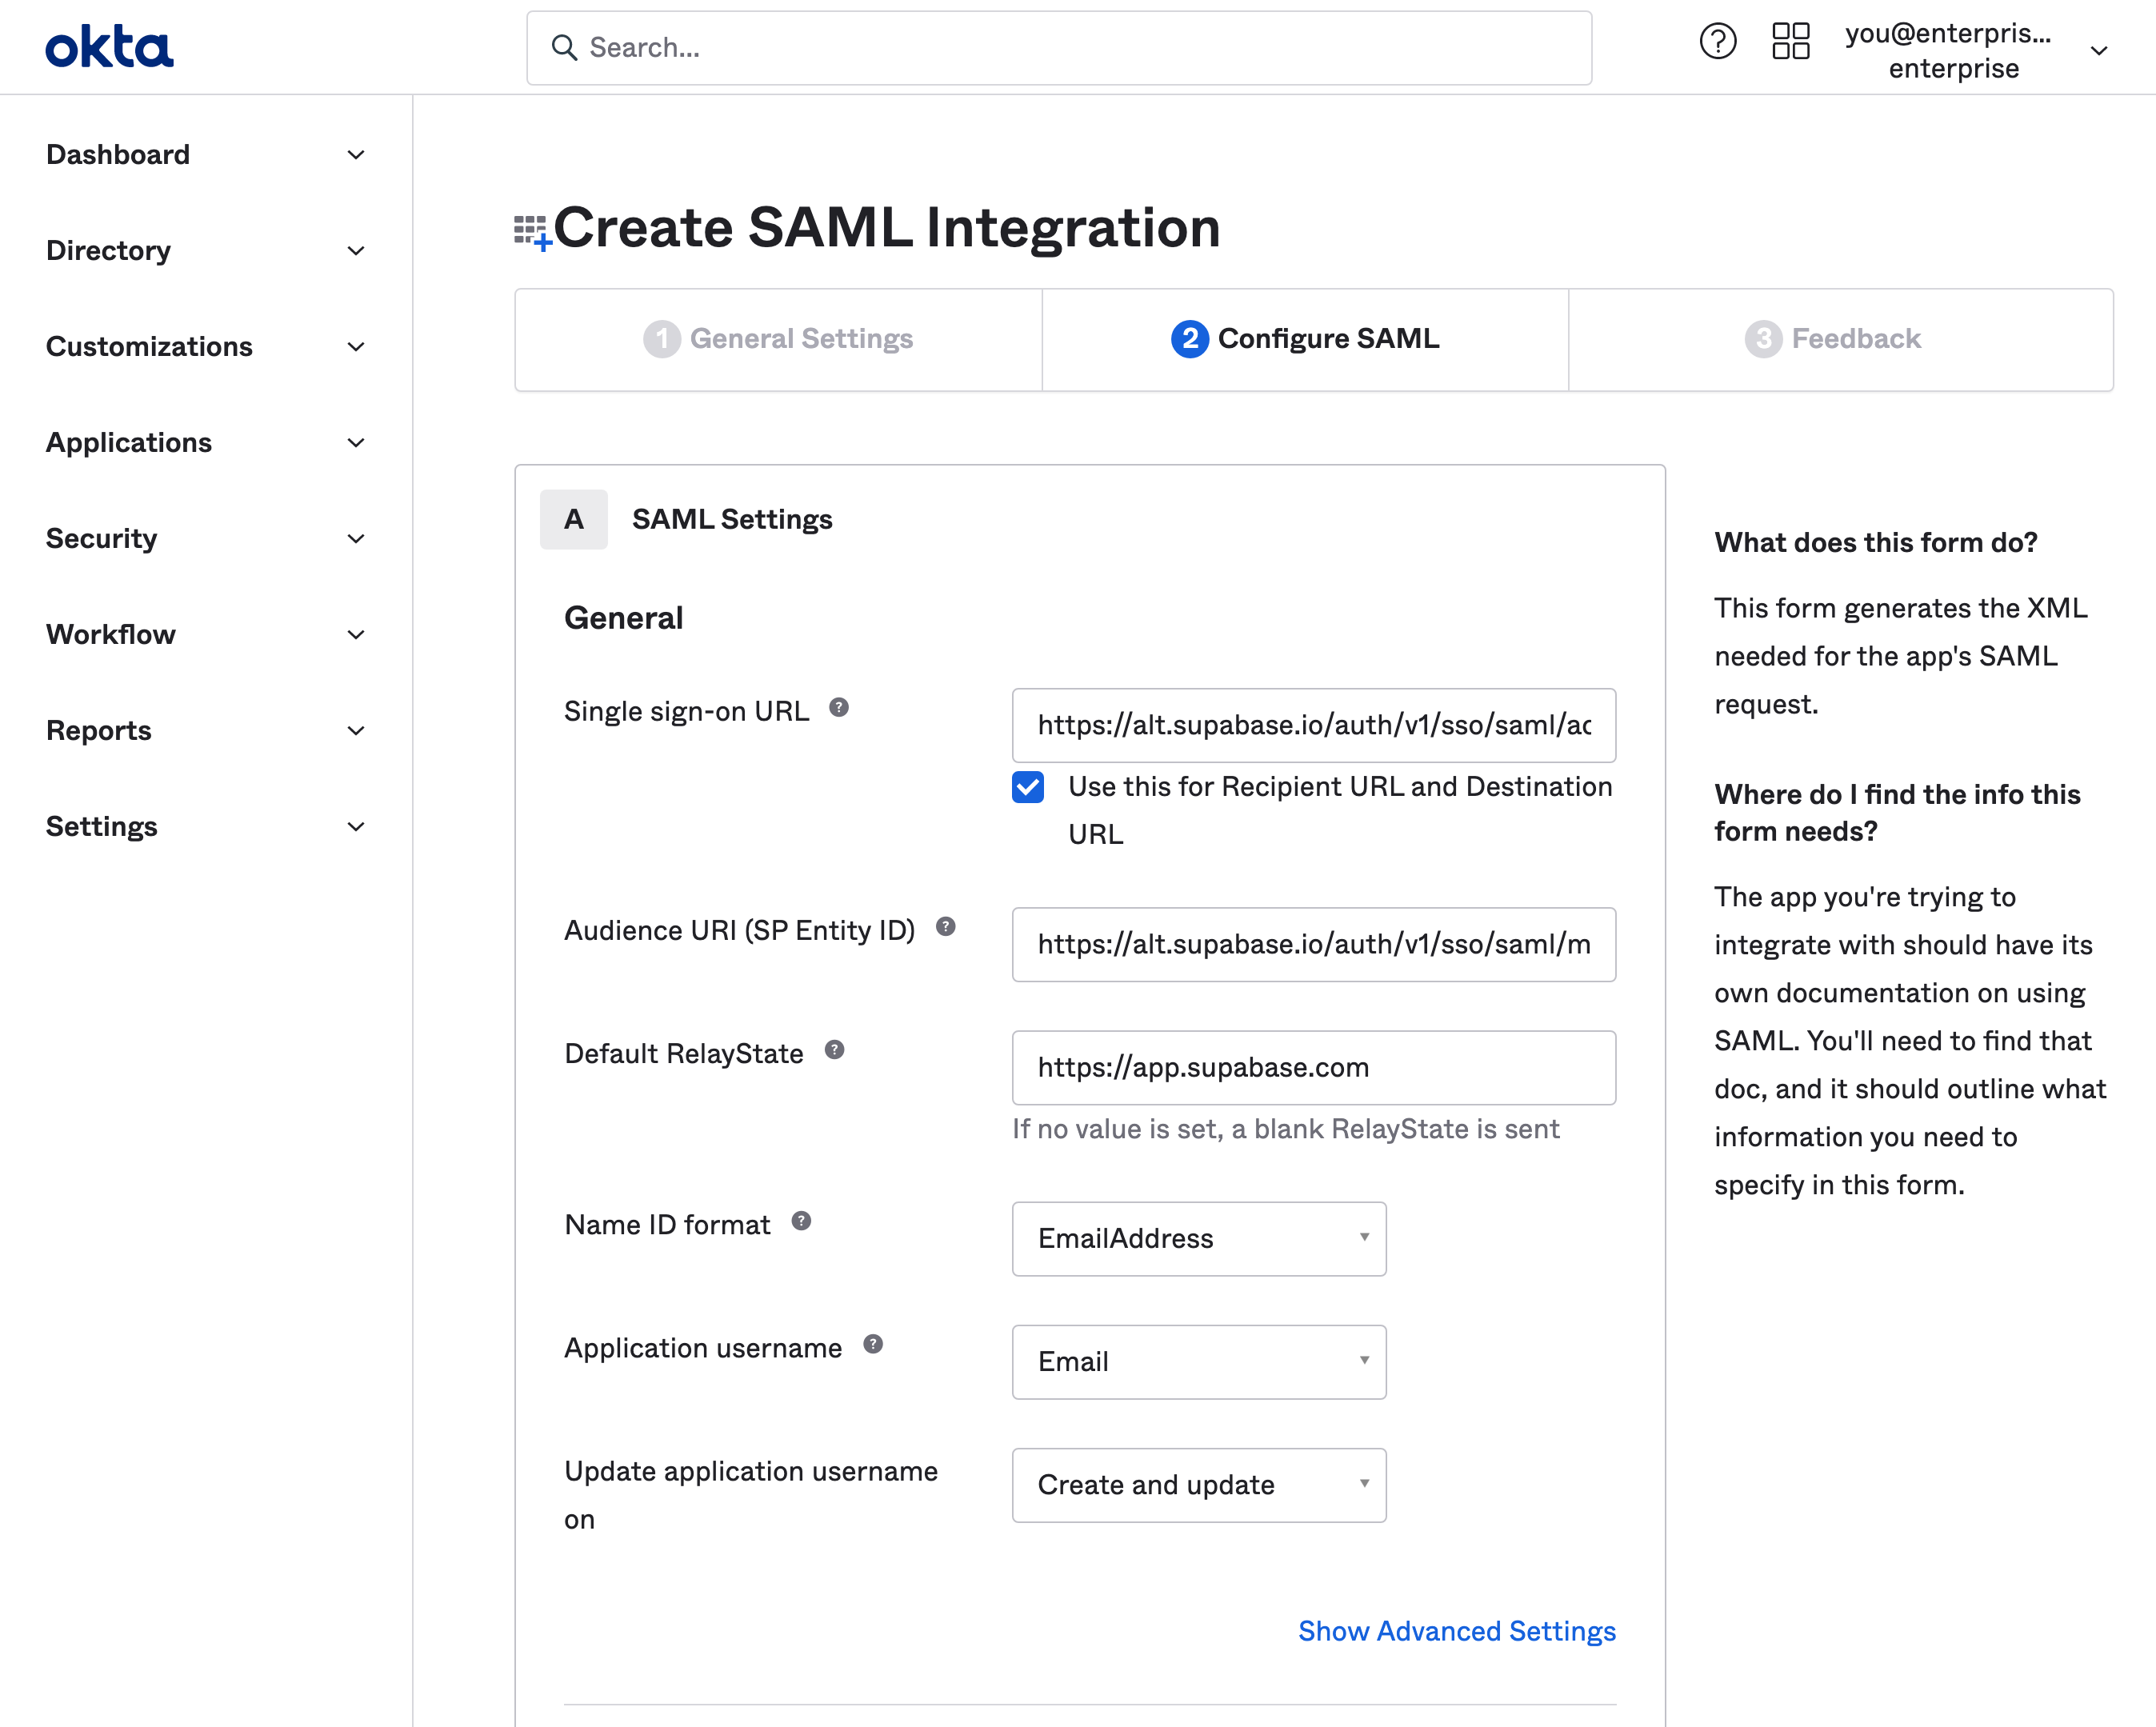
Step 4: Fill out SAML settings #
These settings let Supabase use SAML 2.0 properly with your Okta application. Make sure you enter this information exactly as shown on in this table.
| Setting | Value |
|---|---|
| Single sign-on URL | https://alt.supabase.io/auth/v1/sso/saml/acs |
| Use this for Recipient URL and Destination URL | ✔️ |
| Audience URI (SP Entity ID) | https://alt.supabase.io/auth/v1/sso/saml/metadata |
Default RelayState | https://supabase.com/dashboard |
| Name ID format | EmailAddress |
| Application username | |
| Update application username on | Create and update |
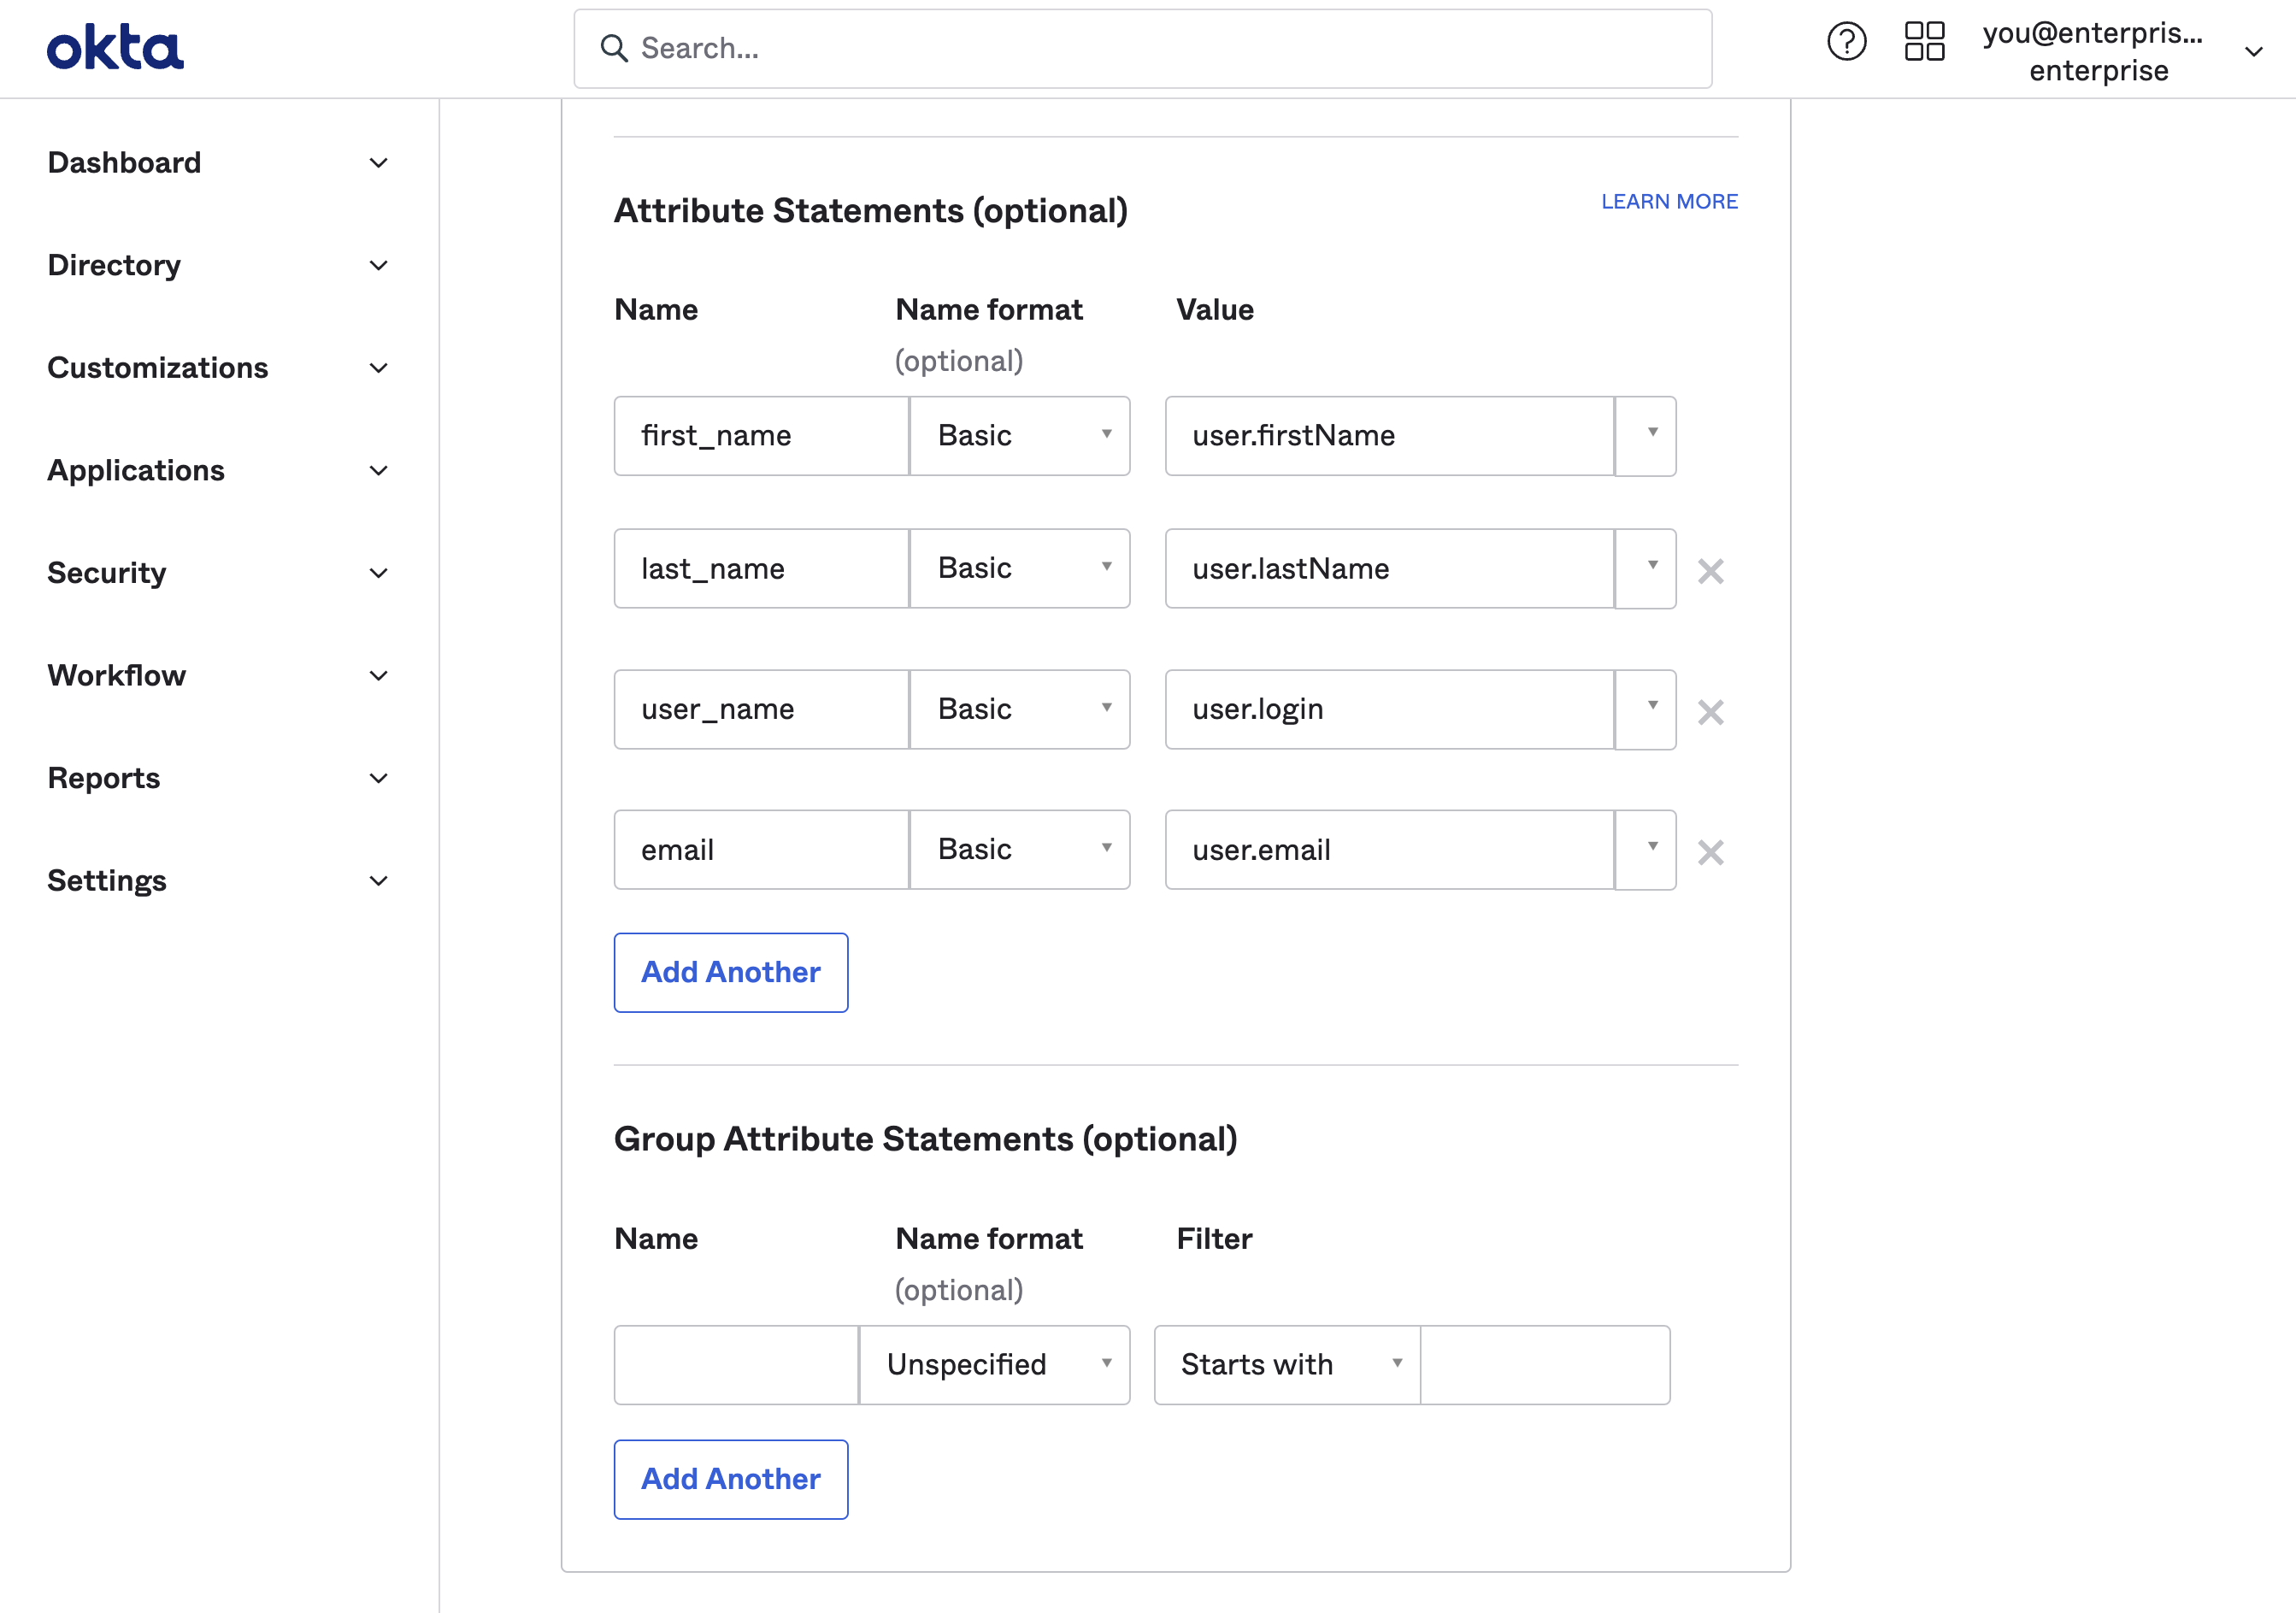
Step 5: Fill out attribute statements #
Attribute Statements allow Supabase to get information about your Okta users on each login.
A email to user.email statement is required. Other mappings shown below are optional and configurable depending on your Okta setup. If in doubt, replicate the same config as shown. You will use this mapping later in Step 10.
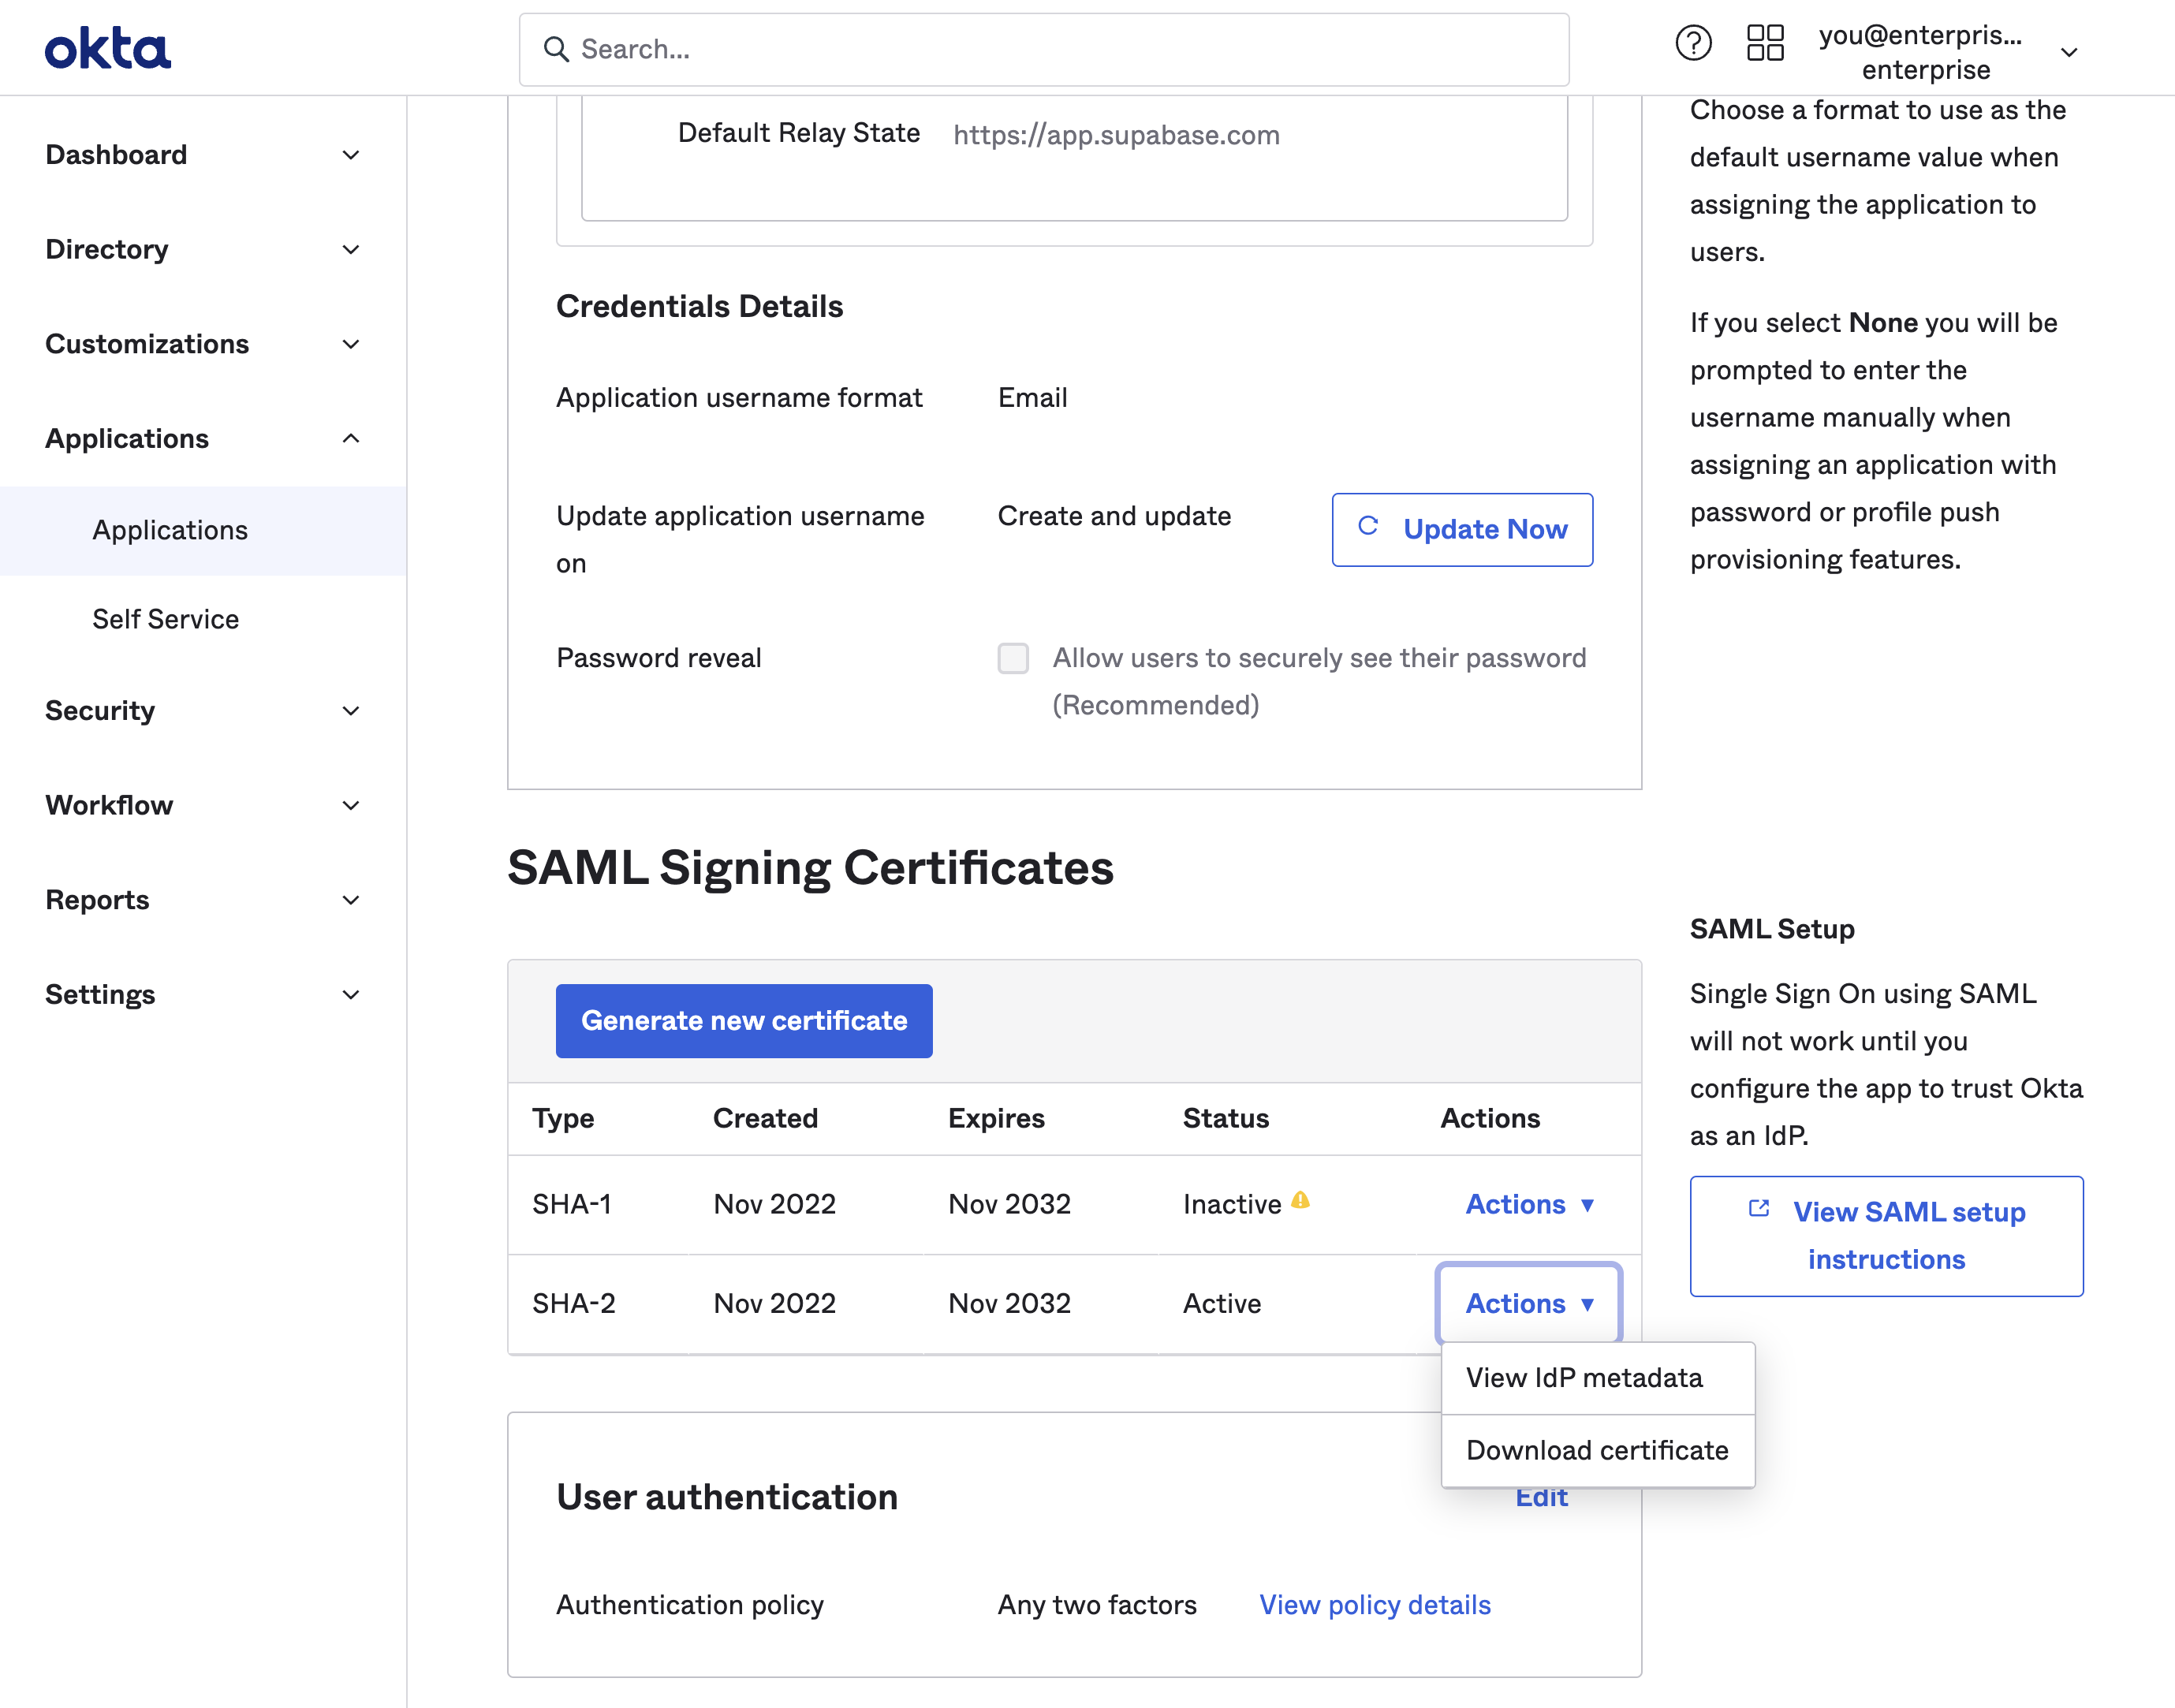
Step 6: Obtain IdP metadata URL #
Supabase needs to finalize enabling single sign-on with your Okta application.
To do this scroll down to the SAML Signing Certificates section on the Sign On tab of the Supabase application. Pick the SHA-2 row with an Active status. Click on the Actions dropdown button and then on the View IdP Metadata.
This will open up the SAML 2.0 Metadata XML file in a new tab in your browser. You will need to enter this URL later in Step 9.
The link usually has this structure: https://<okta-org>.okta.com/apps/<app-id>/sso/saml/metadata
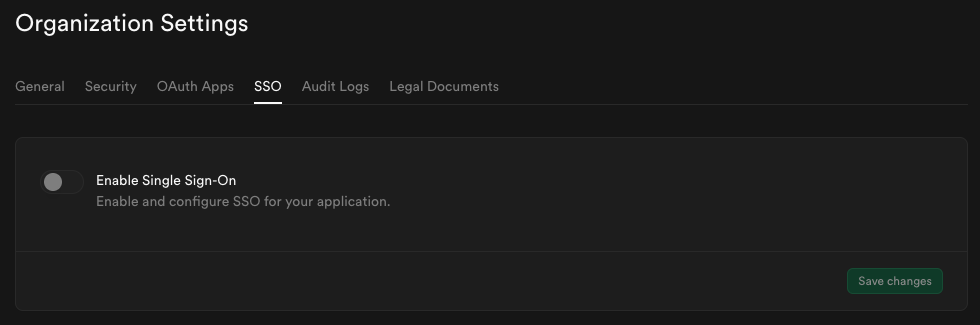
Step 7: Enable SSO in the Dashboard #
-
Visit the SSO tab under the Organization Settings page.
-
Toggle Enable Single Sign-On to begin configuration. Once enabled, the configuration form appears.
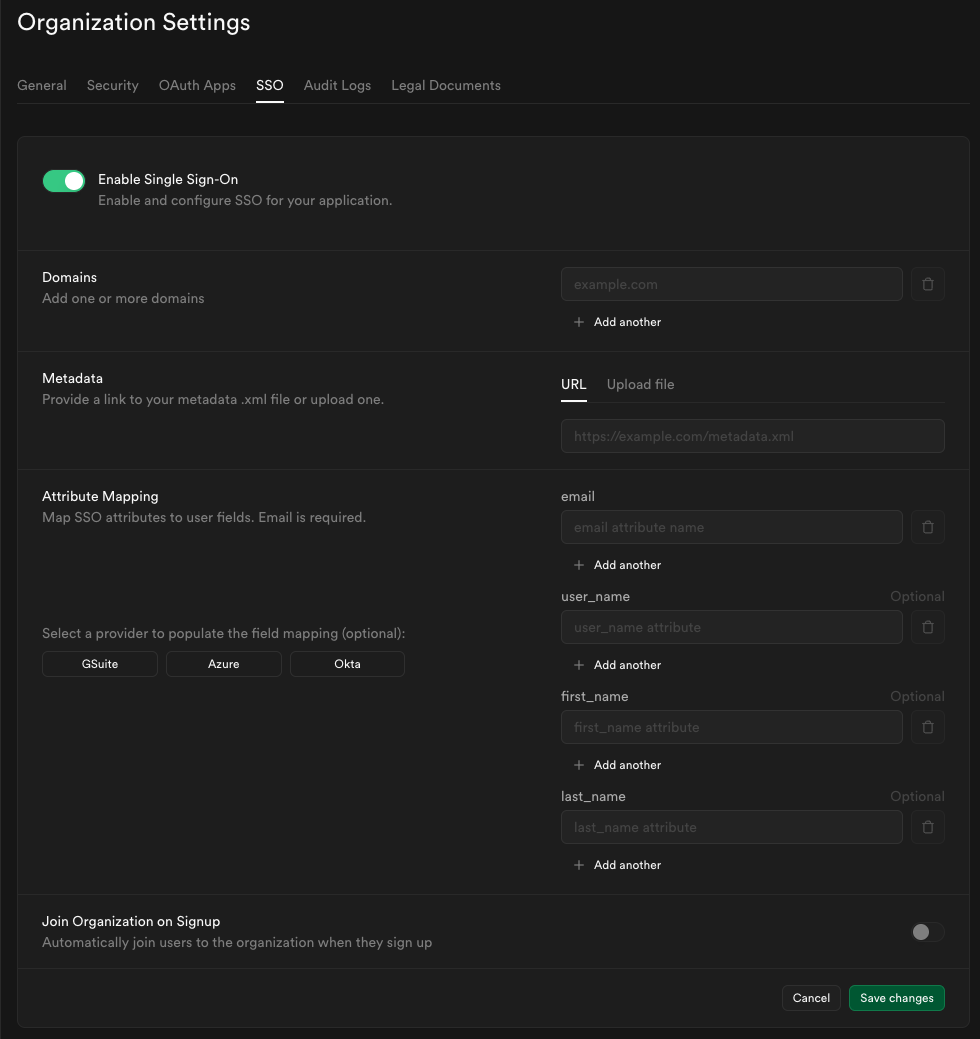
Step 8: Configure domains #
Enter one or more domains associated with your users email addresses (e.g., supabase.com).
These domains determine which users are eligible to sign in via SSO.

If your organization uses more than one email domain - for example, supabase.com for staff and supabase.io for contractors - you can add multiple domains here. All listed domains will be authorized for SSO sign-in.

We do not permit use of public domains like gmail.com, yahoo.com.
Each SSO provider can be configured with different email domains. For multi-environment setups (Dev/Staging/Prod), we recommend using IdP-initiated flow with multiple SAML apps under the same domain rather than domain-based routing. For more details, see the Multiple SSO Providers guide.
Step 9: Configure metadata #
Enter the metadata URL you obtained from Step 6 into the Metadata URL field:

Step 10: Configure attribute mapping #
Enter the SAML attributes you filled out in Step 5 into the Attribute Mapping section.
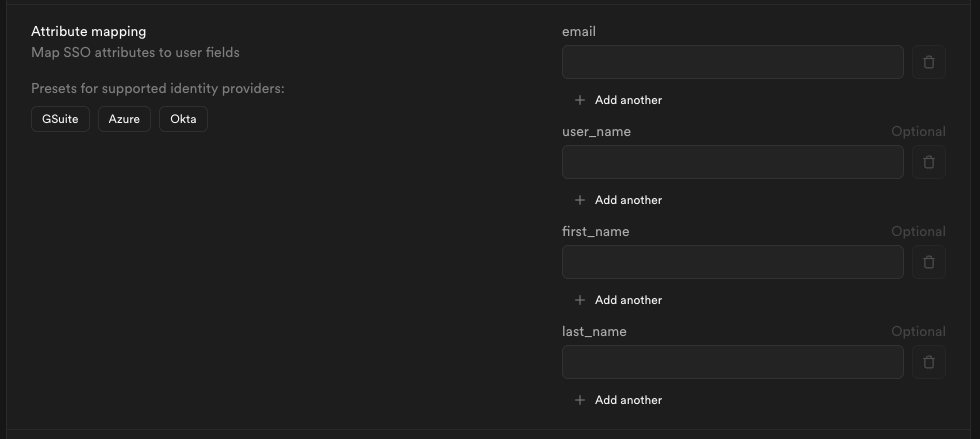
If you did not customize your settings you may save some time by clicking the Okta preset.
Step 11: Join organization on signup (optional) #
Recommended workflow: Start with auto-join disabled to test your SSO configuration. Once SSO login is working correctly, enable auto-join if desired.
By default this setting is disabled, users logging in via SSO will not be added to your organization automatically.

Toggle this on if you want SSO-authenticated users to be automatically added to your organization when they log in via SSO. Auto-join applies on every login, not just first signup - this makes it safe to test SSO before enabling this feature.

When auto-join is enabled, you can choose the default role for new users:
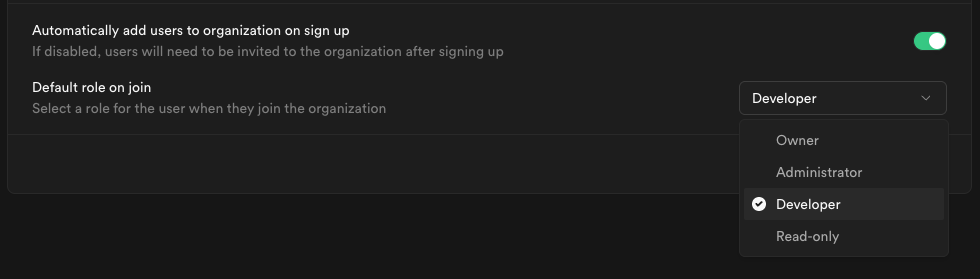
We recommend choosing Developer as the default role (principle of least privilege) and promoting users individually as needed.
Visit access-control documentation for details about each role.
Step 12: Save changes #
When you click Save changes, your new SSO configuration is applied immediately. From that moment, any user with an email address matching one of your configured domains who visits your organization's sign-in URL will be routed through the SSO flow.
Next step: Test your SSO configuration
Before rolling out SSO to your organization, we strongly recommend thorough testing. Visit our SSO Testing and Best Practices guide for:
- Step-by-step testing instructions
- How to verify auto-join works correctly
- Common issues and troubleshooting
- Security best practices
- Pre-launch checklist
Testing in Okta sandbox: If your organization has an Okta sandbox environment, consider testing your SSO configuration there first before applying to production.