SSO and Social Login with WorkOS
Use Social Login with WorkOS#
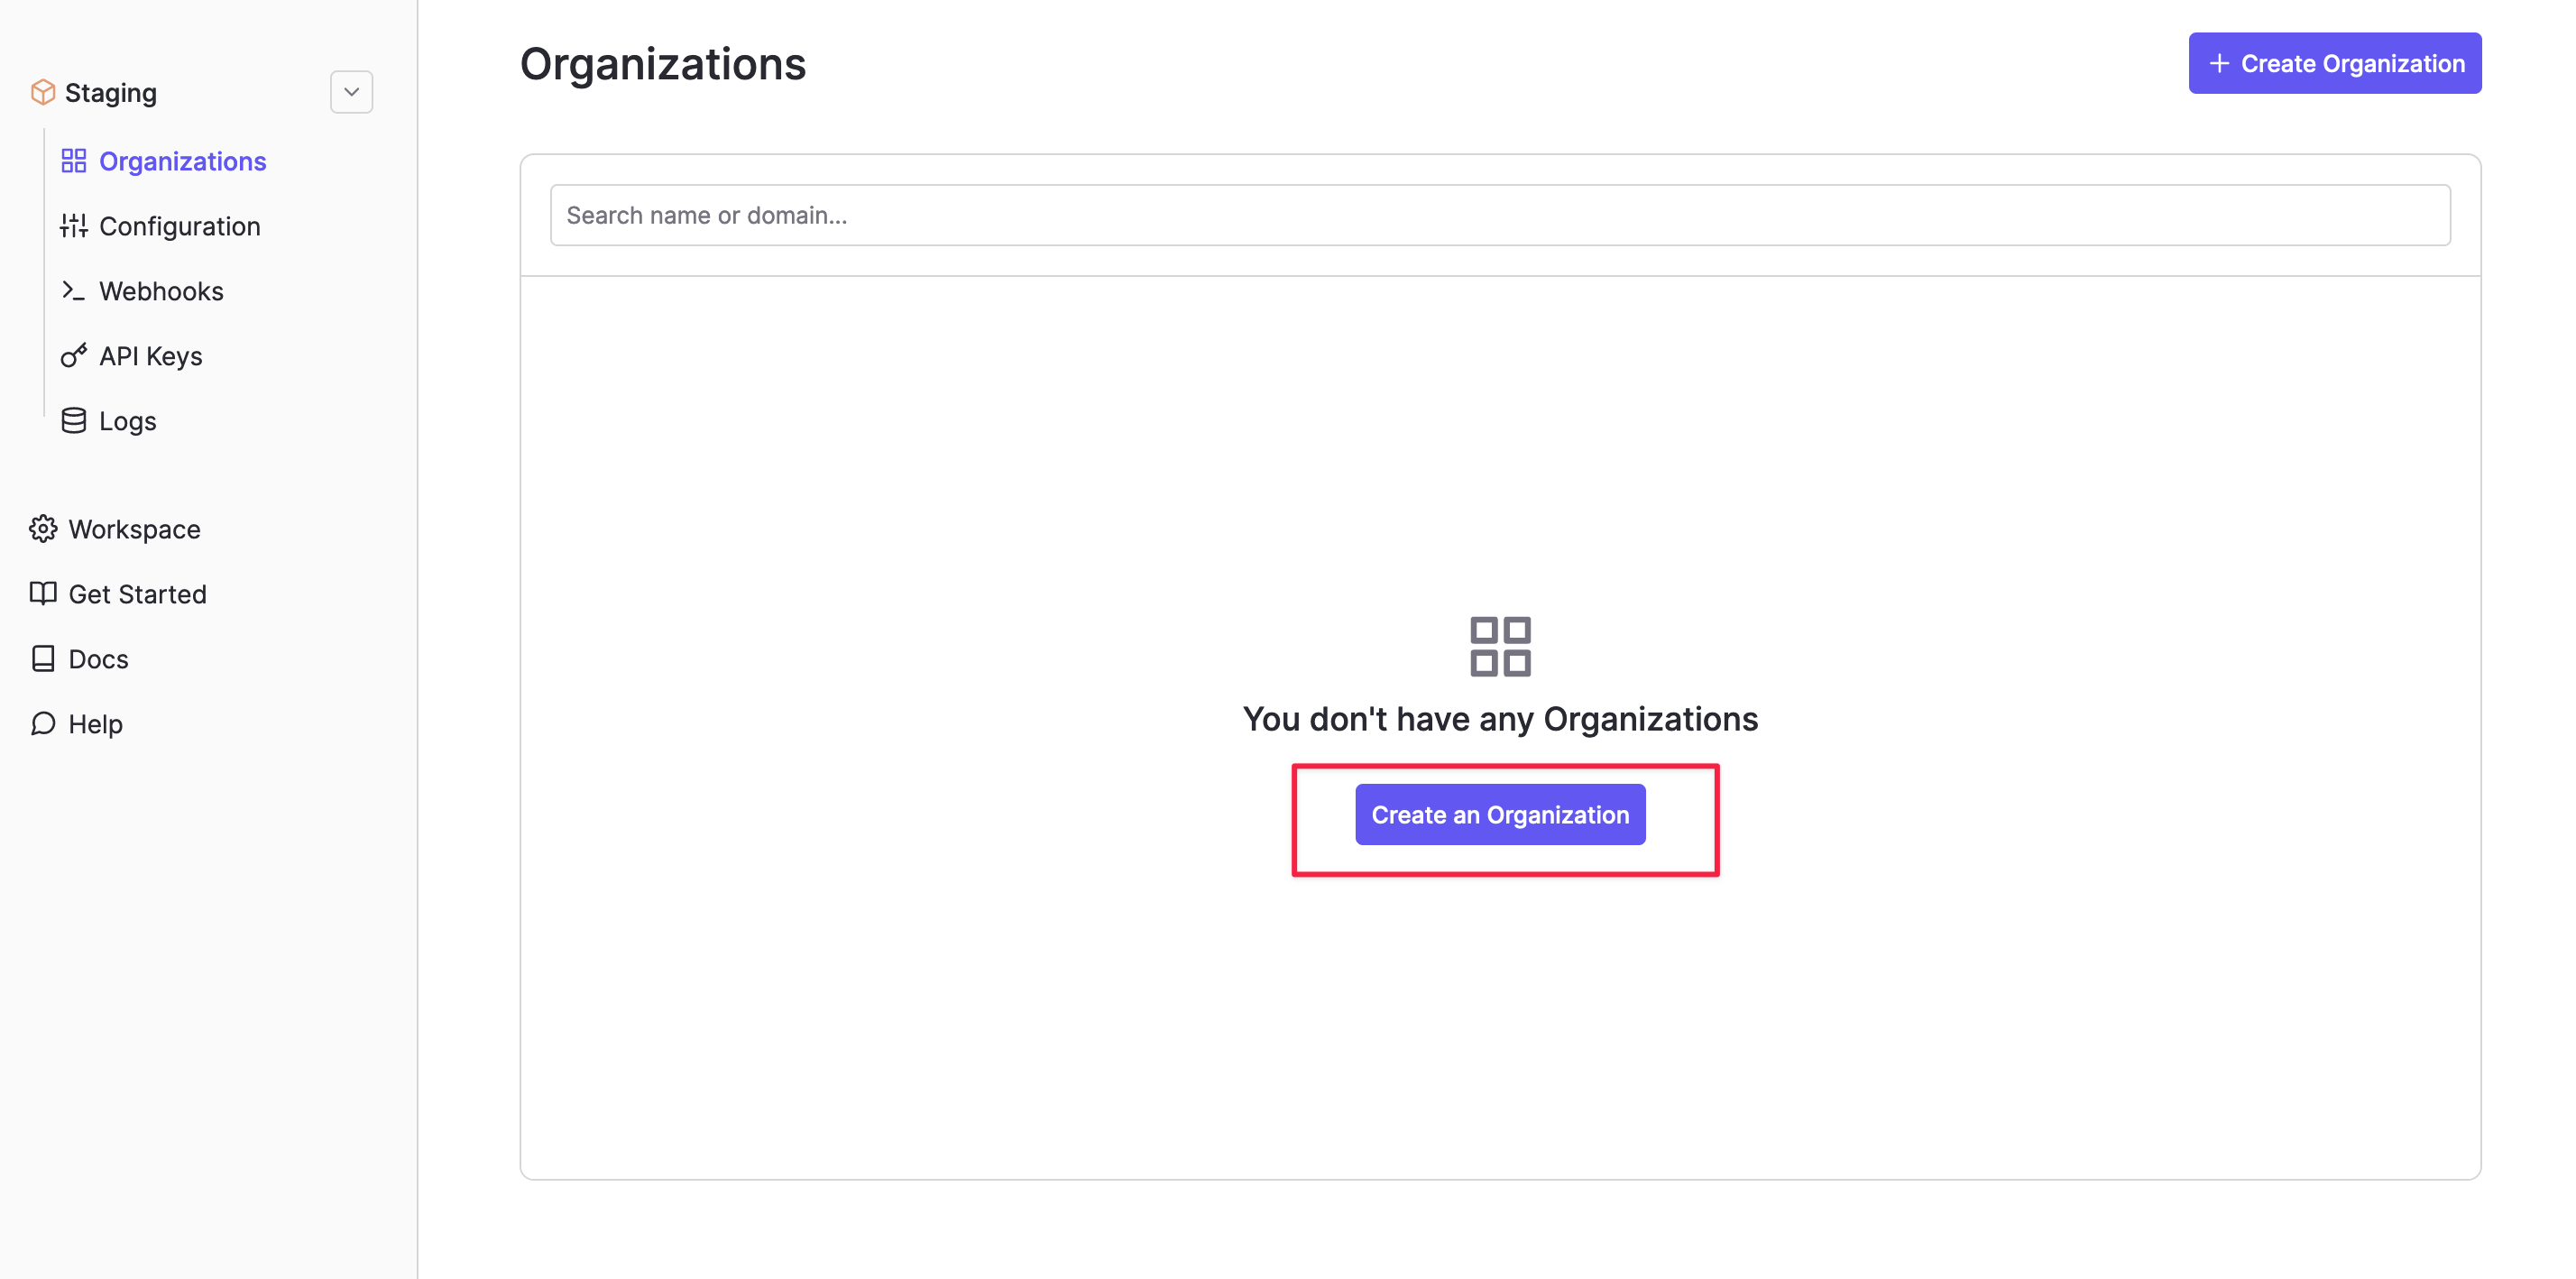
Step 1. Create a WorkOS organization#
Log in to the WorkOS dashboard and visit the Organizations tab to create an organization.
Alternatively, you can create an organization via the WorkOS API.
Step 2. Obtain your Client ID and WORKOS_API_KEY values#
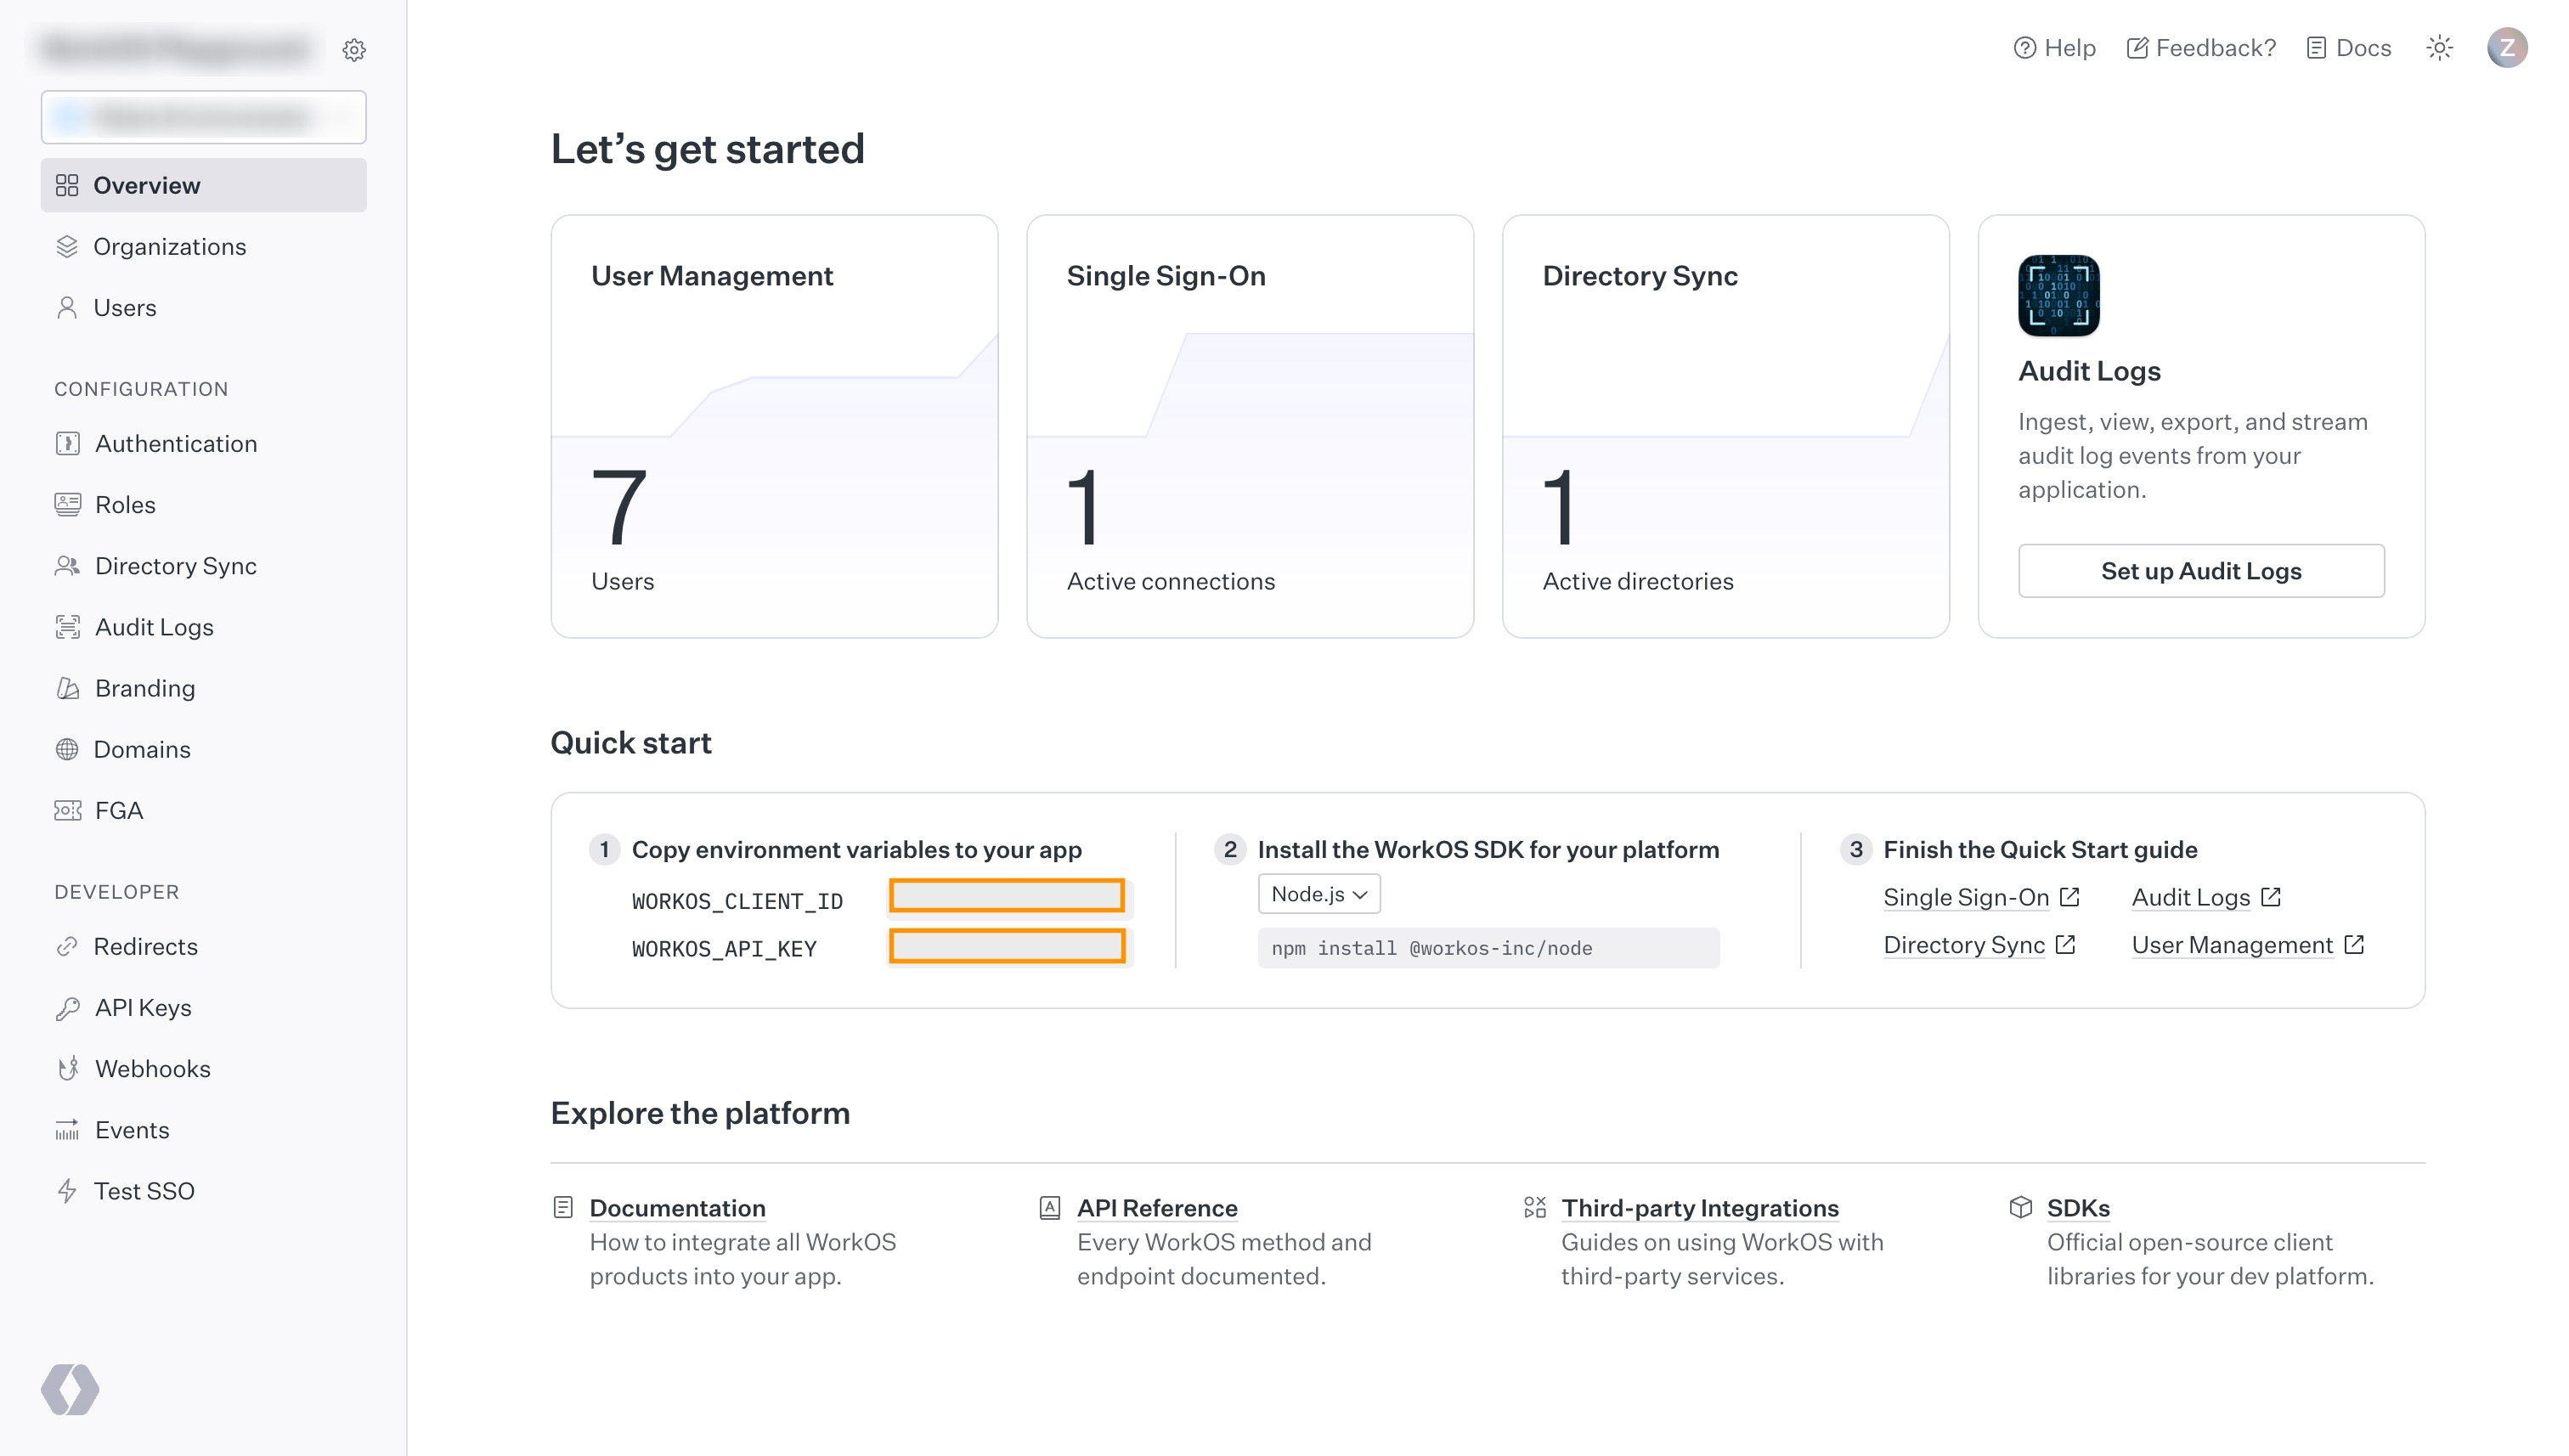
Visit the getting started page of the WorkOS Dashboard. Copy the following values from the Quickstart panel:
WORKOS_CLIENT_IDWORKOS_API_KEY
You must be signed in to see these values.
Step 3. Add your WorkOS credentials to your Supabase project#
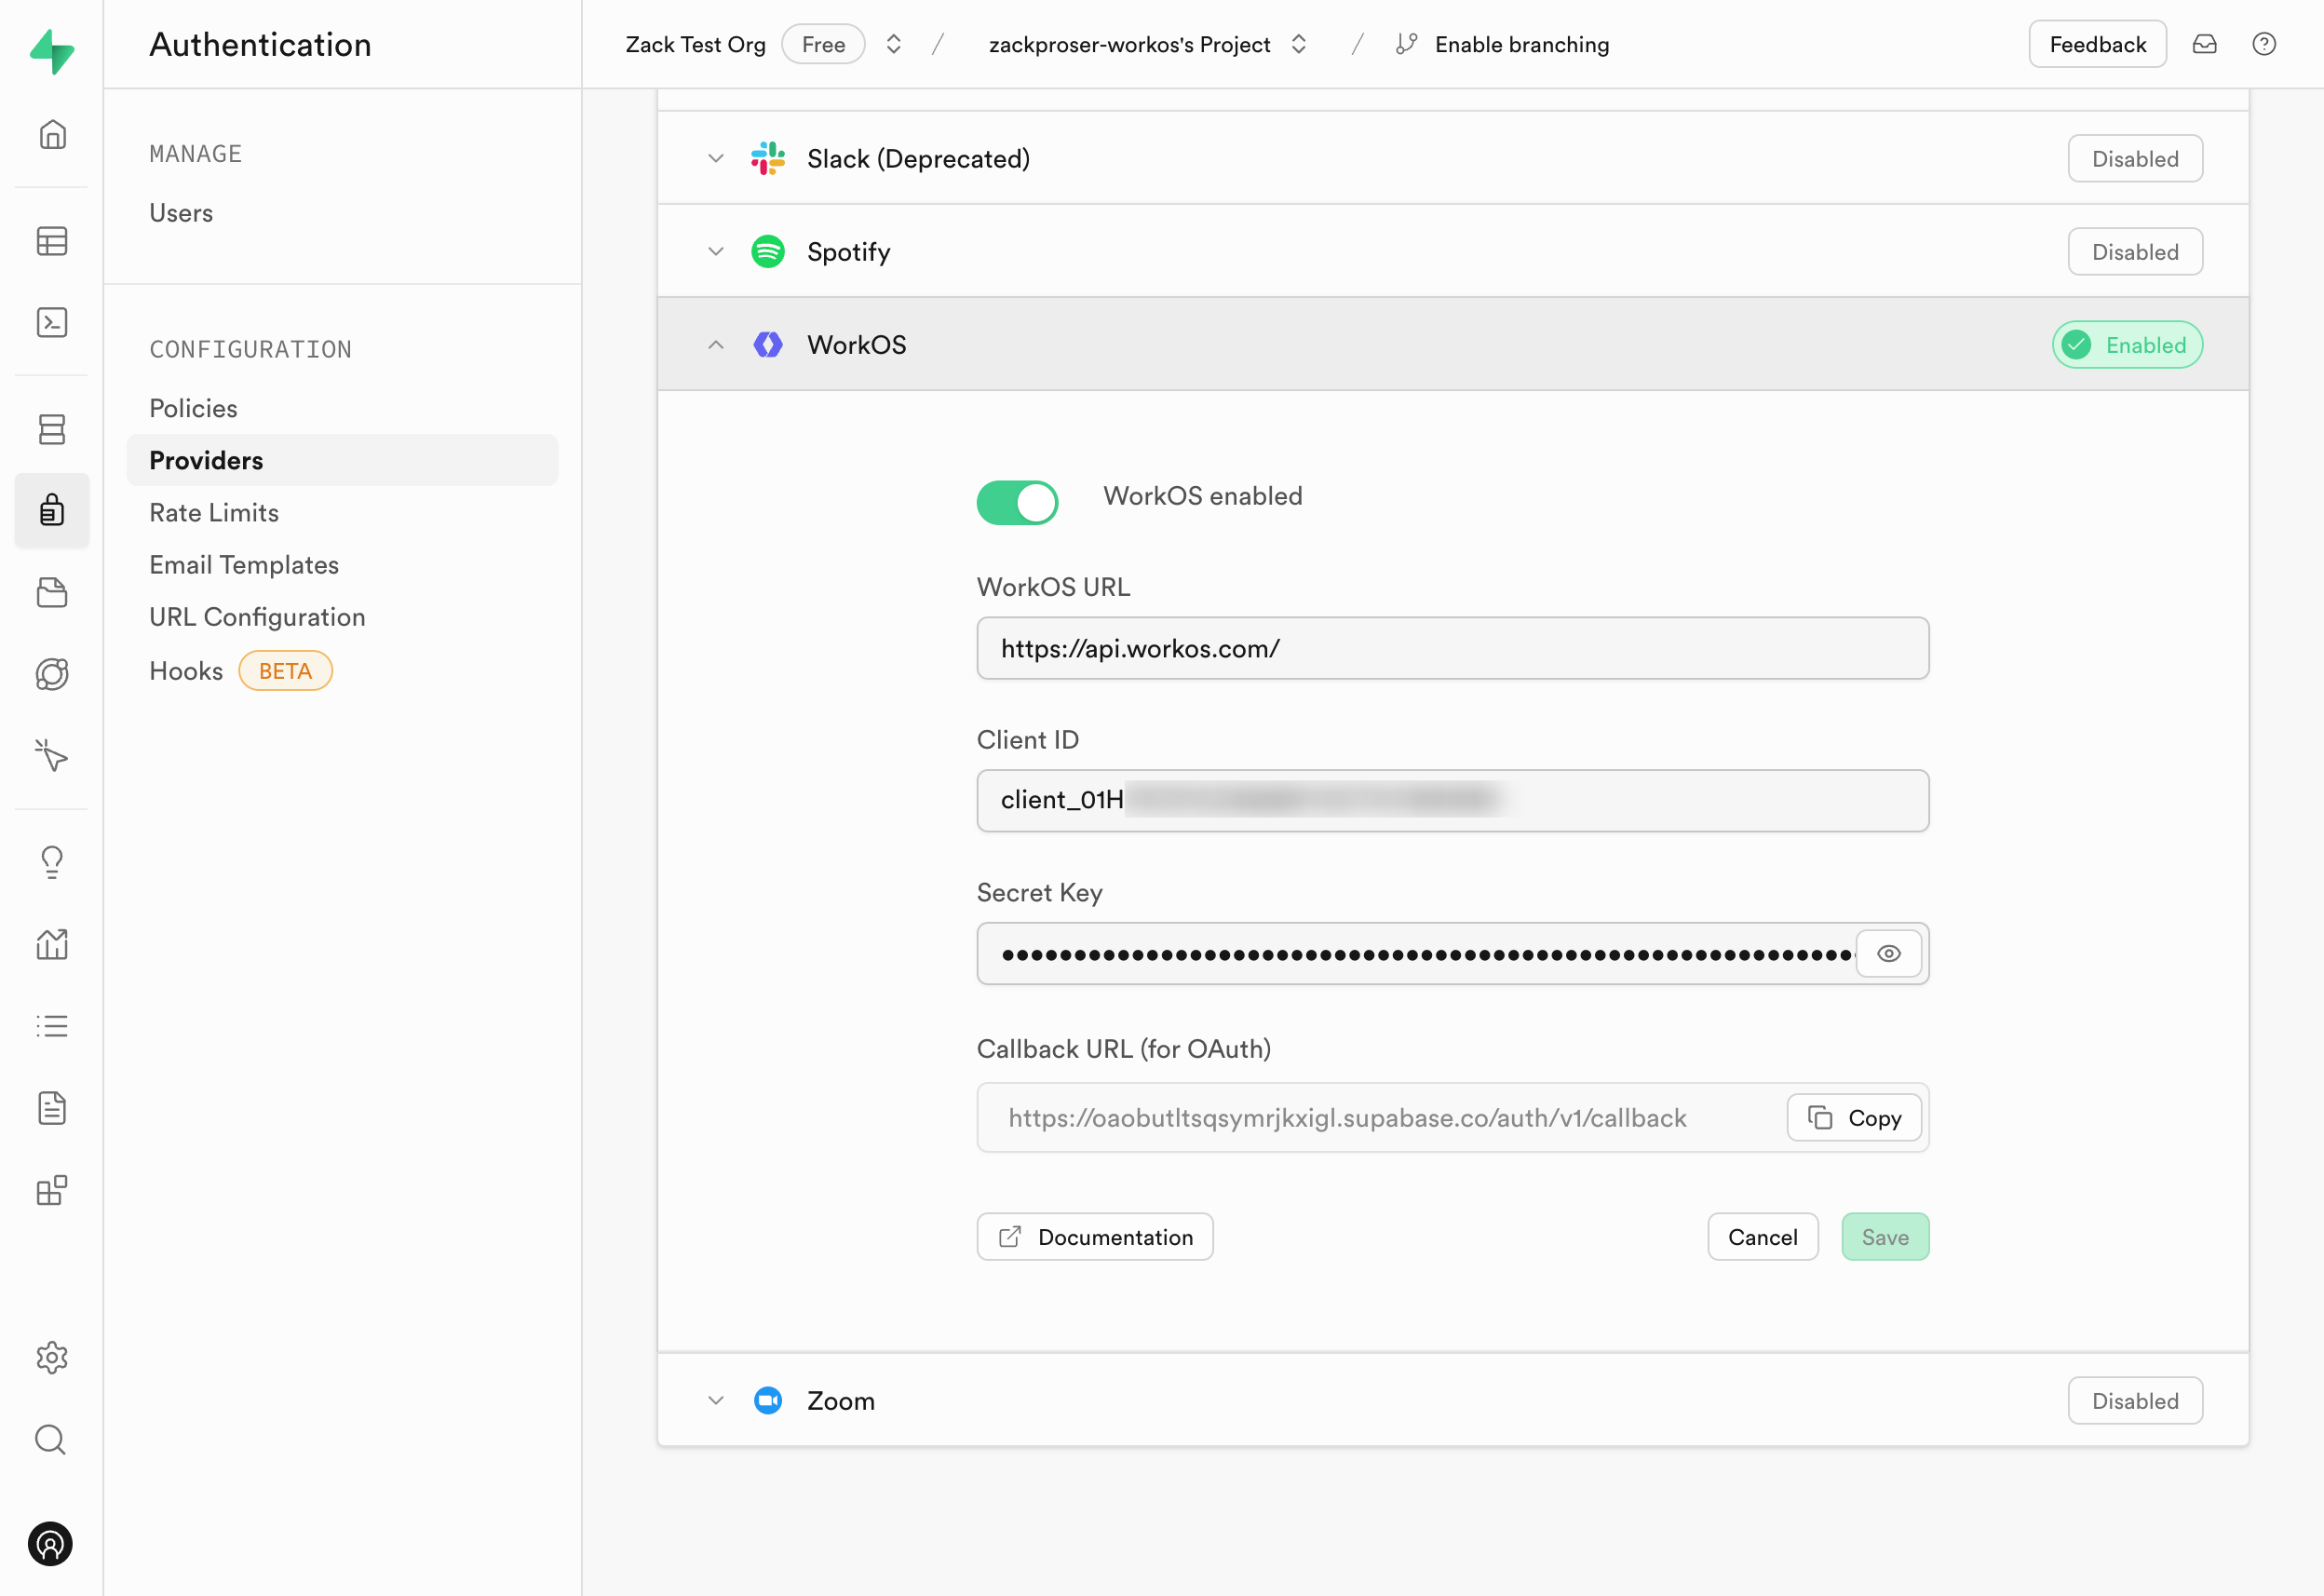
- Go to your Supabase Project Dashboard.
- In the left sidebar, click the Authentication icon (near the top).
- Click on Providers under the Configuration section.
- Click on WorkOS from the accordion list to expand.
- Toggle the
WorkOS Enabledswitch to ON. - Enter
https://api.workos.comin the WorkOS URL field. - Enter your WorkOS Client ID and WorkOS Client Secret saved in the previous step.
- Copy the
Callback URL (for OAuth)value from the form and save it somewhere handy. - Click Save.
You can also configure the WorkOS auth provider using the Management API:
1# Get your access token from https://supabase.com/dashboard/account/tokens2export SUPABASE_ACCESS_TOKEN="your-access-token"3export PROJECT_REF="your-project-ref"45# Configure WorkOS auth provider6curl -X PATCH "https://api.supabase.com/v1/projects/$PROJECT_REF/config/auth" \7 -H "Authorization: Bearer $SUPABASE_ACCESS_TOKEN" \8 -H "Content-Type: application/json" \9 -d '{10 "external_workos_enabled": true,11 "external_workos_url": "https://api.workos.com",12 "external_workos_client_id": "your-workos-client-id",13 "external_workos_secret": "your-workos-client-secret"14 }'Step 4. Set your Supabase redirect URI in the WorkOS Dashboard#
Visit the WorkOS dashboard and click the redirects button in the left navigation panel.
On the redirects page, enter your Supabase project's Callback URL (for OAuth) which you saved in the previous step, as shown below:

Step 5. Add login code to your client app#
When a user signs in, call signInWithOAuth with workos as the provider.
1import { createClient } from '@supabase/supabase-js';2const supabase = createClient('https://your-project-id.supabase.co', 'sb_publishable_...');3const redirect = (url: string) => {}45// ---cut---6async function signInWithWorkOS() {7 const { data, error } = await supabase.auth.signInWithOAuth({8 provider: 'workos',9 options: {10 redirectTo: 'http://example.com/auth/v1/callback', // Make sure your redirect URL is configured in the Supabase Dashboard Auth settings11 queryParams: {12 connection: '<connection_id>',13 },14 },15 })1617 if (data.url) {18 redirect(data.url) // use the redirect API for your server or framework19 }20}You can find your connection_id in the WorkOS dashboard under the Organizations tab. Select your organization and then click View connection.
Within your specified callback URL, you'll exchange the code for a logged-in user profile:
1import { NextResponse } from 'next/server'2import { createClient } from '@/utils/supabase/server'34export async function GET(request: Request) {5 const { searchParams, origin } = new URL(request.url)6 const code = searchParams.get('code')7 // if "next" is in param, use it as the redirect URL8 let next = searchParams.get('next') ?? '/'9 if (!next.startsWith('/')) {10 // if "next" is not a relative URL, use the default11 next = '/'12 }1314 if (code) {15 const supabase = await createClient()16 const { error } = await supabase.auth.exchangeCodeForSession(code)17 if (!error) {18 const forwardedHost = request.headers.get('x-forwarded-host') // original origin before load balancer19 const isLocalEnv = process.env.NODE_ENV === 'development'20 if (isLocalEnv) {21 // we can be sure that there is no load balancer in between, so no need to watch for X-Forwarded-Host22 return NextResponse.redirect(`${origin}${next}`)23 } else if (forwardedHost) {24 return NextResponse.redirect(`https://${forwardedHost}${next}`)25 } else {26 return NextResponse.redirect(`${origin}${next}`)27 }28 }29 }3031 // return the user to an error page with instructions32 return NextResponse.redirect(`${origin}/auth/auth-code-error`)33}