Login with Keycloak
To enable Keycloak Auth for your project, you need to set up an Keycloak OAuth application and add the application credentials to your Supabase Dashboard.
Overview#
To get started with Keycloak, you can run it in a docker container with: docker run -p 8080:8080 -e KEYCLOAK_ADMIN=admin -e KEYCLOAK_ADMIN_PASSWORD=admin quay.io/keycloak/keycloak:latest start-dev
This guide will be assuming that you are running Keycloak in a docker container as described in the command above.
Keycloak OAuth consists of five broad steps:
- Create a new client in your specified Keycloak realm.
- Obtain the
issuerfrom the "OpenID Endpoint Configuration". This will be used as theKeycloak URL. - Ensure that the new client has the "Client Protocol" set to
openid-connectand the "Access Type" is set to "confidential". - The
Client IDof the client created will be used as theclient id. - Obtain the
Secretfrom the credentials tab which will be used as theclient secret. - Add the callback URL of your application to your allowlist.
Access your Keycloak admin console#
- Login by visiting
http://localhost:8080and clicking on "Administration Console".
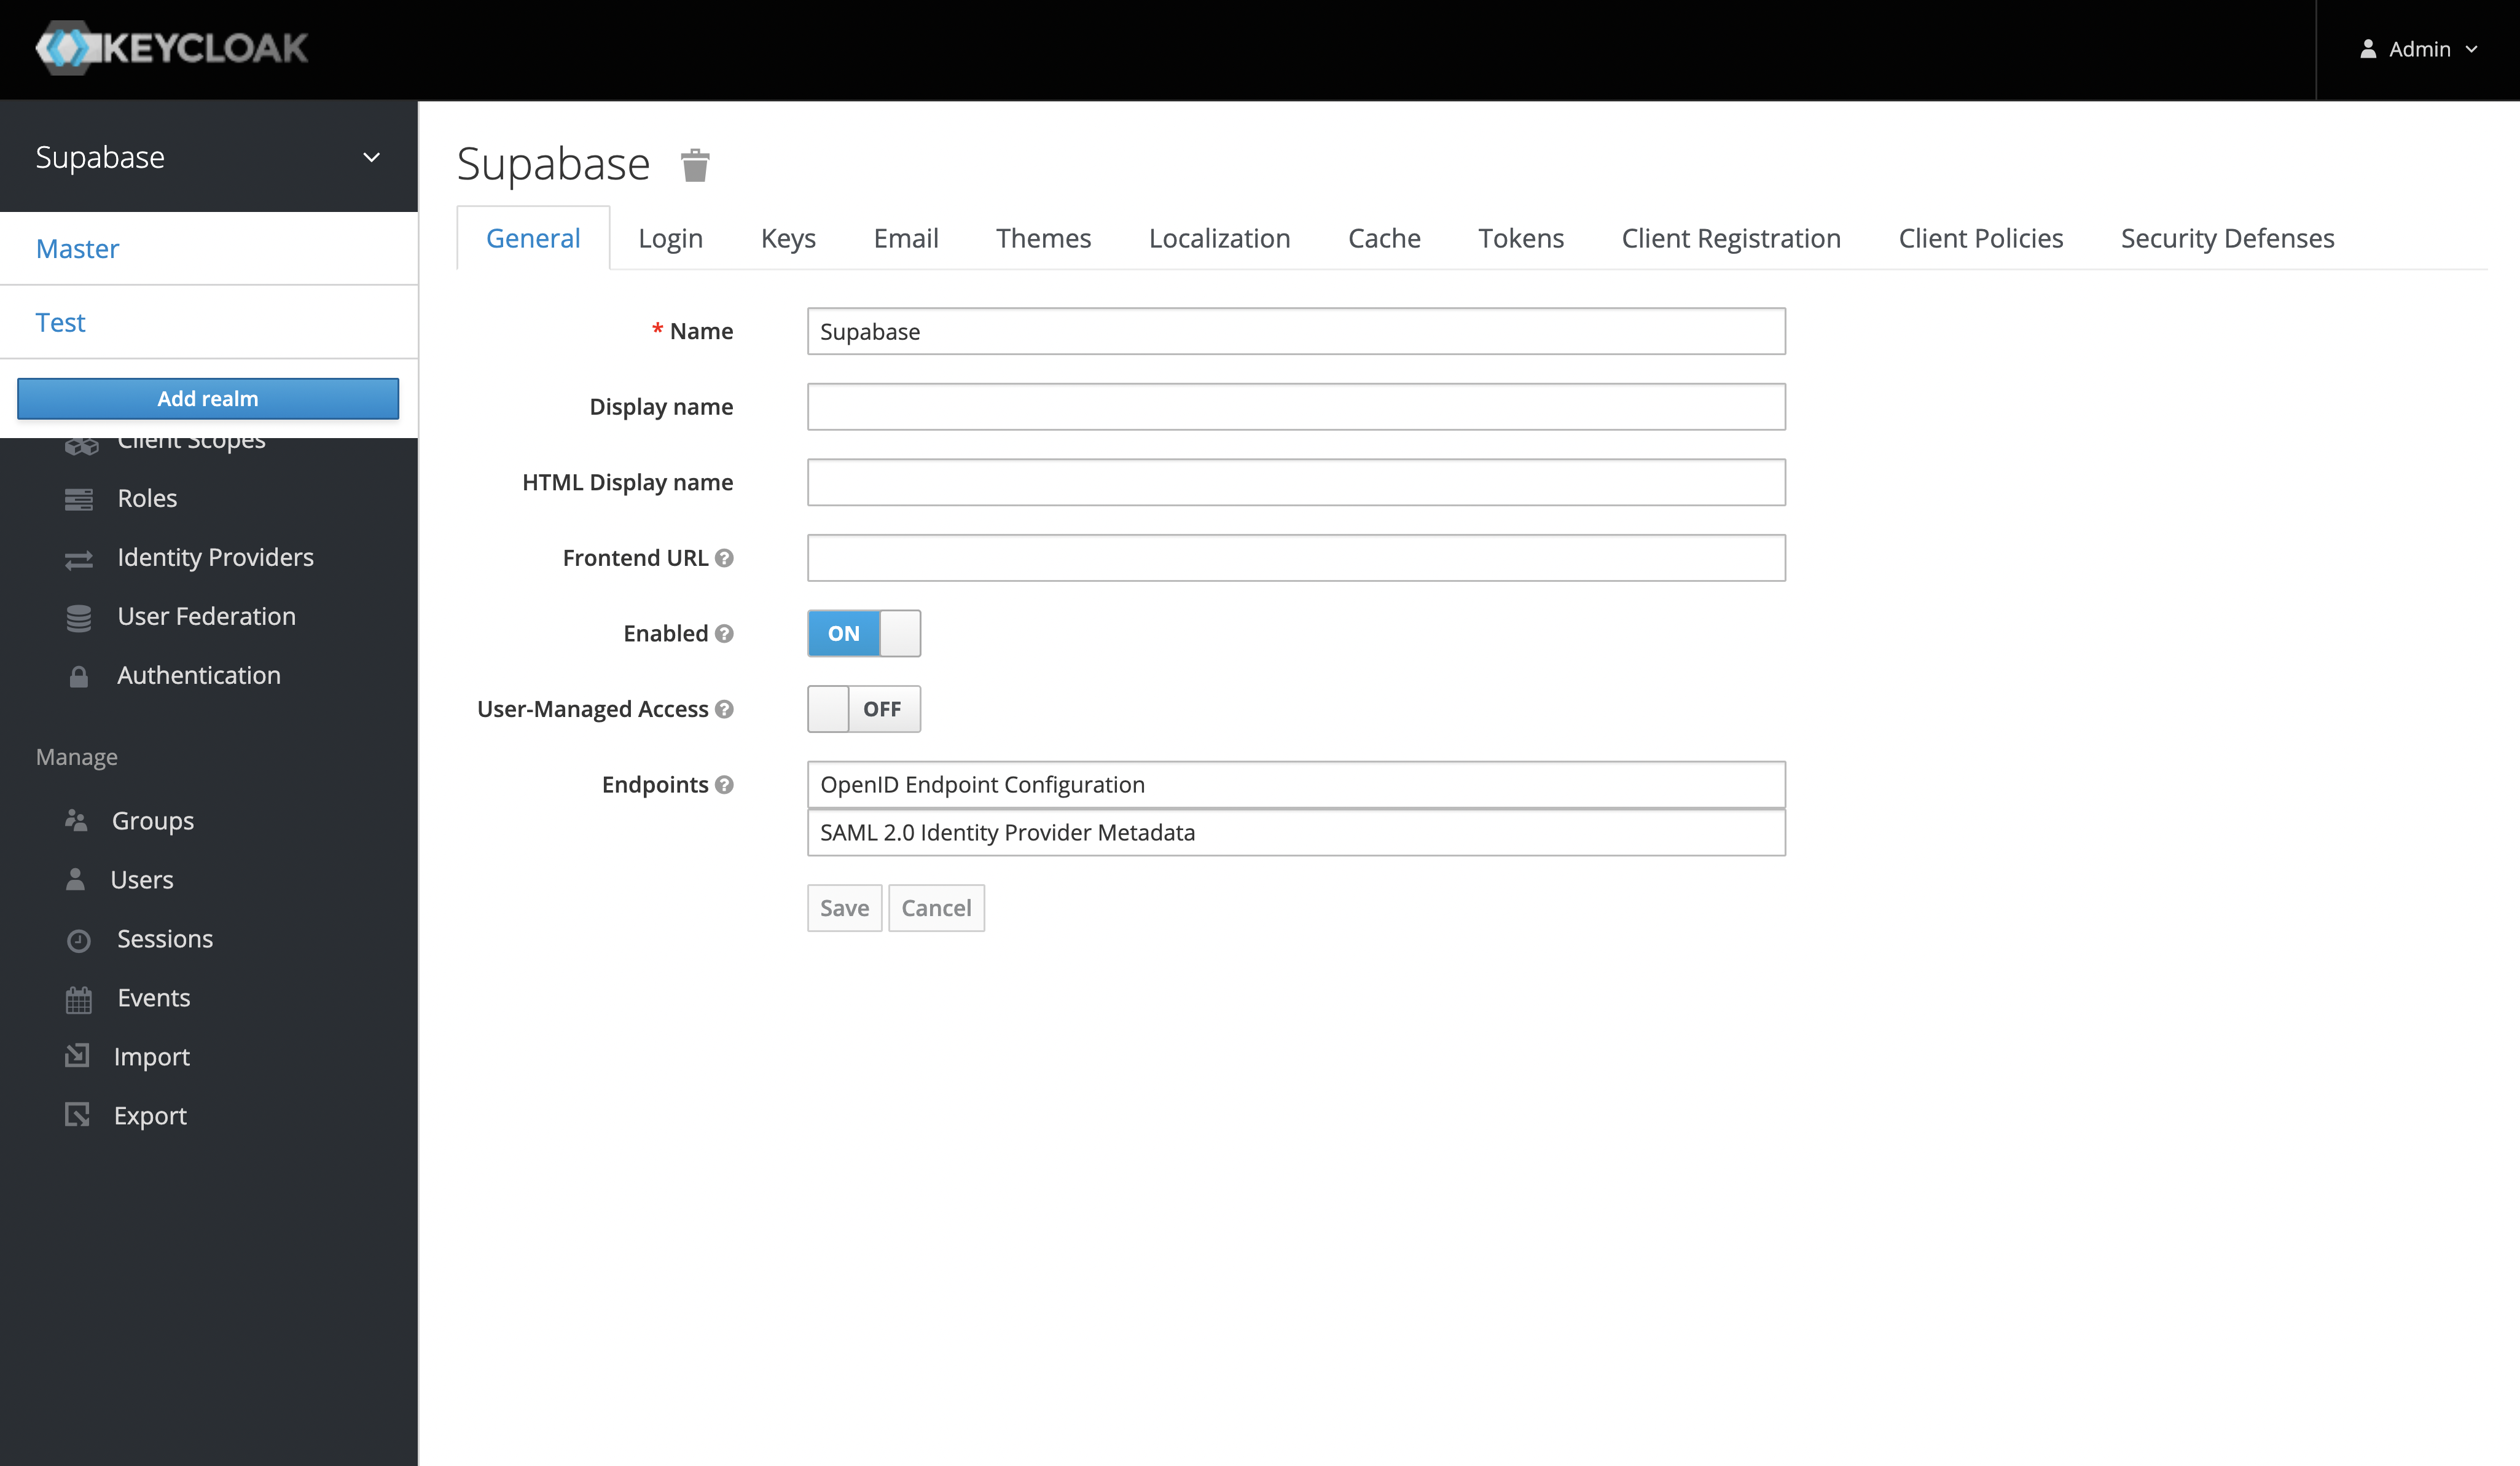
Create a Keycloak realm#
- Once you've logged in to the Keycloak console, you can add a realm from the side panel. The default realm should be named "Master".
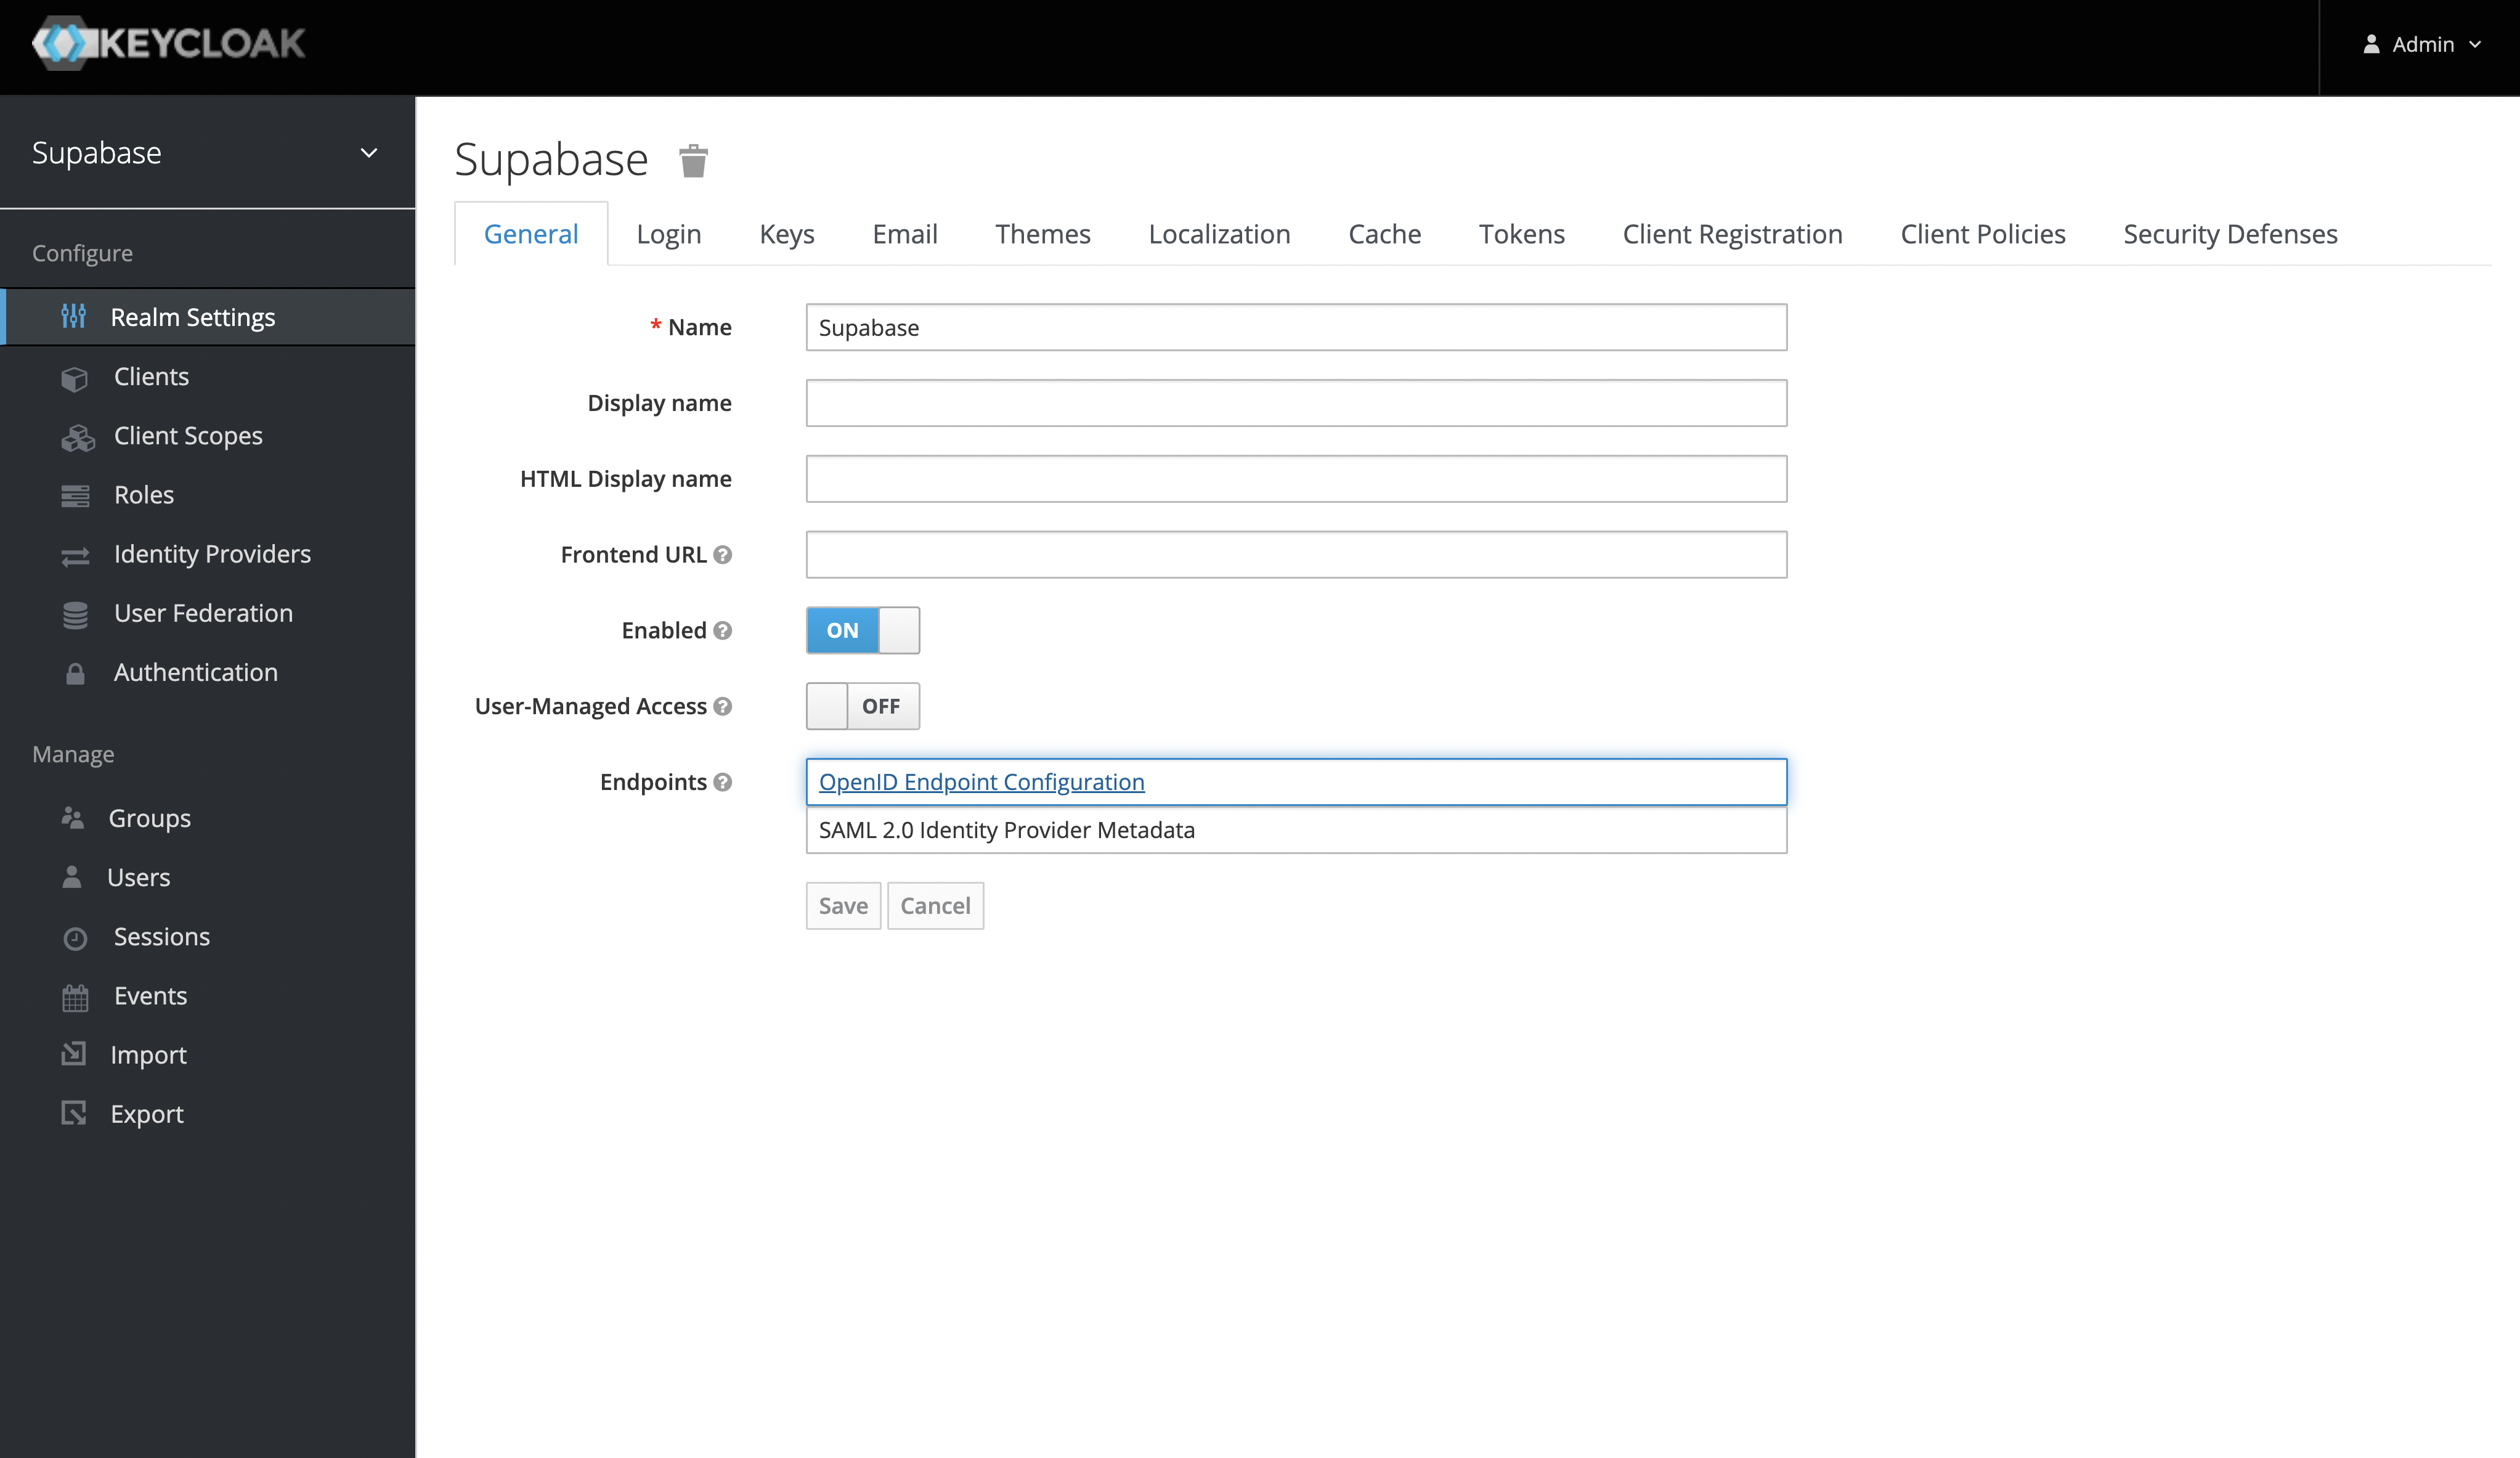
- After you've added a new realm, you can retrieve the
issuerfrom the "OpenID Endpoint Configuration" endpoint. Theissuerwill be used as theKeycloak URL. - You can find this endpoint from the realm settings under the "General Tab" or visit
http://localhost:8080/realms/my_realm_name/.well-known/openid-configuration
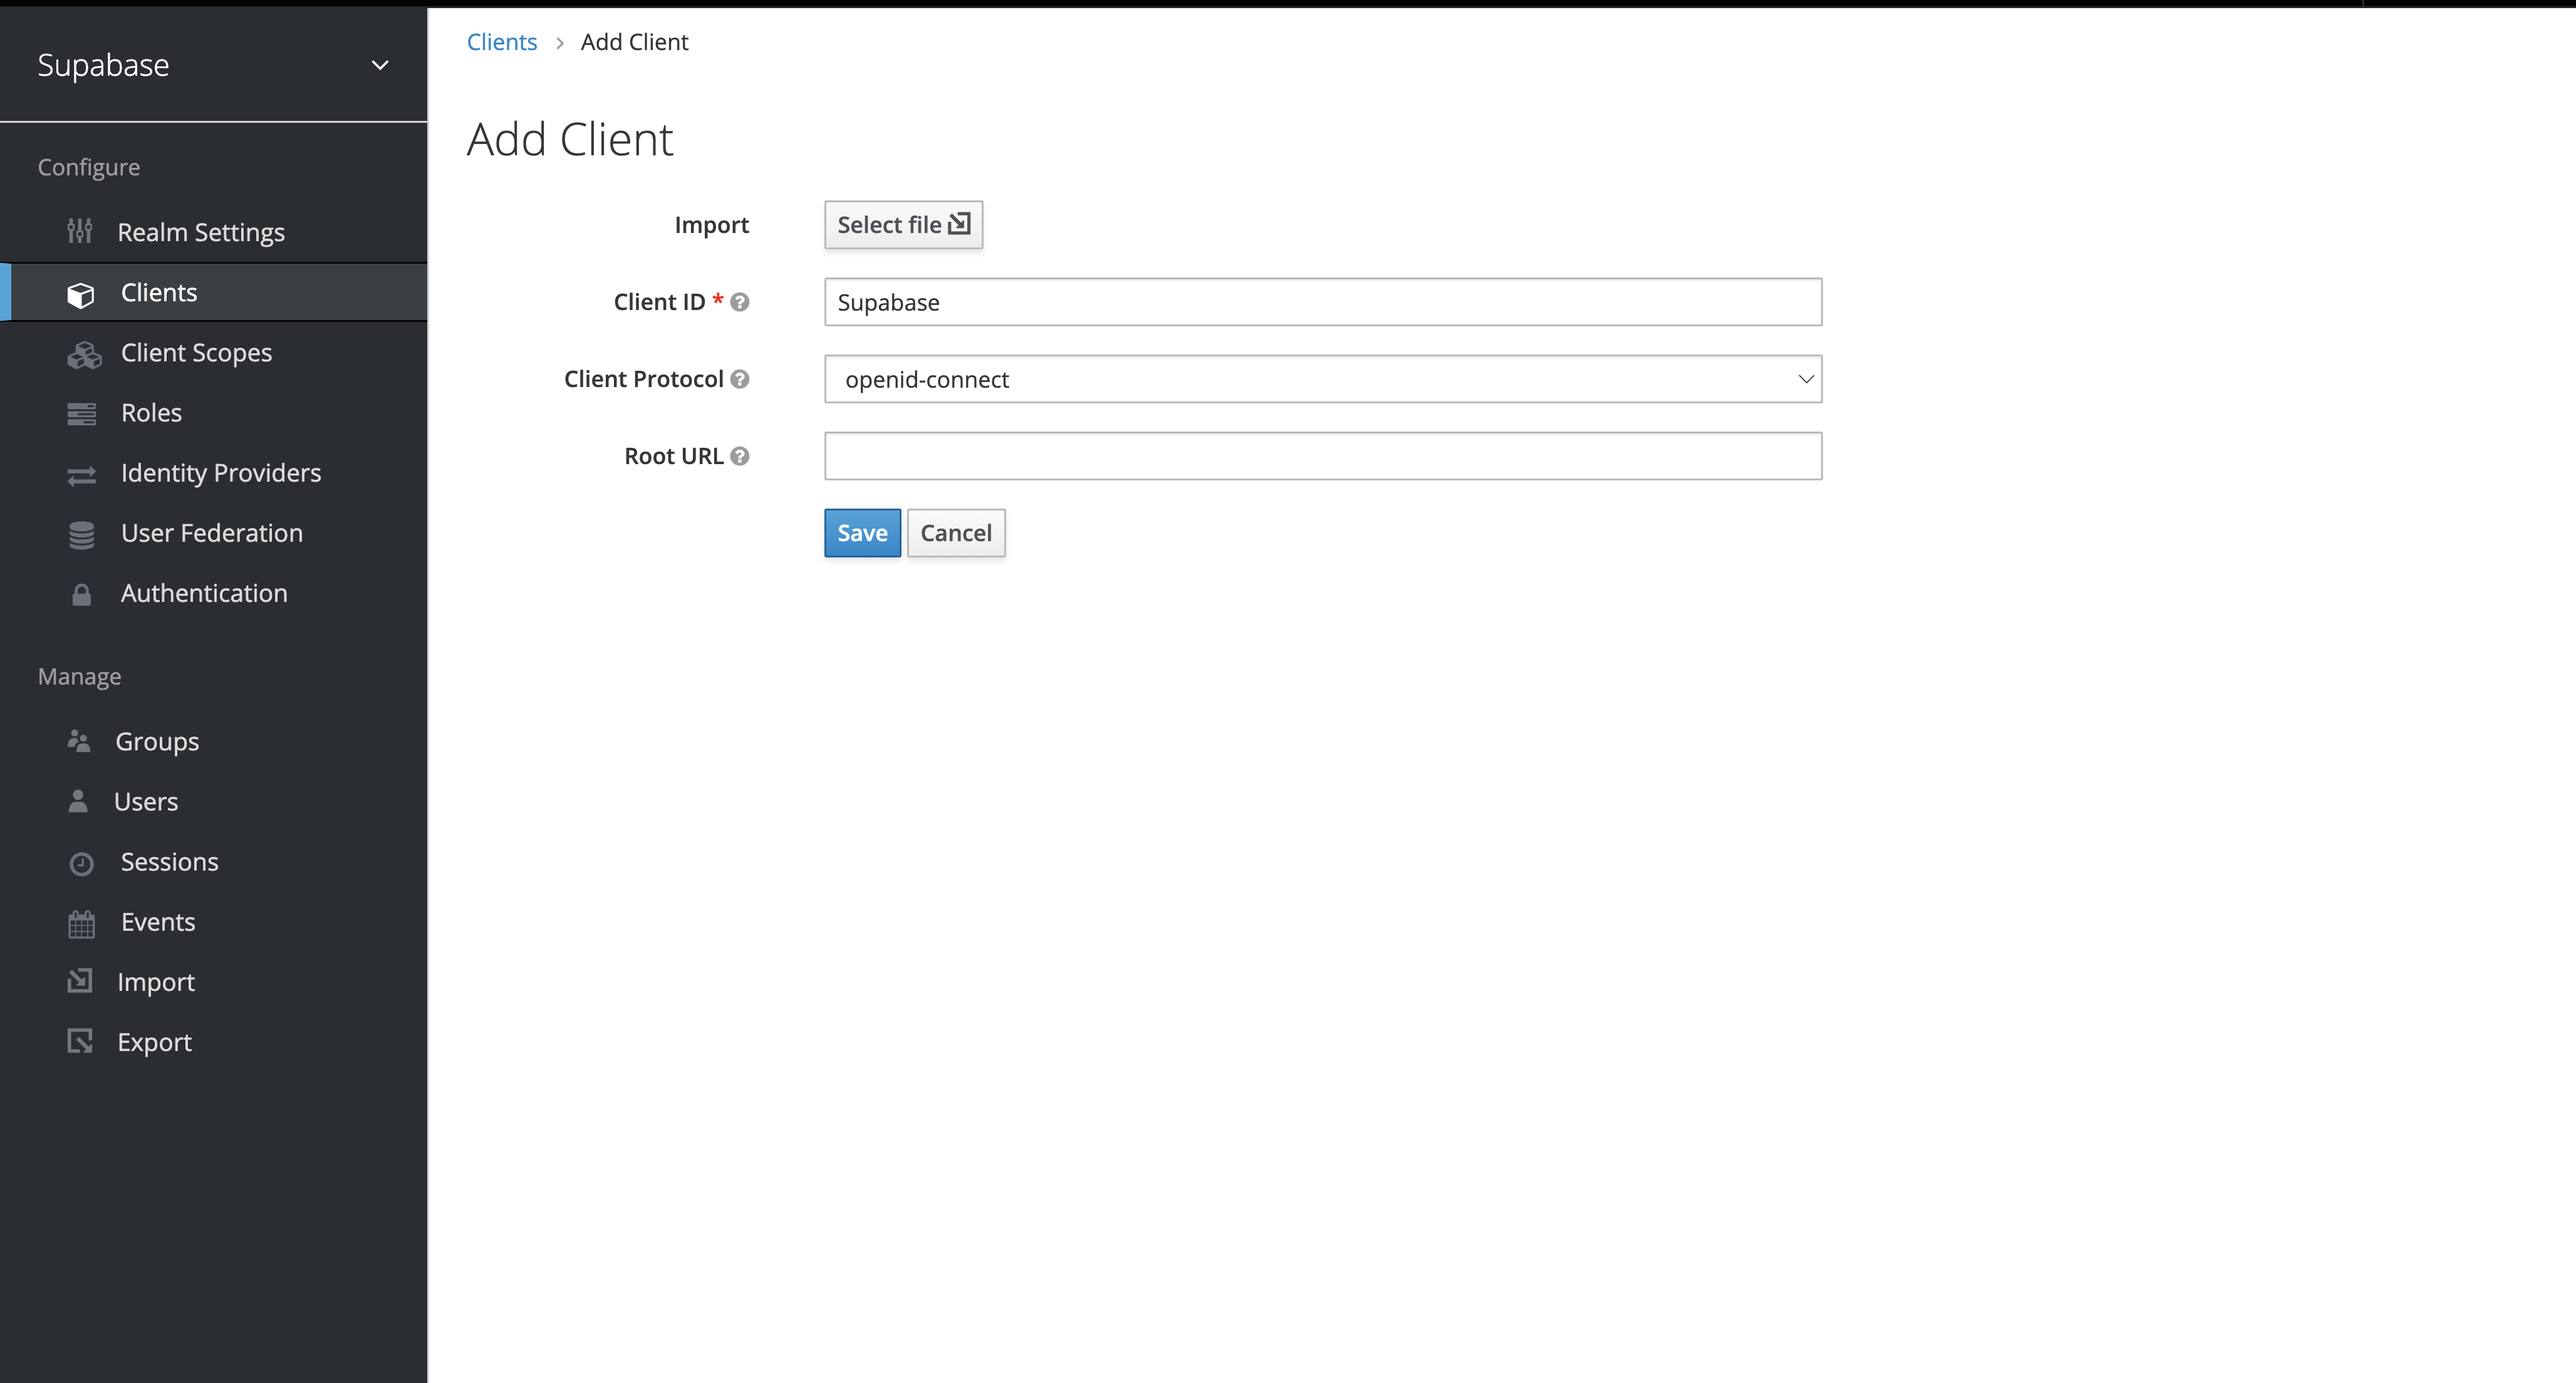
Create a Keycloak client#
The "Client ID" of the created client will serve as the client_id when you make API calls to authenticate the user.
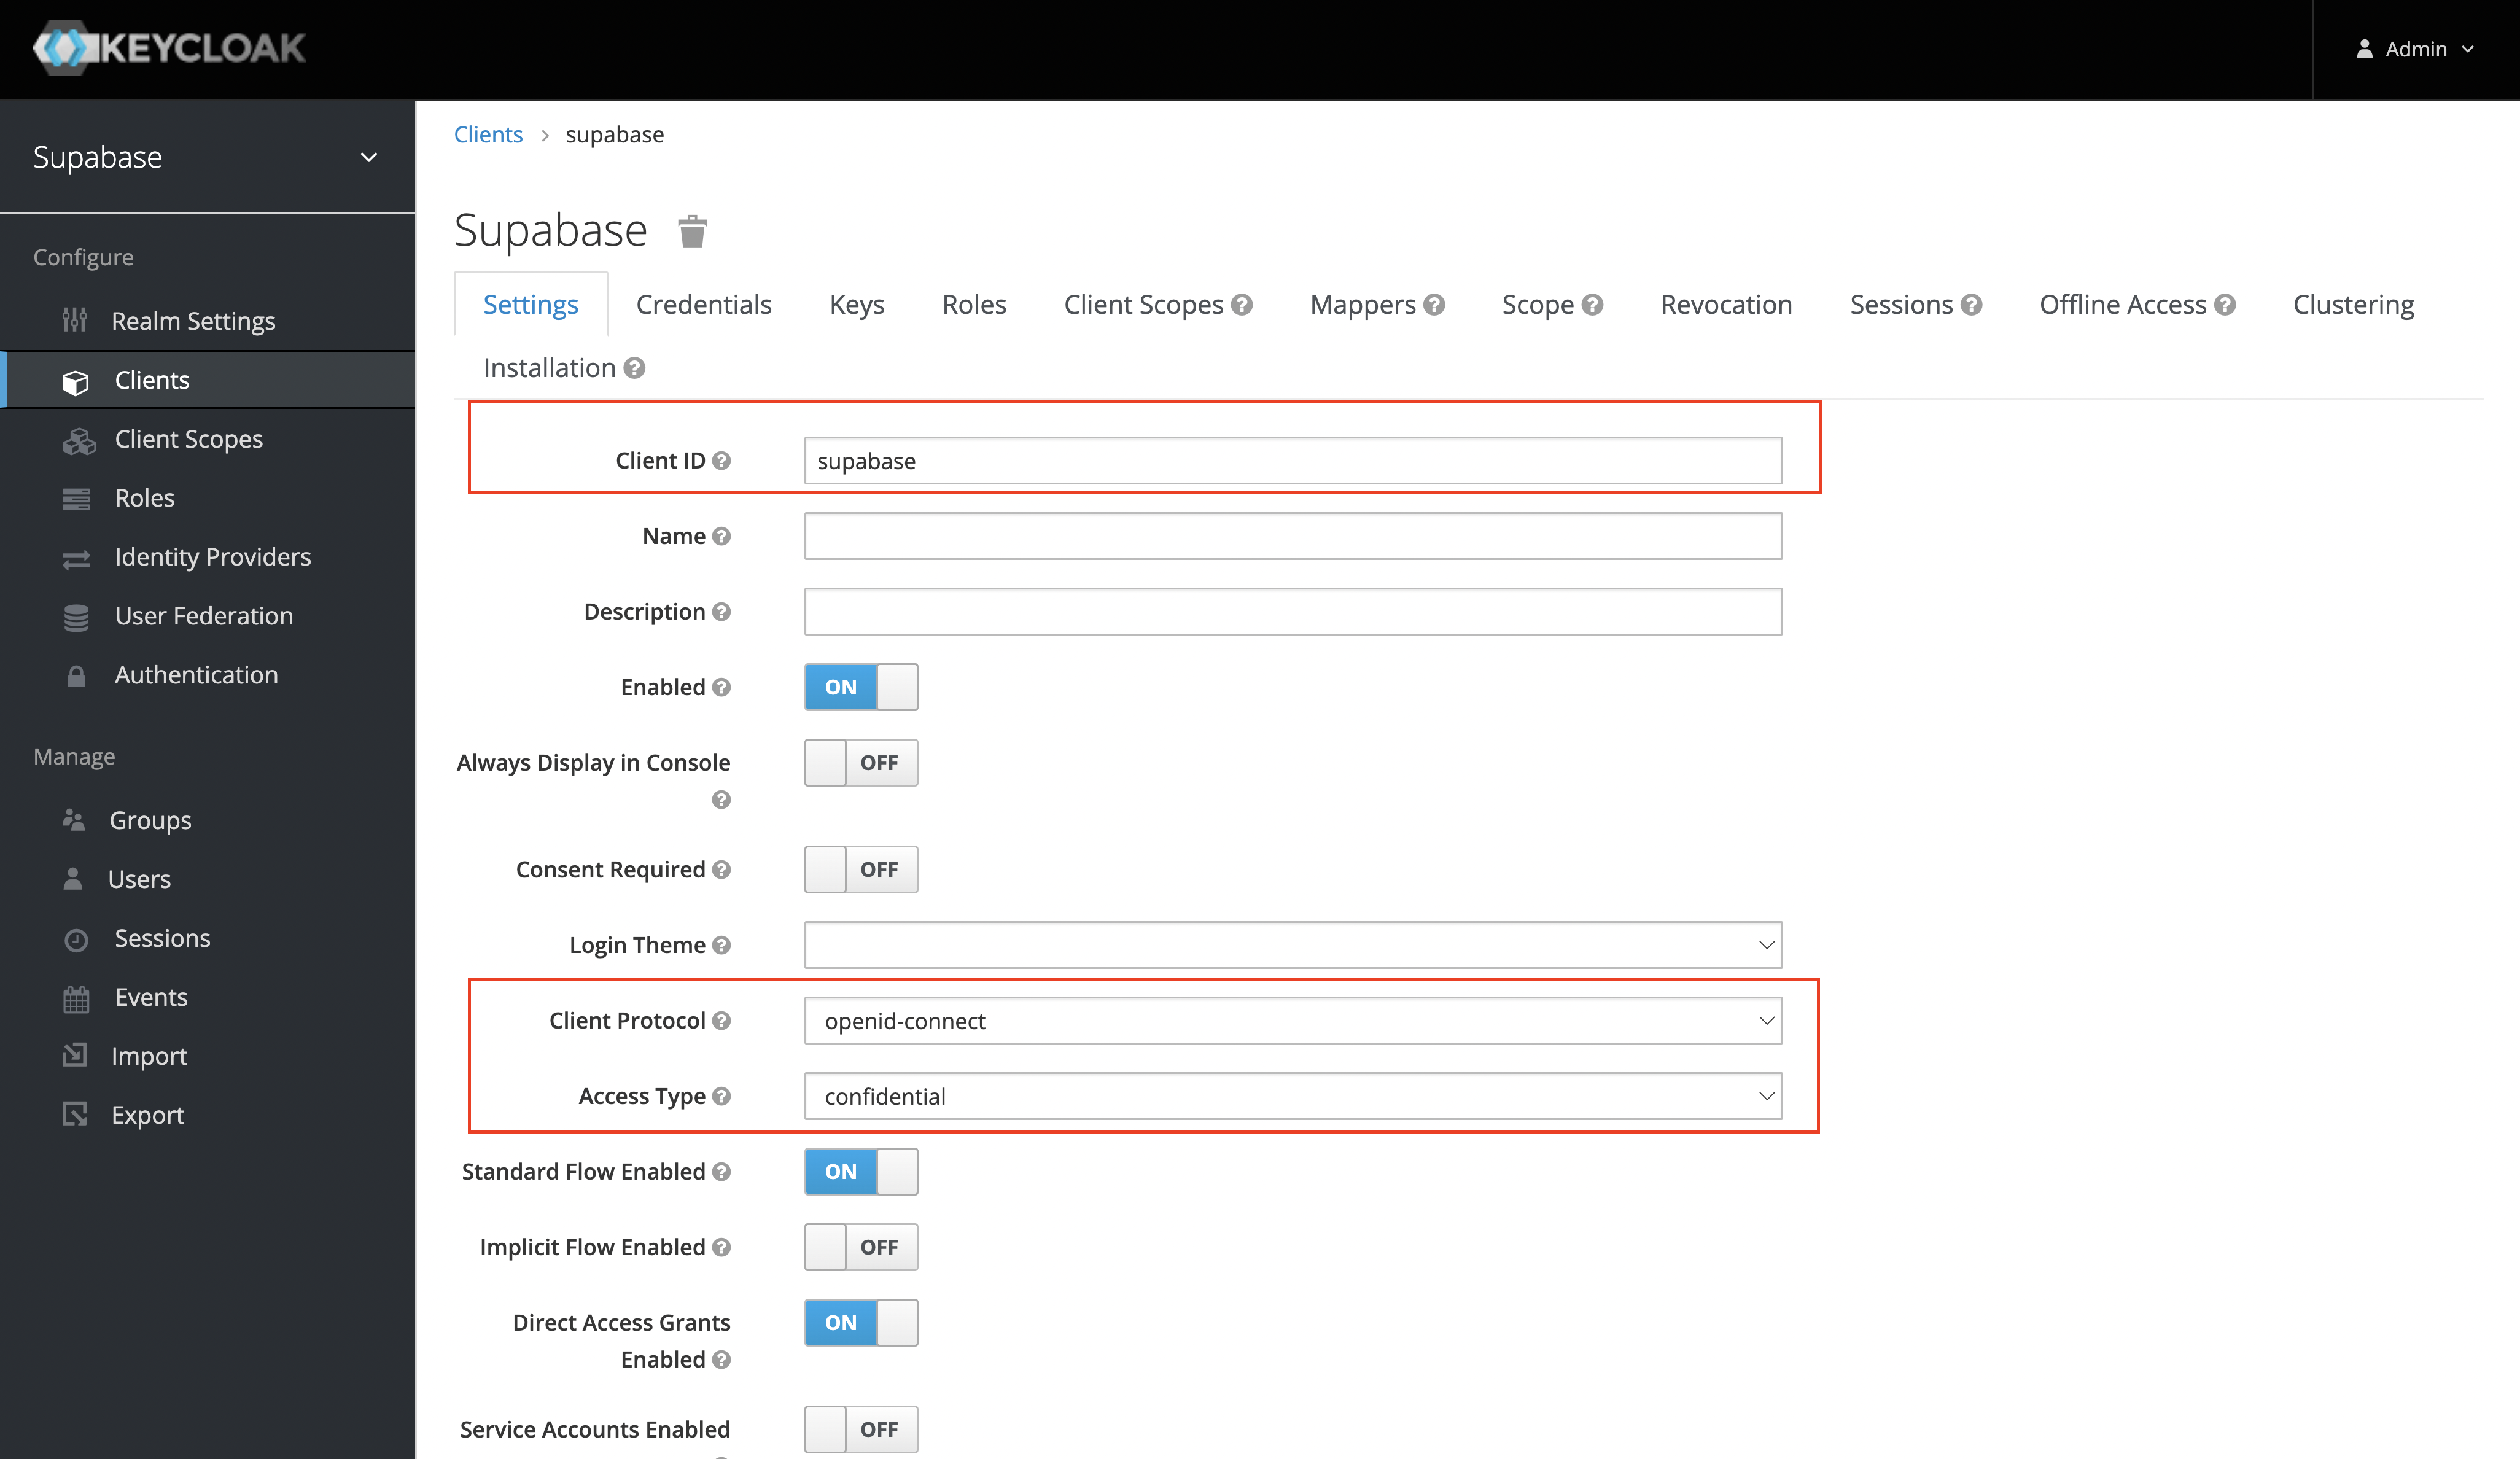
Client settings#
After you've created the client successfully, ensure that you set the following settings:
- The "Client Protocol" should be set to
openid-connect. - The "Access Type" should be set to "confidential".
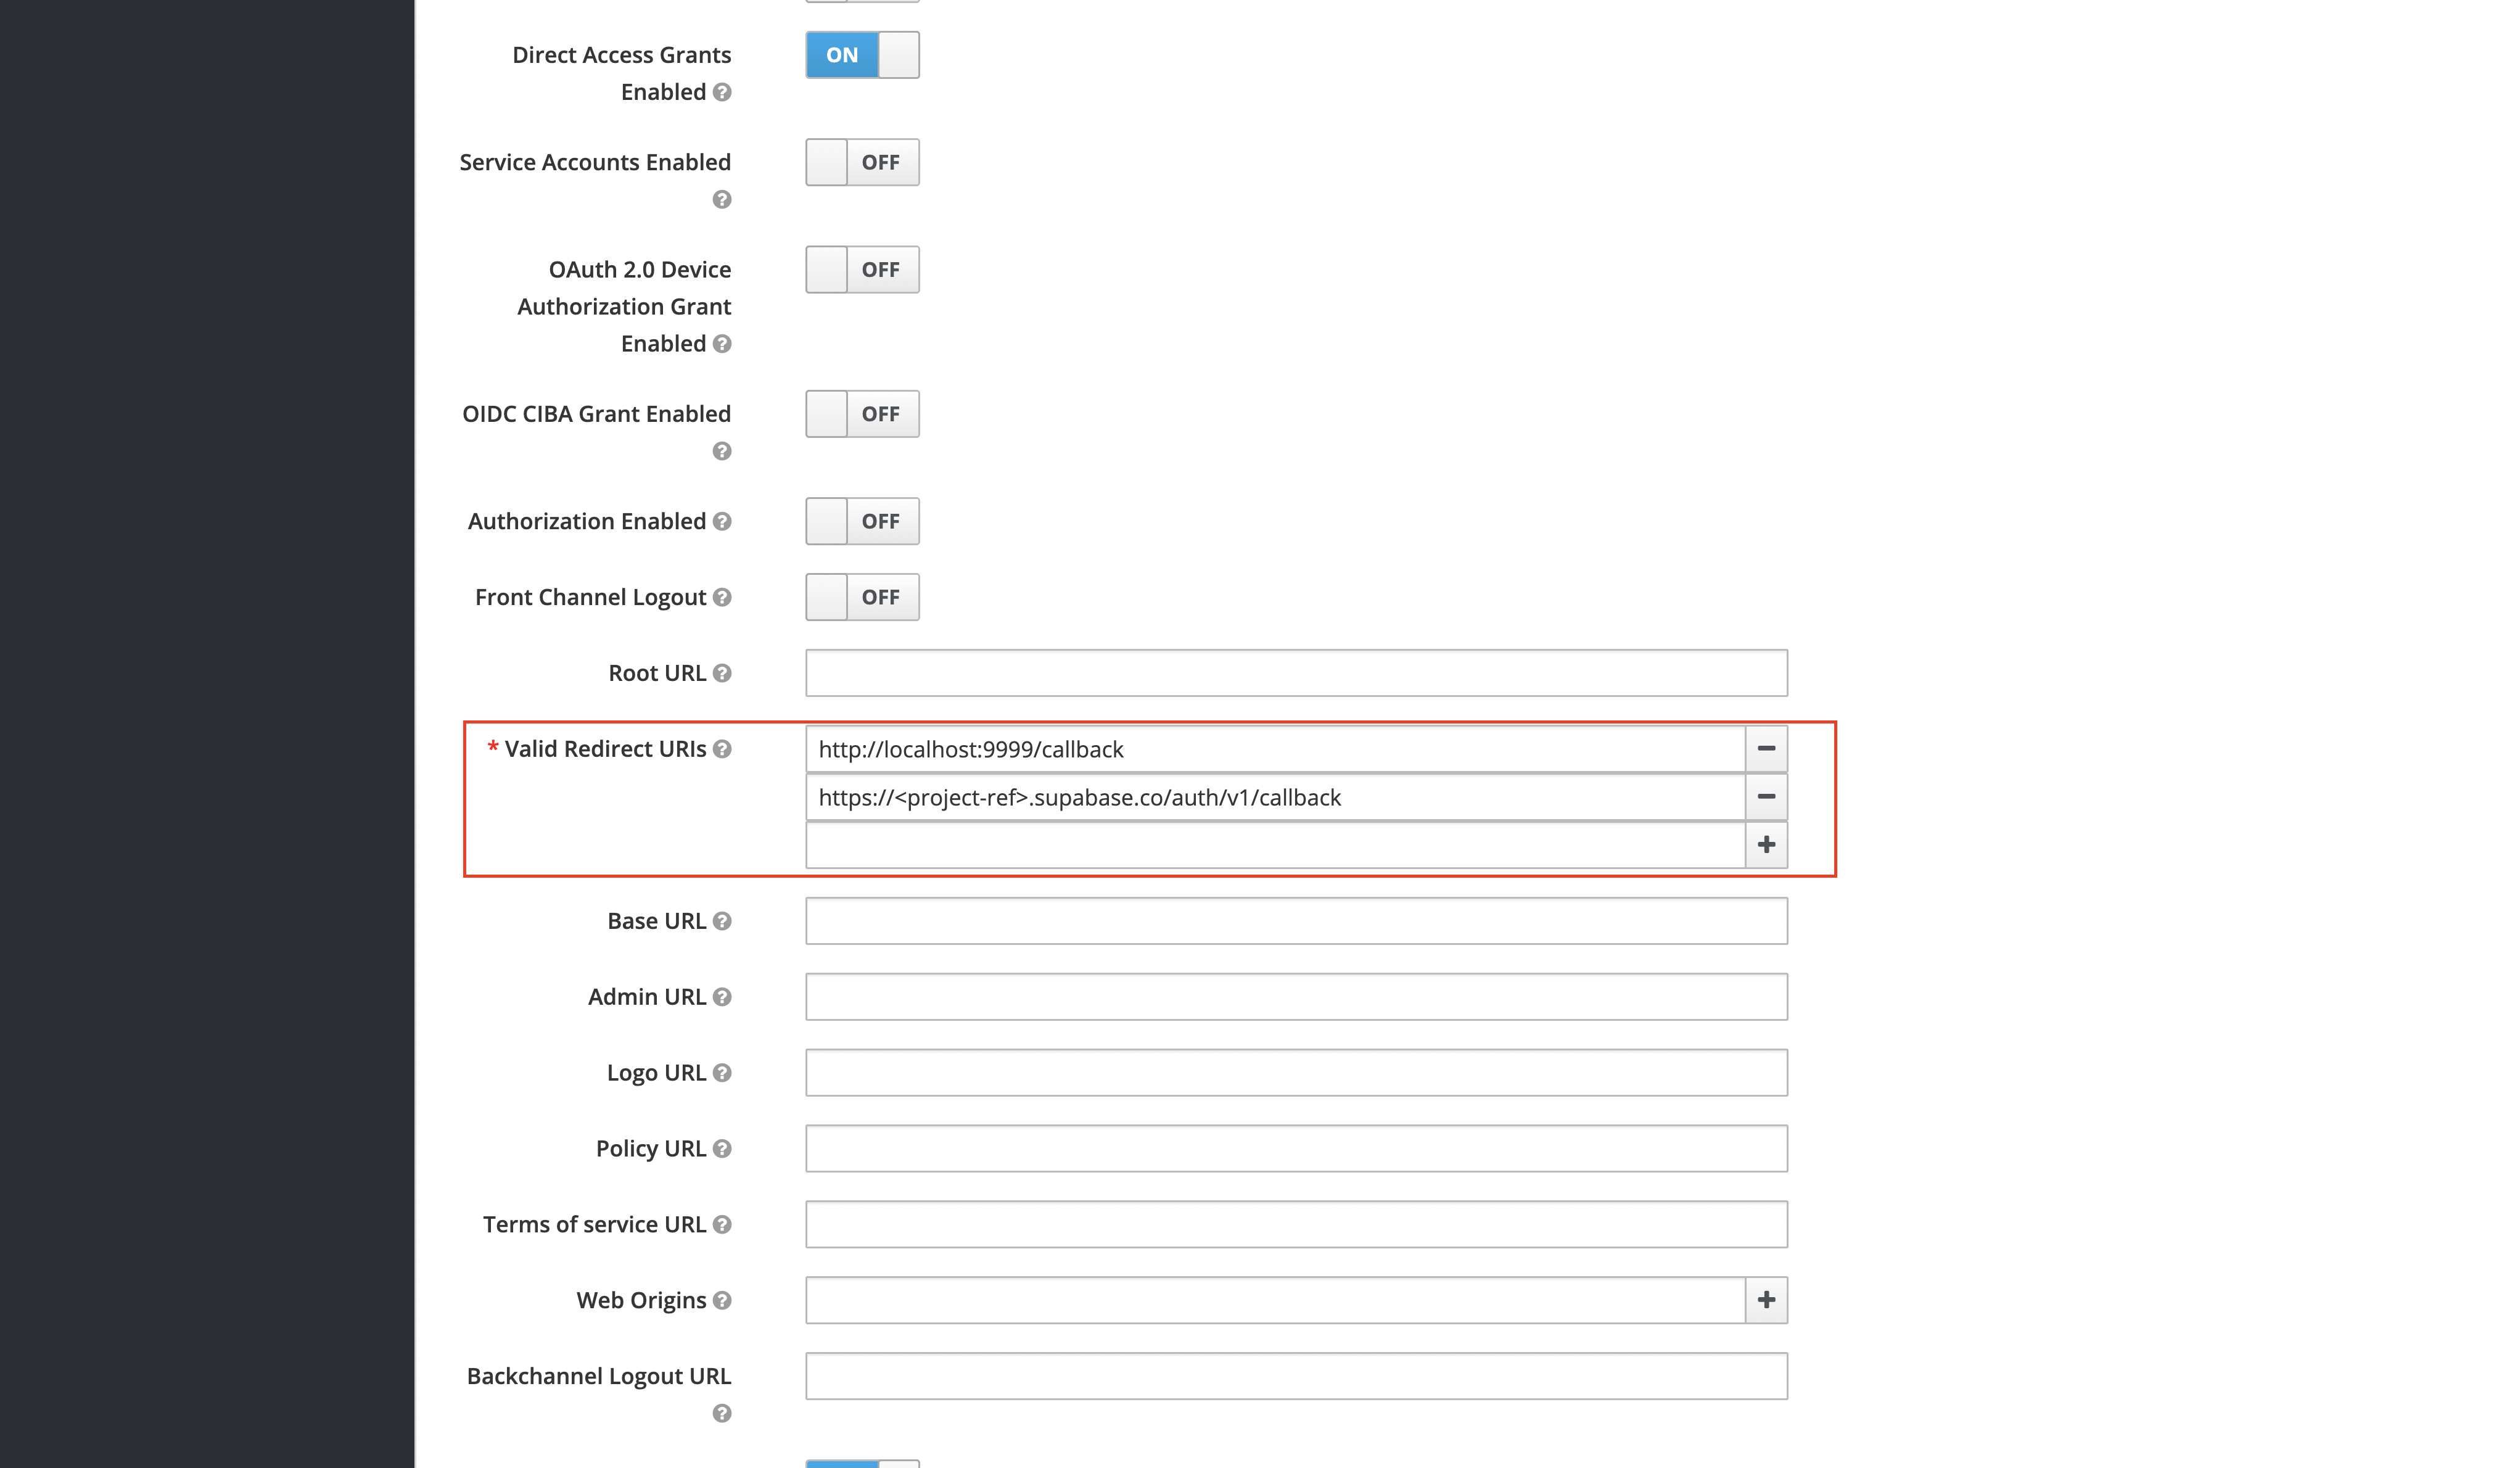
- The "Valid Redirect URIs" should be set to:
https://<project-ref>.supabase.co/auth/v1/callback.
Obtain the client secret#
This will serve as the client_secret when you make API calls to authenticate the user.
Under the "Credentials" tab, the Secret value will be used as the client secret.

Add login code to your client app#
Since Keycloak version 22, the openid scope must be passed. Add this to the supabase.auth.signInWithOAuth() method.
Make sure you're using the right supabase client in the following code.
If you're not using Server-Side Rendering or cookie-based Auth, you can directly use the createClient from @supabase/supabase-js. If you're using Server-Side Rendering, see the Server-Side Auth guide for instructions on creating your Supabase client.
When your user signs in, call signInWithOAuth() with keycloak as the provider:
1import { createClient } from '@supabase/supabase-js'23const supabase = createClient('https://your-project-id.supabase.co', 'sb_publishable_...')45// ---cut---6async function signInWithKeycloak() {7 const { data, error } = await supabase.auth.signInWithOAuth({8 provider: 'keycloak',9 options: {10 scopes: 'openid',11 },12 })13}For a PKCE flow, for example in Server-Side Auth, you need an extra step to handle the code exchange. When calling signInWithOAuth, provide a redirectTo URL which points to a callback route. This redirect URL should be added to your redirect allow list.
In the browser, signInWithOAuth automatically redirects to the OAuth provider's authentication endpoint, which then redirects to your endpoint.
1import { createClient, type Provider } from '@supabase/supabase-js';2const supabase = createClient('https://your-project-id.supabase.co', 'sb_publishable_...')3const provider = 'provider' as Provider45// ---cut---6await supabase.auth.signInWithOAuth({7 provider,8 options: {9 redirectTo: `http://example.com/auth/callback`,10 },11})At the callback endpoint, handle the code exchange to save the user session.
Create a new file at app/auth/callback/route.ts and populate with the following:
app/auth/callback/route.ts
1import { NextResponse } from 'next/server'23// The client you created from the Server-Side Auth instructions4import { createClient } from '@/utils/supabase/server'56export async function GET(request: Request) {7 const { searchParams, origin } = new URL(request.url)8 const code = searchParams.get('code')9 // if "next" is in param, use it as the redirect URL10 let next = searchParams.get('next') ?? '/'11 if (!next.startsWith('/')) {12 // if "next" is not a relative URL, use the default13 next = '/'14 }1516 if (code) {17 const supabase = await createClient()18 const { error } = await supabase.auth.exchangeCodeForSession(code)19 if (!error) {20 const forwardedHost = request.headers.get('x-forwarded-host') // original origin before load balancer21 const isLocalEnv = process.env.NODE_ENV === 'development'22 if (isLocalEnv) {23 // we can be sure that there is no load balancer in between, so no need to watch for X-Forwarded-Host24 return NextResponse.redirect(`${origin}${next}`)25 } else if (forwardedHost) {26 return NextResponse.redirect(`https://${forwardedHost}${next}`)27 } else {28 return NextResponse.redirect(`${origin}${next}`)29 }30 }31 }3233 // return the user to an error page with instructions34 return NextResponse.redirect(`${origin}/auth/auth-code-error`)35}When your user signs out, call signOut() to remove them from the browser session and any objects from localStorage:
1async function signOut() {2 const { error } = await supabase.auth.signOut()3}Resources#
- You can find the Keycloak OpenID endpoint configuration under the realm settings.