Build a User Management App with Expo React Native
This tutorial demonstrates how to build a basic user management app. The app authenticates and identifies the user, stores their profile information in the database, and allows the user to log in, update their profile details, and upload a profile photo. The app uses:
- Supabase Database - a Postgres database for storing your user data and Row Level Security so data is protected and users can only access their own information.
- Supabase Auth - allow users to sign up and log in.
- Supabase Storage - allow users to upload a profile photo.
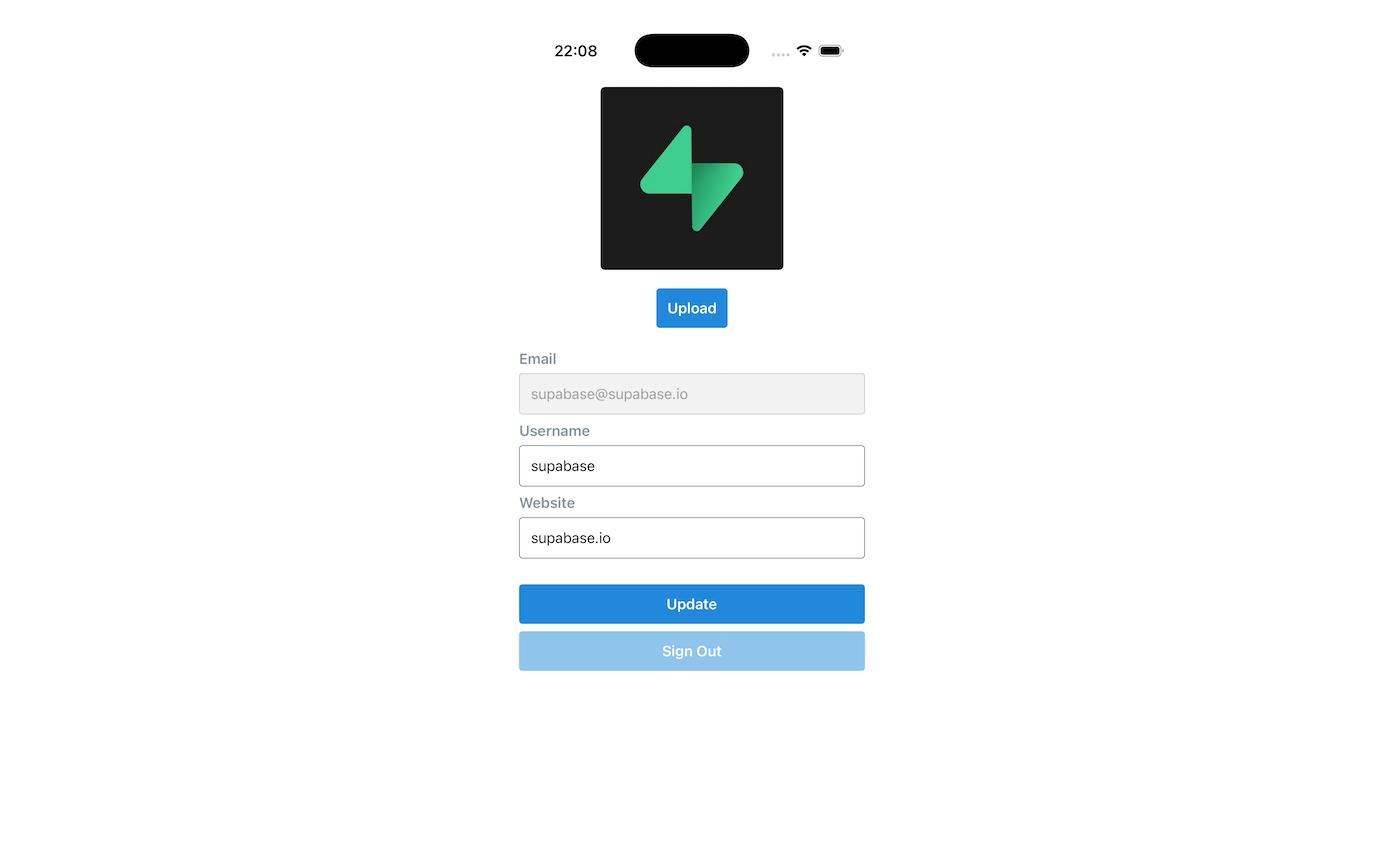
If you get stuck while working through this guide, refer to the full example on GitHub.
Project setup#
Before you start building you need to set up the Database and API. You can do this by starting a new Project in Supabase and then creating a "schema" inside the database.
Create a project#
- Create a new project in the Supabase Dashboard.
- Enter your project details.
- Wait for the new database to launch.
Set up the database schema#
Now set up the database schema. You can use the "User Management Starter" quickstart in the SQL Editor, or you can copy/paste the SQL from below and run it.
- Go to the SQL Editor page in the Dashboard.
- Click User Management Starter under the Reference > Examples tab.
- Click Run.
You can pull the database schema down to your local project by running the db pull command. Read the local development docs for detailed instructions.
supabase link --project-ref <project-id># You can get <project-id> from your project's dashboard URL: https://supabase.com/dashboard/project/<project-id>supabase db pullGet API details#
To interact with data in database tables, you use the client libraries that wrap the auto-generated Data API endpoints, authenticating using the Project URL and key from the project Connect dialog.
See API keys for a full explanation of all key types, their uses, and where to find them.
Building the app#
Start by building the React Native app from scratch.
Initialize a React Native app#
Use expo to initialize
an app called expo-user-management:
npx create-expo-app -t expo-template-blank-typescript expo-user-managementcd expo-user-managementThen install the additional dependencies:
npx expo install @supabase/supabase-js @react-native-async-storage/async-storageNow create a helper file to initialize the Supabase client using the API URL and the key that you copied earlier.
These variables are safe to expose in your Expo app since Supabase has Row Level Security enabled on your Database.
import { createClient } from '@supabase/supabase-js'import AsyncStorage from '@react-native-async-storage/async-storage'const supabaseUrl = process.env.EXPO_PUBLIC_SUPABASE_URL!const supabasePublishableKey = process.env.EXPO_PUBLIC_SUPABASE_PUBLISHABLE_KEY!export const supabase = createClient(supabaseUrl, supabasePublishableKey, { auth: { storage: AsyncStorage as any, autoRefreshToken: true, persistSession: true, detectSessionInUrl: false, },})App styling#
You can use the following StyleSheet component in styles/styles.ts to add style to the app:
import { StyleSheet } from 'react-native'export const appStyles = StyleSheet.create({ container: { marginTop: 40, padding: 12, }, verticallySpaced: { paddingTop: 4, paddingBottom: 4, alignSelf: 'stretch', }, mt20: { marginTop: 20, }, label: { fontSize: 16, fontWeight: '600', color: '#86939e', marginBottom: 6, }, input: { borderWidth: 1, borderColor: '#86939e', borderRadius: 4, padding: 12, fontSize: 16, }, inputDisabled: { backgroundColor: '#f2f2f2', borderColor: '#d1d1d1', color: '#9e9e9e', }, button: { backgroundColor: '#2089dc', borderRadius: 4, padding: 12, alignItems: 'center', }, buttonDisabled: { opacity: 0.5, }, buttonText: { color: '#fff', fontSize: 16, fontWeight: '600', }, avatarContainer: { alignItems: 'center', justifyContent: 'center', marginTop: 20, }, avatar: { borderRadius: 5, overflow: 'hidden', maxWidth: '100%', marginBottom: 20, }, image: { objectFit: 'cover', paddingTop: 0, }, noImage: { backgroundColor: '#333', borderWidth: 1, borderStyle: 'solid', borderColor: 'rgb(200, 200, 200)', borderRadius: 5, },})Set up a sign-in component#
Set up a React Native component to manage sign-ins and sign-ups. Users should be able to sign in with their email and password.
import React, { useState } from 'react'import { Alert, Text, TextInput, TouchableOpacity, View } from 'react-native'import { supabase } from '../lib/supabase'import { appStyles } from '../styles/styles'export default function Auth() { const [email, setEmail] = useState('') const [password, setPassword] = useState('') const [loading, setLoading] = useState(false) const styles = appStyles async function signInWithEmail() { setLoading(true) const { error } = await supabase.auth.signInWithPassword({ email: email, password: password, }) if (error) Alert.alert(error.message) setLoading(false) } async function signUpWithEmail() { setLoading(true) const { error } = await supabase.auth.signUp({ email: email, password: password, }) if (error) Alert.alert(error.message) setLoading(false) } return ( <View style={styles.container}> <View style={[styles.verticallySpaced, styles.mt20]}> <Text style={styles.label}>Email</Text> <TextInput onChangeText={(text) => setEmail(text)} value={email} placeholder="email@address.com" autoCapitalize="none" style={styles.input} /> </View> <View style={styles.verticallySpaced}> <Text style={styles.label}>Password</Text> <TextInput onChangeText={(text) => setPassword(text)} value={password} secureTextEntry={true} placeholder="Password" autoCapitalize="none" style={styles.input} /> </View> <View style={[styles.verticallySpaced, styles.mt20]}> <TouchableOpacity style={[styles.button, loading && styles.buttonDisabled]} onPress={() => signInWithEmail()} disabled={loading} > <Text style={styles.buttonText}>Sign in</Text> </TouchableOpacity> </View> <View style={styles.verticallySpaced}> <TouchableOpacity style={[styles.button, loading && styles.buttonDisabled]} onPress={() => signUpWithEmail()} disabled={loading} > <Text style={styles.buttonText}>Sign up</Text> </TouchableOpacity> </View> </View> )}By default Supabase Auth requires email verification before a session is created for the users. To support email verification you need to implement deep link handling!
While testing, you can disable email confirmation in your project's email auth provider settings.
Account page#
After a user signs in, let them edit their profile details and manage their account.
Create a new component for that called Account.tsx.
import { useState, useEffect } from 'react'import { supabase } from '../lib/supabase'import { View, Alert, TextInput, Text, TouchableOpacity } from 'react-native'import Avatar from './Avatar'// ...export default function Account({ userId, email }: { userId: string; email?: string }) { const [loading, setLoading] = useState(true) const [username, setUsername] = useState('') const [website, setWebsite] = useState('') const [avatarUrl, setAvatarUrl] = useState('') const styles = appStyles useEffect(() => { if (userId) getProfile() }, [userId]) async function getProfile() { try { setLoading(true) let { data, error, status } = await supabase .from('profiles') .select(`username, website, avatar_url`) .eq('id', userId) .single() if (error && status !== 406) { throw error } if (data) { setUsername(data.username) setWebsite(data.website) setAvatarUrl(data.avatar_url) } } catch (error) { if (error instanceof Error) { Alert.alert(error.message) } } finally { setLoading(false) } } async function updateProfile({ username, website, avatar_url, }: { username: string website: string avatar_url: string }) { try { setLoading(true) const updates = { id: userId, username, website, avatar_url, updated_at: new Date(), } let { error } = await supabase.from('profiles').upsert(updates) if (error) { throw error } } catch (error: any) { Alert.alert(error.message) } finally { setLoading(false) } } return ( <View style={styles.container}> <View> {/* ... */} <Text style={styles.label}>Email</Text> <TextInput value={email ?? ''} editable={false} selectTextOnFocus={false} style={[styles.input, styles.inputDisabled]} /> </View> <View style={styles.verticallySpaced}> <Text style={styles.label}>Username</Text> <TextInput value={username || ''} onChangeText={(text) => setUsername(text)} style={styles.input} /> </View> <View style={styles.verticallySpaced}> <Text style={styles.label}>Website</Text> <TextInput value={website || ''} onChangeText={(text) => setWebsite(text)} style={styles.input} /> </View> <View style={[styles.verticallySpaced, styles.mt20]}> <TouchableOpacity style={[styles.button, loading && styles.buttonDisabled]} onPress={() => updateProfile({ username, website, avatar_url: avatarUrl })} disabled={loading} > <Text style={styles.buttonText}>{loading ? 'Loading ...' : 'Update'}</Text> </TouchableOpacity> </View> <View style={styles.verticallySpaced}> <TouchableOpacity style={styles.button} onPress={() => supabase.auth.signOut()}> <Text style={styles.buttonText}>Sign Out</Text> </TouchableOpacity> </View> </View> )}Launch!#
Now that you have all the components in place, update App.tsx:
import { useState, useEffect } from 'react'import { supabase } from './lib/supabase'import Auth from './components/Auth'import Account from './components/Account'import { View } from 'react-native'export default function App() { const [userId, setUserId] = useState<string | null>(null) const [email, setEmail] = useState<string | undefined>(undefined) useEffect(() => { supabase.auth.getClaims().then(({ data: { claims } }) => { if (claims) { setUserId(claims.sub) setEmail(claims.email) } }) supabase.auth.onAuthStateChange(async (_event, _session) => { const { data: { claims }, } = await supabase.auth.getClaims() if (claims) { setUserId(claims.sub) setEmail(claims.email) } else { setUserId(null) setEmail(undefined) } }) }, []) return <View>{userId ? <Account key={userId} userId={userId} email={email} /> : <Auth />}</View>}Once that's done, run this in a terminal window:
npm startAnd then press the appropriate key for the environment you want to test the app in and you should see the completed app.
Bonus: Profile photos#
Every Supabase project is configured with Storage for managing large files like photos and videos.
Additional dependency installation#
You need an image picker that works on the environment you are building the project for, this example uses expo-image-picker.
npx expo install expo-image-pickerCreate an upload widget#
Create an avatar for the user so that they can upload a profile photo. Start by creating a new component:
import { useState, useEffect } from 'react'import { supabase } from '../lib/supabase'import { View, Alert, Image, Text, TouchableOpacity } from 'react-native'import * as ImagePicker from 'expo-image-picker'import { appStyles } from '../styles/styles'interface Props { size: number url: string | null onUpload: (filePath: string) => void}export default function Avatar({ url, size = 150, onUpload }: Props) { const [uploading, setUploading] = useState(false) const [avatarUrl, setAvatarUrl] = useState<string | null>(null) const avatarSize = { height: size, width: size } const styles = appStyles useEffect(() => { if (url) downloadImage(url) }, [url]) async function downloadImage(path: string) { try { const { data, error } = await supabase.storage.from('avatars').download(path) if (error) { throw error } const fr = new FileReader() fr.readAsDataURL(data) fr.onload = () => { setAvatarUrl(fr.result as string) } } catch (error: any) { console.log('Error downloading image: ', error.message) } } async function uploadAvatar() { try { setUploading(true) const result = await ImagePicker.launchImageLibraryAsync({ mediaTypes: ImagePicker.MediaTypeOptions.Images, // Restrict to only images allowsMultipleSelection: false, // Can only select one image allowsEditing: true, // Allows the user to crop / rotate their photo before uploading it quality: 1, exif: false, // We don't want nor need that data. }) if (result.canceled || !result.assets || result.assets.length === 0) { console.log('User cancelled image picker.') return } const image = result.assets[0] console.log('Got image', image) if (!image.uri) { throw new Error('No image uri!') // Realistically, this should never happen, but just in case... } const arraybuffer = await fetch(image.uri).then((res) => res.arrayBuffer()) const fileExt = image.uri?.split('.').pop()?.toLowerCase() ?? 'jpeg' const path = `${Date.now()}.${fileExt}` const { data, error: uploadError } = await supabase.storage .from('avatars') .upload(path, arraybuffer, { contentType: image.mimeType ?? 'image/jpeg', }) if (uploadError) { throw uploadError } onUpload(data.path) } catch (error: any) { if (error) { Alert.alert(error.message) } else { throw error } } finally { setUploading(false) } } return ( <View style={styles.avatarContainer}> {avatarUrl ? ( <Image source={{ uri: avatarUrl }} accessibilityLabel="Avatar" style={[avatarSize, styles.avatar, styles.image]} /> ) : ( <View style={[avatarSize, styles.avatar, styles.noImage]} /> )} <View> <TouchableOpacity style={[styles.button, uploading && styles.buttonDisabled]} onPress={uploadAvatar} disabled={uploading} > <Text style={styles.buttonText}>{uploading ? 'Uploading ...' : 'Upload'}</Text> </TouchableOpacity> </View> </View> )}Add the new widget#
And then add the widget to the Account page:
import { useState, useEffect } from 'react'import { supabase } from '../lib/supabase'import { View, Alert, TextInput, Text, TouchableOpacity } from 'react-native'import Avatar from './Avatar'import { appStyles } from '../styles/styles'export default function Account({ userId, email }: { userId: string; email?: string }) { const [loading, setLoading] = useState(true) const [username, setUsername] = useState('') const [website, setWebsite] = useState('') const [avatarUrl, setAvatarUrl] = useState('') const styles = appStyles useEffect(() => { if (userId) getProfile() }, [userId]) async function getProfile() { try { setLoading(true) let { data, error, status } = await supabase .from('profiles') .select(`username, website, avatar_url`) .eq('id', userId) .single() if (error && status !== 406) { throw error } if (data) { setUsername(data.username) setWebsite(data.website) setAvatarUrl(data.avatar_url) } } catch (error) { if (error instanceof Error) { Alert.alert(error.message) } } finally { setLoading(false) } } async function updateProfile({ username, website, avatar_url, }: { username: string website: string avatar_url: string }) { try { setLoading(true) const updates = { id: userId, username, website, avatar_url, updated_at: new Date(), } let { error } = await supabase.from('profiles').upsert(updates) if (error) { throw error } } catch (error: any) { Alert.alert(error.message) } finally { setLoading(false) } } return ( <View style={styles.container}> <View> <Avatar size={200} url={avatarUrl} onUpload={(url: string) => { setAvatarUrl(url) updateProfile({ username, website, avatar_url: url }) }} /> </View> <View style={[styles.verticallySpaced, styles.mt20]}> <Text style={styles.label}>Email</Text> <TextInput value={email ?? ''} editable={false} selectTextOnFocus={false} style={[styles.input, styles.inputDisabled]} /> </View> <View style={styles.verticallySpaced}> <Text style={styles.label}>Username</Text> <TextInput value={username || ''} onChangeText={(text) => setUsername(text)} style={styles.input} /> </View> <View style={styles.verticallySpaced}> <Text style={styles.label}>Website</Text> <TextInput value={website || ''} onChangeText={(text) => setWebsite(text)} style={styles.input} /> </View> <View style={[styles.verticallySpaced, styles.mt20]}> <TouchableOpacity style={[styles.button, loading && styles.buttonDisabled]} onPress={() => updateProfile({ username, website, avatar_url: avatarUrl })} disabled={loading} > <Text style={styles.buttonText}>{loading ? 'Loading ...' : 'Update'}</Text> </TouchableOpacity> </View> <View style={styles.verticallySpaced}> <TouchableOpacity style={styles.button} onPress={() => supabase.auth.signOut()}> <Text style={styles.buttonText}>Sign Out</Text> </TouchableOpacity> </View> </View> )}Now run the prebuild command to get the application working on your chosen platform.
npx expo prebuildAt this stage you have a fully functional application!